Polvo Guisado a/k/a Portuguese Octopus Stew

1
Portuguese Octopus Stew Completed

Seems like almost exactly a year ago I was writing about pulpo/polvo/octopus, then I got caught up in the business of actually moving to Portugal (not there yet), and then the plague hit. Although I have been in the kitchen a fair bit, I’ve been away from the blog. I am intending to change that, but it is subject to intervention from a couple of governments, a shipping company, a real estate agent, and life during COVID-19.

Since I can’t be in Portugal (as is the case for most of us living in America at present), the next best thing is to bring a bit of Portugal to California.

This particular stew is by no means uniquely Portuguese; in Catalunya, there’s a version known as Estofat de pop i patata; in Greece, you can find the very similar Octapodi Kokkinisto, though it’s usually served over rice or orzo rather than with potatoes; in Italy, it’s Polpi in Umido and Polpo alla Luciana, often including clams or other seafood and served with pasta or just bread. And in Galicia, Pulpo a la Gallega omits the tomatoes, but is frequently served over boiled potatoes. I’m sure if I dug a bit deeper, I could find Croatian and Turkish versions of the dish; heck, even the French might have one, although their version would probably be more elegant, since that’s what they do. From what I can gather, this one originated in the Azores, some say specifically on Pico Island.

In most Mediterranean (and Mediterranean-adjacent) countries, polvo guisado is peasant food; the cephalopod was pulled out of the sea, and the tomatoes and potatoes came out of your garden. No real fancy ingredients are necessary (although I did use a South African Pinotage Rosé, because the South African wine industry is currently in desperate straits due to COVID-19).

One quick note before we get to the actual recipe: a number of friends and acquaintances on social media find the eating of octopuses distasteful. They (the cephalopods) seem to be intelligent creatures, and many people, myself included, find them endearing. I understand and respect those whose ethics have led them away from creature consumption, and am happy to engage in conversation on that topic over the telephone or in person, but social media lack the capacity for nuance, so comments will be moderated. If this recipe is not to your taste, please feel free to avail yourself of one of the many vegetarian and vegan options on the blog.

You may be able to get the octopus pre-cleaned from your fishmonger, but if not, you have a little cutting to do.
You may be able to get the octopus pre-cleaned from your fishmonger, but if not, you have a little cutting to do. Removing the eyes, the ink sacs, and the beak are not difficult, and there are many YouTube vids to guide you.

INGREDIENTS
2 lbs. / 1kg octopus, blanched and cleaned
2-3 tbsp. / 30-45ml olive oil
2 large onions, chopped
4 large cloves minced garlic
3 bay leaves
4.25 cups / 1000ml chicken or fish stock (I used Aneto)
2 cups / 500ml wine (rosé, white, and red all work fine)
2 lbs. / 1kg fresh (or canned) tomatoes, chopped (peeling optional)
2 lbs. / 1kg new potatoes (or fingerlings, or whatever you have)
1 thsp. / 5g crushed red pepper flakes
1 bunch fresh cilantro (coriander), chopped
1 bunch fresh parsley, chopped
1-2 small lemons, juiced (or 2-3 tbsp. / 30-45ml lemon juice)
Salt and pepper (to taste)

Our octopus turns a pinky-purple during its five-minute bath.

DIRECTIONS
Set a large pot of salted water on the stovetop to boil.
Remove the octopus’ eyes, ink sacs, beak, and interior of the head (if not pre-cleaned by your fishmonger) then rinse under cold water and set aside.
If you’re using medium or large potatoes, wash and quarter them (peeling is optional), and set aside.
Chop onions and mince garlic and set aside.
Chop cilantro and parsley fairly fine and set aside.
Dip the octopus three times into the salted boiling water to curl the tentacles, then submerge it for 5 minutes.


Drain and let it cool, then cut the tentacles and body into 2-inch lengths or chunks and reserve.
In that same pot, add the olive oil; add the onions, garlic, pepper flakes, and bay leaves, stirring occasionally. Fry in the oil for 6 to 7 minutes, until slightly wilted and beginning to brown.
Deglaze the pan with the wine, bring the liquid up to a boil and reduce it by half.
Stir in the tomatoes, season with salt and pepper, add the potatoes, the octopus, and stock. (Note: I used chicken stock, but fish or vegetable stock will also work, and if necessary, you could just use water with perhaps a bouillon cube or paste.)
Bring the liquid up to a boil and reduce to a simmer.


Cover the pot and simmer for about 90 minutes on low heat.
Add the lemon juice, fresh chopped cilantro (a/k/a coriander), and parsley. Simmer for another 5 minutes or so (it’s okay to go longer).
Adjust the salt and pepper (if necessary), fish out the bay leaves (if you can), allow the stew to cool slightly and serve.
Serve with crusty bread or rolls (optional) for mopping up the sauce.
Incidentally, a nice vinho verde goes nicely with the stew, but don’t be fussy about red or white; both are fine.

Split Belly (Karniyarik) — or — The Imam Fainted a Second Time When He Had a Mouthful of Meat

0
10237637-391f-406e-865f-da239fe55a04.jpeg

No, it’s NOT just stuffed eggplant! Well, maybe.

First and foremost, this is a recipe — well, actually a roadmap — for stuffed aubergine (a/k/a eggplant), loosely adapted from a Turkish recipe for karniyarik, which I have read translates literally to “split bellies.” I don’t speak Turkish, and I’m guessing you don’t either, so we’ll just have to rely on the experts.

Karniyarik is a meat-enhanced dish, apparently loosely based on a vegetarian version of stuffed aubergine known as Imam Bayildi (literally, “the imam fainted”). Some stories would have it that he fainted because it was so delicious, and I will take that at face value, because stuffed aubergine is indeed swoonworthy.

Those of you who follow the blog will know it’s not uncommon for me to plunge headlong down the rabbit hole of a recipe’s provenance and expression; this one was no different. I viewed no fewer than a dozen recipes, and found no definitive formula, nor did I discover its origin. I don’t consider the investigatory time wasted, though, because I discovered several variants on the recipe that may find their way into my oven sometime in the future. I have to hand big props to Chef John at foodwishes.blogspot.com, whose video popped up in my YouTube feed and started me down this road to begin with.

Typically, the meat in this recipe is ground, generally beef or lamb. As it happened, I had excess smoked pork shoulder hanging about in the fridge, so that was my meat of choice. The balance of my ingredients hew fairly closely to the harmonized medium of the canon: tomato paste, onion, garlic, cumin, peppers, etc. Some versions include cheese in the filling, but I wasn’t feeling it (although I might in future). Many would have you serve this over (or with) rice or orzo. Fine, but not strictly necessary.

f45b12ec-33a4-4ef3-933b-817b836e0729

The semi-peeling keeps them from bursting, and gives you a flat surface they can sit on.

INGREDIENTS
2 similarly-sized aubergines (a/k/a eggplant)
.75 lb / .33 kg roasted pork shoulder, shredded
6 mini red bell peppers, diced
1/2 large or 1 small onion, diced
2 cloves garlic, minced
1 can (7 oz. / 198 g) diced roasted green chilies (with juice)
1 tbsp / 7 g cumin powder
1 tsp / 2.5 g ground cinnamon
2 tbsp / 15 g tomato paste
2 tbsp / 15 g Darrell & Nil’s Turkish Spice Blend*
salt and black pepper to taste
2 tbsp / 30 ml olive oil
1 cup / 250 ml chicken stock

*This is a custom spice blend made by some friends. It’s made from paprika, black pepper, cumin, coriander, allspice, cassia, sumac, oregano, Maras chile, clove, cardamom, and nutmeg. Maybe I can get them to cough up the actual recipe, but if not, make sure you include the sumac and Maras chile, which really push the blend toward Istanbul


8dd089f7-8330-4b8c-b4f7-ad9595e31b01

Stuff for the stuffing.


DIRECTIONS
Wash the aubergines, peel four equally spaced strips and set aside. The peel allows them to sit flat in the casserole dish or roasting tin.
Preheat oven to 400°F / 205°C.
Drizzle a little olive oil into a casserole dish or small roasting pan sufficient to hold the two aubergines, then pop the veggies into the dish and pop the dish into the oven.
You’ll want to roast the aubergines for 45 minutes to an hour, depending on their size. You don’t want them cooked all the way, because you will be stuffing them. When you take them out of the oven, they should still be fairly firm and holding their shape.

During that time, you can prepare your filling.
Warm a frying pan over a medium heat, and put in the cumin, cinnamon, spice blend, and black pepper; toast the spices for 1-2 minutes, just to bring out a little more flavour. The add the salt, onion, green chilies, and bell peppers; cook for 5-8 minutes, or until the bell peppers are softened and the onions are translucent. You don’t need to brown them, but don’t freak out if they take on a little colour or if they’re still slightly firm. Remember, they have more time to cook when you stuff the aubergine.
Add the garlic and tomato paste, and cook for a couple of minutes more, just to take the rough edges off the garlic. Then remove the pan from the heat and set aside until it’s time to stuff the aubergines.

7d973c03-e5db-4565-b288-4929f98bdf50

Fit to be stuffed.

When the aubergines are partially cooked, but still firm(-ish), take them out of the oven and allow them to cool sufficiently that you can stuff them without burning your fingers. Take a knife and “split their bellies” (vertically of course), then spoon in a generous amount of filling. Don’t pack it in too much, though, or the aubergines will split during their second oven sojourn. Pour the chicken stock into the pan (but not over the aubergines), so they don’t burn. You can also use the resulting sauce to spoon over the finished dish, although in my case most of the liquid had evaporated.

Return the stuffed aubergines to the oven for 30-35 minutes, or until a knife can pierce their flesh without resistance. Allow them to cool for about 10 minutes, because they are molten lava hot straight from the furnace. Plate, spoon over some of the drippings, and serve. [Although inauthentic, cheese, sour cream, or crème fraîche could be used as toppings. You could also sprinkle some fresh chopped parsley on top for colour. ]

This is scalable, depending on the number of diners, and is quite mutable while still staying within the parameters of karniyarik. Find the ingredients that exist in your pantry and/or suit your palate, pour yourself a glass of raki for a job well done, and offer a hearty şerefe to your dining companions.


Ensalada de Pulpo con tomates ahumados (Octopus Salad with smoked tomatoes)

0

70261144_10217767910602202_8963468529093312512_n

The variety of textures is pleasing on the tongue, and the variety of ingredients ensures that each bite will be slightly different from the one on either side. I think of this as a summer salad, but even though I’m making it in mid-September, summer is still in full swing in Los Angeles (save for the ever-shortening daylight hours).

INGREDIENTS

1.33 lbs / 600 g octopus, cooked and chopped
1 medium bunch fresh parsley, chopped (leaves only — well, mostly)
2 stalks celery, minced
1 orange, zested (zest only)
1 bottle (12 oz. / 340 g) marinated red peppers, diced
1/2 red onion, quartered, sliced thin, and macerated
2 tbsp / 20 g bottled capers, drained
2 dozen smoked and roasted cherry tomatoes, optional
vinaigrette dressing to taste
coarse or flaked sea salt to taste for finishing

DIRECTIONS

I bought my octopus already cooked, but if you don’t have a store that carries such, cooking octopus is pretty easy (cooking it well, however, is perhaps a little more difficult).

[I will be posting a technique for cleaning and cooking octopus in the Instant Pot® in the next week or 10 days. ]

Most of the work here is cleaning, chopping, and mixing. If you have a Microplane zester, it will make short work of the orange. You can substitute lime, lemon, or grapefruit zest if an orange isn’t handy, but I think orange suits it best.

Macerating the onion entails soaking it in red wine vinegar (or plain old white vinegar if you must) and a pinch of salt for about an hour. During that time, the purple/red of the onion will lighten considerably, and the onion itself will lose some (but not all) of its bite. After the hour is up, you can drain and rinse the onion before adding it to the salad. [You can dress the salad while the onion is macerating; it’s better when the dressing has had a little chance to mingle and be absorbed.]

As for the vinaigrette, I went super simple: 1 part red wine vinegar to 3 parts olive oil, and a teaspoon / 2.5 gm of ground black pepper. I didn’t want to get too fancy, because I didn’t want to overwhelm our cephalopod friend. That said, since there are so few ingredients in the dressing, I made sure to use a really good olive oil. If I’d had access to the appropriate Gegenbauer vinegar, I would have used that, but my remaining sour cherry vinegar wasn’t right for this recipe.

I happened to have roasted and smoked cherry tomatoes taking up space in the fridge, and they were a welcome addition, but by no means crucial. You could use regular cherry or grape tomatoes, or none at all.

Pop the whole lot in the chill chest and refrigerate for at least an hour before serving. This will make an opening salad for 6-8, but the bride and I made it our main course, and polished off about 2/3 of it. We’ll finish up the rest tomorrow because, well, seafood.

And as for summer, I’m gonna hang on to it until reality intrudes, and I have to trade my rosé for a single malt, and my light-filled salads for soup.


Soupe de la Semaine: Cajun White Bean, Andouille, and Collard Green Soup

0

It turns out, thanks to the bride’s penchant for genealogical spelunking, I have recently discovered Acadian blood in my veins. It’s not an enormous surprise; on Prince Edward Island, the tiny Canadian province from which I hail, the populace is drawn largely from Scots, French, and Irish stock. In practise, PEI Scots didn’t tend to intermarry much back in the day, not just due to the language differences (Scots held onto their Gaelic before yielding to English), but also thanks to Catholic-Protestant interfaith snipery. It is, however, an island, so exceptions were occasionally made. Hence the occasional Arsenault or Paquet or Daigle or Cheverie among the Campbells and MacLeods and MacMillians and MacKays. And conversely.

Acadia, for those of you unfamiliar with the term, was originally a French colony that included the provinces of Canada generally known as the Maritimes, and a little of what is now Maine. [Fun fact: Prince Edward Island was originally known to its European settlers as Île Saint-Jean.] Over the years, wars and treaties with England whittled away at the territorial boundaries, and the people referred to as Acadians tended to be identified more by their language (French) than by their place of birth.

Unfortunately, things really went sideways between the Canadian Anglophones and Francophones in 1755. As a consequence of their participation in the French and Indian War, the Acadians were given the choice of swearing allegiance to the British king, or clearing the premises. You can imagine how that went. What happened next became known as the Great Upheaval, the Great Expulsion, the Great Deportation, or Le Grand Dérangement. Many Francophones, including some of my direct kin, were forcibly repatriated to France (which, incidentally, didn’t really want them). Other Acadians fled south to Louisiana, where they became known as Cajuns.

While there’s a lot of intermingling between Cajun and Creole cultures, the reason this soup is more properly identified as Cajun rather than Creole is largely due to the absence of tomatoes, which is one simple signifier separating the two storied cooking traditions. By some measures, Creole cuisine tends to be “city food,” and Cajun cuisine tends to be “country food,” with simpler ingredients and less reliance on sauces. Please do note that these are generalisations, so please don’t flood my inbox with picayune (or Picayune) commentary to the contrary.

I don’t want to sound like a broken record (or, for our younger readers, digital audio stutter), but it never hurts to splurge on some of the key ingredients. I purchased fresh, uncooked andouille sausage (hotter than the quite tasty Aidells’ pre-cooked commercial version I used in an earlier iteration). The white beans in this recipe were Cassoulet heirlooms from Rancho Gordo. Because I had no homemade stock, I substituted Aneto, which is excellent, if pricey. I deglazed the pot with Croma Vera 2017 Rosé, because it was delicious, handy, and fit the bill. And while I seasoned the soup with fleur de sel from Ibiza, that was merely a pointless extravagance that gladdened me and enhanced the back story. We writers care about that stuff.

Best broth you can buy.

This soup can be made entirely on the stove top. I chose not to, partly due to convenience and partly due to shoddy time management. My Instant Pot® allowed me to bypass the overnight pre-soak for the dried beans, and it also condensed the time necessary to tenderise the celery and the collard greens’ stems. You may, of course, use canned beans and/or canned collard greens… if you must.

How much is enough? Maybe 6 cups or so, chopped. Be as green-dependent as you like.

While I favoured traditional Cajun ingredients for this recipe (although I omitted bell pepper, one-third of the Cajun “holy trinity”), my pal Inmaculada Sánchez Leira (no slouch in the cooking department herself) noted that, save for the comparative lack of root vegetables, it’s not particularly far removed from Caldo Gallego, the classic Galician soup. It’s also fairly close to many recipes involving Black Eyed Peas, traditionally served in the South for good luck on New Year’s Day. In fact, you could easily sub black eyed peas into this recipe… and yes, you can get them from Rancho Gordo (if they’re not sold out).

INGREDIENTS
1 lb. / 1/2 kg dried white beans (or four 15 oz. cans cooked beans, drained and rinsed)
30 ml / 2 tbsp olive oil
2 lbs. / 1 kg Andouille sausage links
1/2 cup / 120 ml white or rosé wine (or water or stock) for deglazing
1 large onion, finely chopped
3-4 garlic cloves, minced
2 large carrots, chopped or sliced into coins
2 large bunches fresh collard greens
4-6 large stalks celery, finely minced
1 medium sprig fresh thyme
3 liters / 12 cups good quality chicken and/or vegetable stock (I used Aneto chicken stock)
1 liter / 4 cups water
5-10g / 1-2 tsp salt
1/3 cup / 80 ml apple cider vinegar
chopped fresh parsley for garnish, optional

DIRECTIONS
Rinse beans thoroughly, then drain (whether you’re using canned or dried beans). [This is where you would add the dried beans and two liters of stock to the Instant Pot®, if you are going that route. Add the 1/2 kilo / 1 lb. of dried beans and about 2 liters / 8 cups liquid (I used all stock). Cook according to instructions. For more recommendations on cooking times, check here and here.] My unsoaked Cassoulet beans took 48 minutes on high pressure in the Instant Pot®, with a natural release (I’m told this helps to keep the bean skins from splitting). Should you choose, you can use the stovetop method to cook beans pre-soaked overnight (or dried beans straight from the packet should you choose). When beans are soft, set cooked beans and stock aside.

Here is where the two paths diverged in the wood. First, I will lay out the stovetop version. Then, I’ll include the Instant Pot® shortcut, for those of you who care to use it.

STOVETOP VERSION
Dice onion; mince garlic and celery. Cut carrots into coin-size slices (if the “coins” get to be larger than a quarter or a 2€ coin, cut them in half). Strip collard green leaves from their tougher stems, slice (or tear) the leaves and dice the stems (skip this last bit if using canned collard greens).

In a large soup pot, heat the olive oil. Then season the Andouille links with a little salt, leaving them whole, and brown them for about 10-12 minutes, or until cooked through and browned on all sides. Remove links from pot and let them cool.

Deglaze the browned bits with a little water, stock, or wine. Make sure to give pot a good scrape.

The liquid and browned bits will add depth to your stock base. Plus, you’ll have pre-cleaned the toughest stain in the pot.

[NOTE: If using Instant Pot® shortcut, skip to shortcut below, then come back here.]

Sauté the onion, celery, carrots, collard greens, thyme sprig, and garlic for about 7 minutes, until soft without colouring (the celery and the collard stems will take longer, so don’t wig out if they’re still a little al dente). While the vegges are in sauté mode, slice or crumble the cooled Andouille sausage. Add the beans and stock you set aside earlier, the extra liter of stock (if you’re not using the Instant Pot® shortcut), Andouille, vinegar, and water, along with a little salt. Bring to a low boil and then reduce heat. Simmer for about an hour or more, or until celery and collard green stems have softened to desired degree. Adjust salt and vinegar, if necessary; discard thyme sprig. Ladle into bowls and add optional shredded parsley leaves for garnish.

The Instant Pot® softens up those tough veggies real quick.

INSTANT POT® SHORTCUT
Instead of adding celery and collard green stems and thyme sprig to the main soup pot on the stove, put them into your Instant Pot® with a liter of the stock, set to high pressure for 7 minutes on the Bean/Chili setting, making sure vent is set to Sealing. When done, you can use either natural or instant release. [If you choose the latter, take care to avoid escaping steam.] Discard thyme sprig and add remaining contents to main soup pot. Continue with recipe as above

Soupe de la Semaine: Chicken Noodle Soup with Basil and Spinach

1

The Warhol print was probably tastier.

I realize that I tool on Campbell’s soups a lot — probably more than they deserve, especially since I am descended from Campbells on my Mom’s side (not particularly unusual for someone of Scots heritage). And while Clan Campbell were a prolific lot, it’s likely far more Campbell has passed through my alimentary canal than was ever in my bloodline.

In my youth, their ubiquitous cans were a staple in our pantry. I was especially keen on Scotch Broth, Vegetable Beef, and Beef with Vegetables and Barley. I NEVER liked their Chicken Noodle, since it always got served to me when I was sick. The association has stuck for decades. But in a strange twist of fate, I find myself making soups for an ill friend, so I decided to revisit my childhood chicken soup trauma.

There’s nothing wrong with chicken in soup; Tom Kha Gai is an all-time favourite. And Mexican chicken soups aplenty with tomato and chili and cilantro show up happily, and not infrequently, at table. But my challenge was to attempt to concoct something that was at once chicken noodle soup and not chicken noodle soup. A Zen kōan of a soup, so to speak. In order to achieve this aim, I needed to isolate those elements of trad North American chicken noodle soup that failed to delight me, and simply Marie Kondo them away.

ISSUE #1: The Broth
Typical canned chicken noodle soup features a briny broth with no more point of view than a real estate agent trying to sell you a house. I wanted a stock that would echo our more trad notions wthout being shackled to them.

ISSUE #2: Carrots
Love me carrots, I really do. But not here. There’s a reason Billy Connolly developed a routine based around how, when you regurgitate, there’s always “diced bloody carrots in it.”

ISSUE #3: Celery
Celery in commercial canned soups frequently develops a revolting, slightly slimy texture, and it played an outsize role in the sense-memory flavour of my canned nemesis. I could have opted for celery seed, but I really didn’t want the texture or the taste.

ISSUE #4: The Noodle
Nobody wants a limp noodle. Typically, they look like tiny tapeworms, they have zero toothiness, they shame the marriage of water, flour, and egg. My noodle was going to be strong and proud.

ISSUE #5: The Chicken
This will sound like the proverbial deli diner’s complaint that the food wasn’t good and the portions were too small. But the industrially processed 6mm chicken bit cubes were virtually flavourless, and distributed very sparingly. Hey, I get it — chicken is the soup’s most expensive ingredient, and more chicken = less profit. I responded by loading the pot up with about three pounds (1.5 kilos) of hand shredded boneless, skinless chicken thighs.

But enough of what I didn’t want. Here’s what I did want: simple, healthy (after all, I’m feeding a cancer slayer here), and tasty. I don’t know how you go about planning your recipes (other than having the good fortune to land here, for which I am grateful), but I typically overthink. I read books, I go online, I consult my bride, I mentally review every version of the dish I’ve ever ingested, I engage in an internal Socratic dialogue, I ask friends about their preferences, I fuss.

While in the store buying chicken, I came across a special on fresh basil. The die was cast: green stock. I also had some spinach powder in my pantry, which I suspected would complement the basil, as well as providing an excellent source of beta-carotene and iron. Besides, spinach made Popeye strong, and the Big C is more formidable a foe than Brutus (or, if I might betray my age, Bluto), so bring it on. [You can use regular spinach if you want; I just wanted to play with my new toy. This spinach powder is nothing more than dehydrated fresh spinach ground into green dust. No additives.]

One caveat: the fewer the ingredients, the better each one has to be. Because I had no homemade chicken stock, I used the best commercial stock money can buy. Free range chicken. Wine and olive oil I would proudly serve at table, not hide in the kitchen. Durum semolina pasta from Italy (even if I will use a different shape next time). Of course you can economise (if you have the time and the freezer space, you can save plenty on the stock by making your own), but even in my extravagance this is still cheaper per serving than what you’d probably pay for a bowl at a restaurant.

INGREDIENTS
30 ml / 2 tbsp olive oil (I used Olea Farm Garlic Blush)
3 lbs. / 1.5 kg boneless skinless chicken thighs (about 10)
sea salt and pepper for seasoning chicken
2/3 cup / 150 ml dry white or rosé wine for deglazing (water or chicken stock work also)
1 large onion, finely chopped
4 oz. / 115 g fresh basil, shredded or chopped (reserve about 10-15 leaves for garnish)
3 liters / 12 cups good quality chicken stock (I used Aneto Low-Sodium Chicken Stock)
1/4 cup / 60 g spinach powder (or 4 oz. / 115 g fresh spinach, shredded or chopped)
16 oz. / 454 g dried pasta, cooked separately (I used casarecci, but next time it will be gemelli, ciocchetti, or gigli)
2 tbsp. /35 ml / juice of one fresh-squeezed lemon (I plucked a fresh Meyer from our tree)
OPTIONAL: Shaved or grated Parmesan cheese for garnish.

DIRECTIONS
Cook the pasta and set aside. [You can even undercook it a bit, in fact, given that it will swim in the broth later. Dealer’s choice.] One piece of advice that has served me well is that the pasta water should be as salty as the sea. This, and seasoning the chicken well, meant the recipe required no additional salt.

♫ Brown the chicken in the pot, doo-dah, doo-dah. ♫

Season your chicken liberally with salt and pepper on both sides. In your soup pot, drizzle in about 2-3 tablespoons (30-45 ml) of olive oil, and cook the chicken. Depending on the thickness of the thighs, and the heat of your range top, this should take about 15 minutes. You’re looking for a little browning on the outside, but this is not intended to be fried chicken soup. When the chicken is done (I had to do mine in two batches), remove it to a plate.

What’s left after the chicken cooks is called the fond, and not just because I’m fond of it. When you deglaze the pot, the browned bits will transform into a very tasty sauce.

While the chicken is frying, dice the onion and chop the basil (and spinach, if not using powder), reserving a few basil leaves for later garnish. Afer removing chicken from soup pot, deglaze the pot with some wine or other liquid, then sweat the onion until it turns translucent. Add chopped basil, chicken stock, spinach powder (or chopped spinach), and reserved chicken thighs (including the juices that accumulated on the plate they sat on). Bring to a low boil, then reduce heat and simmer for at least half an hour to 45 minutes or so (plenty of room for error here without any harm).

After the first simmer, remove chicken (again! It keeps jumping in and out, doesn’t it?) and set aside. Allow chicken to cool sufficiently so it can be hand shredded (or chopped, if you must).

OPTIONAL STEP: Remove most of the solids (basil and onion) with a slotted spoon and process in a blender or food processor with a little of the cooking liquid. Alternatively, you could use an immersion blender. This will thicken the liquid slightly.

Return shredded chicken to soup and add cooked noodles. Simmer long enough to warm the noodles, at least 15 minutes. Add lemon juice a few minutes before serving, to brighten and balance the flavour. Taste and adjust salt and pepper, if necessary.

Soup. Mmmm-mmmm-good.

Ladle into bowls, and garnish with chiffonaded basil leaves.

Instant Pot® Vegan Risotto with Mushrooms, Preserved Lemons, and Basil

1

Canadian man makes Italian food.

As the news swirls with epic chills in the Midwest due to a polar vortex that has been altered by climate change, and when rain threatens my California home, it seems like the rib-sticking comfort of risotto is a reasonable response. Unlike my previous recipe for Saffron Risotto with Peas and Langoustine, this version was concocted in a cool bit of technology that had barely penetrated the public consciousness back then, and it’s vegan (although for my second helping, I grated a bit of Pecorino-Romano on top, and found it excellent).

Full disclosure: Although the idea for combining mushrooms and preserved lemons in a risotto originated with a yearning created in my tastebuds, several blog posts guided my thinking as I developed the recipe. You can find them at the Simple Vegan Blog, Vegan Heaven, Vegan Richa, Vegan Huggs, Chew Out Loud, and the ubiquitous Epicurious.

As is often the case, the recipe was developed around existing ingredients; I had some fresh basil in the fridge, it seemed like it would fit in with the other ingredients, and KAPOW, in it went. [One of my #squadgoals for 2019 is to undertake fewer unintentional fridge-based science experiments, a/k/a using ingredients before they stink up the joint.] Same deal with the dried mushrooms; they had been intended for a soup I was going to make for a friend who I later found out doesn’t like mushrooms.

The dried mushrooms I used were porcini (Boletus edulis), and an interesting variety known variously as slippery jack, pink boletus, and sticky bun. Although the package referred to them as Boletus luteus, which is their original 1753-era moniker gifted by the legendary botanist, physician, zoologist, and taxonomist Carl Linnaeus, they are now known to be of a different genus and are more properly called Suillus luteus. You are of course welcome to use fresh mushrooms in addition to or instead of the dried.

Two other ingredients might be slightly unfamiliar to those with a limited pantry. Nutritional yeast is sold as flakes, granules, or powder, and is often employed in vegan dishes to add a cheesy or nutty flavour. You’ll find it in my recipe for Vegan Potatoes au Gratin, in fact. If your local supermercado carries it, you’ll likely find it next to the spices or in the health food/gluten-free/dairy-free ghetto. If not, well, your local GNC or Amazon.

The other possibly unfamiliar ingredient is preserved lemons. Common in South Asian and North African cuisine, preserved lemon is basically a brined or pickled lemon, generally salted heavily and marinated/pickled/brined for a month or so in salt and either lemon juice or water, if liquid is employed. Sometimes spices are added to the mix, but not generally. If you have neither the time, patience, or lemons for this process, they can be found in jars at many Indian, Middle Eastern, or North African markets, should you have such in your area. And yeah, Amazon. But seriously, they are super easy to make and they last a long time, so even if you have to buy a jar to get started, you should make your own, too. Surprisingly, the part you mainly want to use is the peel, not the flesh. Weird, huh?

The Instant Pot® doesn’t let you off the hook entirely when it comes to stirring stirring stirring your risotto; it bypasses only about 85-ish percent, which is not insubstantial. And while this method in all honesty may not yield that Michelin-star-worthy risotto of your Tuscan dreams, it gets close enough that I’ll take it on a weekday when I don’t have the Zen-like attitude or schedule that the former requires.

INGREDIENTS
100 g / 3.5 oz dried mushrooms (to be rehydrated) (or 16 oz. / .5 kg fresh mushrooms, preferably crimini)
2 tbsp. / 30 ml extra virgin olive oil (or other preferred oil)
1 medium onion, diced
3 cloves garlic, minced
3 cups / 600 g uncooked Arborio rice
1/3 cup / 75 g preserved lemon, minced
8 cups / 2 liters Aneto vegetable broth, or other low sodium veggie broth
1 loosely packed cup (1.5 oz. / 45 g) fresh basil leaves, finely chopped
1/4 cup / 10 g nutritional yeast
1/2 teaspoon / 1 g white pepper
salt to taste

“Mushrooms and lemons,” ring the bells of St. Clements.

DIRECTIONS
Rinse dried mushrooms thoroughly to cleanse them of grit, then drain. Then cover them in a liter (or quart / 4 cups) of warm veg broth. I used the stupidly expensive and stupidly great Aneto vegetable broth, available at a case discount at Amazon. If you have your own veggie stock, great. Otherwise I would recommend a mix of water and one of Better Than Bouillon‘s stock bases, such as the No Chicken Base. The mushrooms should hydrate in about 1/2 hour. Remove them from the liquid, then strain the liquid to remove any remaining possible grit and reserve the liquid. [The mushrooms soak up about 100-150 ml of the original liquid, which you can replace with more stock, water, or dry white wine.]

Dice onion, mince garlic, mince preserved lemons.

You can chop the mushrooms if you want; I didn’t.

Set Instant Pot® to “Sauté” and add olive oil to the stainless steel inner container. Add onion and sauté for about 5 minutes, until soft without colouring. Add the garlic (and fresh mushrooms, if you are using them) and sauté for another two minutes or so, stirring regularly. Don’t worry if there’s some browning on the bottom of the stainless steel container. Add minced preserved lemons and sauté for another minute or so. Add rice, and stir, to coat all the rice with a little oil. [Add another few ml or a tbsp. of oil if you feel like you need to.] Deglaze the bottom of the container with a little of the reserved mushroom soaking liquid. Add the rest of the liquid and the mushrooms, close the lid, then set Instant Pot® to high pressure (I used the “Bean/Chili” setting) for six minutes, making sure to set the vent on the lid to “Sealing.”

Chop the basil and set aside.

How much basil? This much basil.

When the timer goes off, carefully turn the vent from “Sealing” to “Venting.” [You may want to do this wearing oven mittens; be mindful to avoid the rapid jet of steam that will be emitted.] Turn power to “Off.” When the steam has vented, carefully open lid and set aside. The risotto will look a little soupy at this point, but it will thicken as you stir in the remaining ingredients. Stir in the chopped basil, nutritional yeast, and white pepper a bit at a time, making sure they are well distributed, until remaining liquid is absorbed. Add salt (if necessary), ladle into bowls, and serve.

Just like mamma mia didn’t used to make.

Soupe de la Semaine: Nässelsoppa, the Stinging Nettle Soup from Sweden

0

In a perfect world, I’d have a beautiful serving shot for you, but I froze the soup for a friend, so here’s one I nicked from the Queen of Kammebornia.

I’m continually surprised by the lengths to which our species will go to get food. Olives give us stomach aches straight from the tree? Maybe soak them in lye, then, because a little lye makes everything tasty. Rhubarb leaves are potentially deadly? Okay, let’s just harvest the stalks, and see if they won’t kill us. Nettles sting us when we touch them? Then we’ll boil them, and then perhaps they won’t sting.

I completely apprehend the ancient sensibility of finding local greens, boiling them, and consuming the broth. In every culture, you can find some version of this basic idea. Maritimers all over the globe even harvested seaweed, which makes for a magnificent, if humble, soup.

So far, a credible origin story for the Swedish version of this soup has not emerged, but since there are similar versions of it in Ireland, Scotland, and Native American culture, I’m presuming that the arc of its development was probably not that of something being spread from a single source, but a soup with a parallel evolution wherever Urtica dioica flourished (originally Europe, Asia, and western North Africa, but now pretty much everywhere). The bottom line is that it is ancient, dating back to the Bronze Age, and if something has persisted that long, there’s a reason.

I dug through dozens of recipes to arrive at this one, many of them Google Translated from Swedish. If you go out hunting on your own, don’t be put off by instructions for chopping nostrils, or be dissuaded by “raspberry soup” mistranslations. So long as you handle the raw nettles with care, your nostrils are safe. You will want to use gloves or tongs for the initial cleansing, though. Gotta respect a plant that employs not only miniscule thorns, but also formic acid, to try to keep itself safe from the likes of soup-making us.

This can easily be adapted to a vegan recipe by omitting the eggs, crème fraîche/sour cream, and chicken stock. Be sure to use a really good vegetable stock to get the depth of flavour the soup deserves. Roasting the vegetables before putting them in the stock is a must for this recipe.

Have a care with these before they’re given the hot broth bath.

INGREDIENTS
30 ml / 2 tbsp olive oil
2 small onions, finely chopped
500g / 1 lb stinging nettle shoots and leaves
1 liter / 4 cups good quality chicken or vegetable stock
500ml / 2 cups water
5-10g / 1-2 tsp salt
1-2g / 1-2 tsp dried thyme
pinch white pepper
20g / 2 tablespoons potato starch (or corn starch)
4 hard boiled eggs
10-20 chives, chopped
250 ml / 1 cup crème fraîche, optional (sour cream may be substituted)

Ready for the purée.

DIRECTIONS
Rinse nettles thoroughly, picking out grass and any foreign objects, then drain. In a large pan, heat the oil, thyme, salt, and white pepper, and then sauté the onion for about 5 minutes, until soft without colouring. Add the water and stock. Bring to a boil and then add nettles. Cover and simmer for about 20 minutes. Using immersion blender, purée soup until smooth (or use food processor/VitaMix). Dissolve the potato starch in a little water and stir it into the soup. Bring back to a gentle boil, stirring regularly until it thickens slightly. Check and adjust the seasoning. Serve hot with quartered or halved hard-boiled eggs, chopped chives, and a dollop of sour cream or crème fraîche.

Despite what Kermit said, it actually is easy being green.

At $9 A Liter, Aneto Chicken Broth Is A Steal.

5

Worth its weight in chicken.

I know, I know. For that amount of money you could buy THREE liters of chicken broth. You’d probably be better off mixing this with two liters of water, actually, if price is your sole criterion.

Full disclosure: Due to an upcoming medical procedure during which they insert a video camera up into the shadiest area of my body (i.e., “where the sun don’t shine”), I am currently on a liquid diet. Chicken broth is permitted. I decided to use this opportunity to test drive a suggestion I came across while writing the article on fideuà inauténtico. My research for that piece led me to an excellent food blog called The Daring Gourmet, which features not only recipes, but also product reviews, travel and health tips, restaurant reviews, and more. [You should visit it after you’re done reading this.]

They wrote an article about their visit to the Aneto factory in Artes, Spain, that I found completely captivating. Enough so that I was willing to plunk down $27 to pick up three liters of the broth as part of my hydration regime, knowing I would be renting it for not much longer than it will take you to finish watching the final episode of The Americans this evening.

I had considered myself a fairly savvy shopper, and the chicken broth in the pantry was Kroeger’s Simple Truth Organic Free Range Chicken Broth Fat Free, which I bought at the local Ralphs for about $1.99 or so. But compare the ingredient list between Aneto (at left) and Kroeger (at right).

The boxes are the same size, but that’s where the similarities end.

As Kimberly of The Daring Gourmet pointed out in her article,

    To be called “broth” the USDA only requires a Moisture-Protein Ratio (MPR) of 1:135. That’s 1 part chicken to 135 parts water. That translates as 1 ounce of chicken per gallon of water. As unbelievable as that sounds, we’re understandably left asking, “So where’s the chicken in the chicken broth?”

Indeed.

On the left, the Aneto broth. On the right, the Kroeger. Which one do you suppose has more chicken (and, for that matter, flavour)?

I don’t want to come across as picking on Kroeger; it’s one of the best of the conventional chicken broths. The problem is that we in the United States just don’t set the bar very high (another issue addressed at The Daring Gourmet). And most of us aren’t drinking our chicken broth straight. But I gotta say, from the bottom of my taste buds, that Aneto is to conventional chicken broth what a Maybach or a McLaren is to a Vauxhall Viva.

Of course, you could make your own stock. That gives you the option to tweak the taste, and it’s possible to make a stock that’s even better than what Aneto sells. But it takes time to buy and prepare the ingredients, and if you want to get some economy of scale, it also requires a significant amount of freezer space, so those costs deserve to be considered. I come from a family where it was considered to be something of a crime to let potential soup bones go to waste, so I do make my own stock from time to time, but it’s usually with veggies that are a mere few days away from becoming a science project, plus a fresh onion (I always have those). I rarely — read “never” — set out to make a big batch of stock from scratch with purpose-bought vegetables. Plus, Aneto makes really good stock, and it’s always handy to have some room-temp broth in the pantry even if your freezer is (ahem) well-stocked.

Appended to their 2016 article, The Daring Gourmet thoughtfully provided a list of stores across the USA where Aneto is sold (the company also make a ton of broths that are not sold in the US, such as their Caldo Natural de Jamón). I got mine at the local Sur La Table; I could have saved a couple bucks a unit had I bought a six-pack through Amazon, but I failed to plan ahead that far. Idiot me. Over the next few hours, I’m sure I will have ample time to sit and contemplate the error of my ways.

Meanwhile, go read the Aneto story!

Fidella? Paedeuà? Maybe We Should Just Call It Fideuà Inauténtico.

3

A little bit of Valencia, a little bit of Catalunya, a little bit of Inglewood.

If you’ve ever been to Spain — and even if you haven’t — there’s a fair likelihood that you have at some point encountered paella, that rice-based Valencian marvel redolent of saffron and pimentón de la Vera. Believe it or not, the paella you treasure in your taste buds’ memory is likely, in a word, inauténtico. Paella, like pizza and pretzels, rallies a passionate coterie of prescriptivists to its bosom, each claiming that a single path alone leads to the culinary ecstasy prized by gourmands. Yeah, bunk.

The earliest precursor to paella I could find dates to about 1520, when the notes of the master chef to Ferdinand I, Rupert de Nola (who, despite his name, was not from New Orleans), were codified into Libre del Coch (later Libro de Guisados), said to be the first printed cookbook in Catalan (and, some further allege, in Spain). It seems to have been compiled originally in 1477, which indicates that book publishers back then maintained the same sort of leisurely release schedule they do today.

What? A book without pictures? Depends on your edition.

But I digress. According to Saveur magazine, the original Valencian paella was likely cobbled together from local ingredients. Rice was a Moorish legacy dating back to the overthrow of the Visigoths in 711, and Arab traders brought saffron to the region a couple hundred years later. Then, all they had to do was add some veggies and protein, and presto! It’s said that snails (which sound much tastier in Spanish, as caracoles) and rabbits were often featured, as were local beans. [Beans and rice? How is it that there’s no paella burrito food truck in Los Angeles? Maybe this.] In any event, the natives are passionate about what is and is not authentic (even when they disagree on specifics), but what else would you expect from citizens of a town that sports its own rice museum?

In the early 20th century, one Valencian had gone completely heretical, not only adding seafood to paella, but substituting noodles for rice! There are competing legends surrounding the origin of fideuá, one of which portrays it as an accident by a chef who had run out of rice, another concerning a chef who attempted to dissuade a gluttonous sea captain by ostensibly making his paella less palatable with noodles. Whatever the truth, the dish became a hit, though it migrated up the coast into Catalunya for its most elegant expression.

While I have a great deal of respect for the tradition of Spanish cuisine, I’m not above a cultural mashup (I am going to pull together a paella burrito one of these days!), so I assembled a dish I proudly call Fideuà Inauténtico. [I once worked with a multiple Grammy-nominated art director who occasionally said, “Go ugly early.” I’m not sure exactly what she meant by that, but it seems to apply here.] I will note that, as with many of the recipes found on this blog, this is more of a suggestion than an absolutist set of instructions.

Developing the socarrat.

Fideuà Inauténtico
Serves approximately 4 to 6, with a little left over

NOTE: This was made in a 16″ Staub pan designed for cooking paella. Technically, the pan is also called a paella, so saying “paella pan” is as redundant as saying “La Brea Tar Pits.” Mine is rather heavy and thick, while the traditional Spanish version of the pan is thin. The size and weight of your pan will affect cooking time, so have a care. The ultimate goal is for the pasta to absorb the liquid, and to develop a bit of a crust (or socarrat). While the dish as pictured was made on top of my ancient O’Keefe and Merritt stovetop, I often use my outdoor gas grill for this dish, because it produces a superior socarrat, thanks to the larger burners and higher BTU output.

INGREDIENTS
2 packages fideo pasta* (7 oz. / 400 g each)
½ cup / 120 ml extra-virgin Spanish olive oil
1 pound / ½ kg boneless chicken thighs, cooked and chopped
1 – 2 teaspoons / 2½ – 5 g pimentón de la Vera (sweet/dulce if you have it, but bittersweet/agridulce or hot/picante work fine)
1 medium onion, chopped
4 garlic cloves, chopped
2 pounds / 1 kg tomatoes, peeled, seeded, and chopped or two 14-oz / 400 g cans of fire-roasted diced tomatoes
20-24 large shrimp, tail on, uncooked
8 oz. / 225 g link of Spanish chorizo** cut into 20 or so slices
3½ – 4 cups / 820 – 940 ml of stock (I used chicken stock, but fish or veggie or beef would work fine also), heated
⅛ – ¼ teaspoon / .09 – .17 g saffron (not really very much, because it’s super expensive, but you can add more if you want)
¼ cup / 60 ml dry Spanish white wine such as Albariño (optional)
Salt to taste

*Angel hair pasta and vermicelli also work well, so long as they are in broken into short pieces and you adjust the cooking time and amount of liquid so they don’t get overcooked. Spaghetti, on the other hand, is too thick.
**Spanish chorizo, unlike Mexican chorizo, is cured and has the texture of a hard sausage.

DIRECTIONS

Cook chicken thighs in advance, using whatever method you prefer. I braised mine in wine, intending to finish them off with a little browning on the gas grill, but I skipped that step for time’s sake, and it worked out fine. In fact, I made the thighs the previous night, and just chopped them up the following evening. I saved the cooking juices to combine with the stock.

Heat the stock in a saucepan to simmer; you will be adding it in a bit at a time later in the recipe.

In large paella pan (sic), combine olive oil and fideo over high heat; brown fideo to golden colour, stirring frequently (don’t worry if some gets a little too dark, just don’t burn it). Add pimentón de la Vera and onion and cook until softened, about 3-4 minutes. Add garlic and continue cooking about one minute. If it looks like the fideo is getting too dark, splash in a little stock or wine and allow it to evaporate.

Add tomatoes, cooked chicken, chorizo, shrimp, and saffron, arranging them in the pan evenly. Begin pouring stock in a bit at a time (about 40% the first time, then 20% or so with each subsequent pour), allowing it to reduce a bit before adding more. DO NOT STIR, because this will mess with the formation of the socarrat. [You can sample the pasta along the way, checking to see if it has gone from crunchy to al dente. Typically, fideo requires only 4-5 minutes in boiling water.] A couple of minutes after the first stock addition, flip over the shrimp. When they are cooked, they’ll turn from grey to pink and white. You may need to turn them over a couple of times to get them there. Should you run out of stock, you can add a bit of dry wine, such as Albariño, or even a dry rosé. It’s also possible that you may not need to use all your stock. Let your tastebuds be your guide. If the pasta’s done and the shrimp are pink, you’re good to go. Allow the liquid to evaporate, take the pan off flame, and let it sit for a 3-5 minutes to help build the socarrat.

Lift portions out of pan with spatula, making sure to scrape off the socarrat in the process. It is traditionally served with allioli, a kind of garlic mayo that can be made in a food processor or with a mortar and pestle. Possibly due to the number of margaritas I had consumed, I skipped this step. It tasted fine without the condiment.

Just about fork-ready.

Curried Chickpea Smash [Vegan]

0

It takes all my will to keep from eating it directly from the bowl.

Total dishes dirtied in the course of making this recipe: 1. [Plus five utensils: the can opener, potato masher, knife, fork, and measuring spoon. Oh, and I had to clean off the cutting board that lives on top of the right-hand sink.] That in itself gives this recipe a warm place in my heart.

Big ups to Jessica Prescott, from whose book Vegan Goodness: Delicious Plant-Based Recipes That Can Be Enjoyed Everyday this recipe was adapted. Further thanks to Deb Lindsey and Joe Yonan of the Washington Post, the former for making it look appetizing enough to try, and the latter for testing the recipe so I could goof with it in my own kitchen.

This takes literally about 10 minutes to pull together, even if your knife skills are as poor as mine, and it packs a wallop, taste-wise. Also, if you prefer to make this with garbanzo beans rather than chickpeas, they are an acceptable substitute.*

Curried Chickpea Smash
makes four sandwiches

INGREDIENTS

    1½ cups (one 15-ounce / 425 g can) chickpeas, drained (save the aquafaba!) and rinsed
    Flesh of 1 large ripe avocado, mashed
    2 tsp. / 10 ml extra-virgin olive oil
    2 tablespoons / 30 ml fresh lemon juice, or more as needed
    ¼-½ cup / 40-75 g finely minced red onion
    4 baby dill pickles, finely chopped (about ½ cup / 71.5 g)
    ¼-½ cup / 15-25 g finely chopped fresh cilantro/coriander (or fresh parsley)
    2 tablespoons / 13 g curry powder
    ½ tsp. / 3 g kosher or sea salt, or more to taste
    ½ tsp. / 1 g finely ground black pepper, or more to taste
    About ½ cup / 115 g lightly packed baby spinach leaves
    4 hamburger-bun-size rolls (or 8 slices of bread), toasted; or several slices of pita bread, cut into wedges for dipping

[NOTE: The amount of onion and/or coriander can vary widely according to taste. I like mine with a little more kick, which is why I go to the high end of the recommendation. Also, I use twice as much curry powder as was in the original recipe, I think partly due to my palate and the fact that my jar of curry powder has a little age on it and may have mellowed. To me, the main bar to clear is finding the right bread-to-filling ratio. If the bun is too big relative to its surface area (like a slider bun), you’ll have too much bread. On the other hand, if you toast regular sandwich bread, you need to go a little light on the filling for structure’s sake. Believe me, it’s a fun problem to have to work out.]

Next time, homemade bread.

DIRECTIONS

Combine the chickpeas, oil, and lemon juice in a medium bowl or flat bottomed storage container such as the one pictured at top. Smash with a potato masher or fork until fairly chunky (try to leave no chickpea whole). Stir in the avocado, minced onion, pickles, cilantro/coriander, curry powder, salt, and pepper. [If you are using this as a dip for pita, chop the spinach and mix it in; otherwise, reserve it for the sandwich building, directions to follow.] Taste, and adjust spices as needed (I often add more lemon juice and/or olive oil to keep it from being too dry, especially if I’m using it as a dip rather than a sandwich filling).

If you’re not using this as a dip for pita bread, place a few baby spinach leaves on the bottom halves of the toasted rolls (or bread) and top with the chickpea salad. Top with the remaining halves of the rolls/bread, and slice in half if the resulting sandwich seems unwieldy.

*Chickpeas and garbanzo beans are the same thing. That was a joke.

Soupe de la Semaine: Green Posole Soup [Vegan] [Instant Pot® recipe]

0

This could actually be seriously vintage posole.

It is possible that I made soup the other evening with posole that’s older than Ariana Grande. As you can tell from the packaging, marks from the inner lining’s adhesive have bled through the external paper bag, and the very top (which had not been exposed to light) is a great deal lighter than the rest of the bag. To the best of my recollection, I’ve been to Santa Fe only a couple of times in the last 30 years: once in 1990, on my honeymoon; and once in 2015, to see the Santa Fe Opera’s excellent production of Donizetti’s La fille du régiment. I’m sure I didn’t buy this bag of posole on the latter trip. When the bride said that it was probably from 1990, I was gobsmacked. That would have meant it survived two cross-country moves, both of which took place in the previous millennium. Oy.

That said, it was really tasty soup. Full marks to The Chile Shop in Santa Fe (which is still in business) for the quality and durability of their products.

The word “posole” (or “pozole”) originates in the Nahuatl language, and is possibly derived either from “posolli” (or “pozolli”) which is alleged to mean “frothy” or “foamy.” Or it could come from the Nahuatl word “potzonti,” meaning “to boil or bubble.” It apparently used to be called “tlacatlaolli,” which is said to mean “threshed men corn.” But hey, I don’t speak Nahuatl, so I’m sort of agnostic on the issue. It is further alleged that human flesh was a key ingredient in the original recipe (although some have been less eager to embrace the description in Fray Bernardino de Sahagún’s twelve-volume 16th century masterpiece, Historia general de las cosas de nueva España, also known as The Florentine Codex). I expect that very few modern butcher shops cater to the cannibal crowd, so as long as we’re going inauthentic, why not jump to a vegan version?

The central ingredient, of course, is cacahuazintle, or hominy corn. [Q:”Hominy corn?” A:”About a pound’s worth.” FX:rimshot.] Much like the Mexican flag, the soup comes in three colours: red, white, and green. I chose green, basically a riff off the version found on the 10th Kitchen website, based upon ingredients at hand and my culinary aesthetic (which included trying to make it fairly quickly).

Green Posole Soup
Makes approximately 14 cups / 3½ liters

INGREDIENTS
1 pound / 500 g dried white hominy (or two large cans pre-soaked) [25 oz. / 708 g per can]
1 large white onion, sliced thin lengthwise into strips
6-8 cloves garlic, peeled and chopped
1 tsp. / 1 g dried Mexican oregano
1 bottle (23 oz. / 652 g) crushed tomatillos OR 1½ pounds / 700 g tomatillos, husks removed, rinsed
1 can (7 oz. / 198 g) diced green chiles (or 1-3 diced serrano chiles)
1 big bunch fresh cilantro/coriander, finely minced
2 tablespoons / 30 ml olive oil (or other vegetable oil)
½ cup / 65 g pepitas (optional)
8 cups / 64 oz. / 2 liters water or vegetable stock (Better Than Bouillon enhanced my stock)
Salt to taste

Soaking the dried hominy. When you pour the water into the center of the pot after you’ve added the corn, it looks like this. Cool.

DIRECTIONS

If you are using dried hominy, it’s best to rinse it off and soak it overnight. [That in itself makes a good case for buying canned hominy, which must be drained and rinsed before being added to the mix.] In either case, drain the soaked hominy and leave it in the strainer.

In the Instant Pot® interior container, add onion, olive oil, Mexican oregano, and a generous pinch of salt. Set Instant Pot® to “Sauté” function, and sweat onions, stirring occasionally, until softened; it’s okay if they get a little brown. Add chopped garlic and sauté for another minute or two, then press the “Keep Warm/Cancel” button.

If you are using whole tomatillos and chiles, you should pop them in a food processor with a little bit of water and the cilantro; chop until fairly smooth and add to the Instant Pot® container. Otherwise, just mince the cilantro and dump it in the Instant Pot® container with the crushed tomatillos and diced canned chiles. Add the hominy and stock (and pepitas, if you are using them). Close the Instant Pot®, and set the vent on the lid to “Sealing.” Then press the “Soup” button, making sure that the pressure is set to high.

Here is where paths diverge in the woods. IF you are using the canned hominy, set the time for 12 minutes, and allow pressure to release naturally when done, unless you’re in a huge hurry. IF you are using the dried and soaked hominy, set the time for 35 minutes, and allow pressure to release naturally when done, unless you’re in a huge hurry (in which case you should have used the canned hominy in the first place). [NOTE: Because my hominy apparently dated to the Mesozoic, it was still a little more al dente than I would have liked at the 35 minute mark. I replaced the lid and added another 15 minutes of cooking time. Still not quite there. So I replaced the lid again and added another 15 minutes of cooking time. Perfect. The lesson here is not to use hominy that was dried before the first web browser was invented.]

Yummy goodness that tastes better than it looks, I promise. I’m a way better cook than food stylist.

Soupe de la Semaine: Vegetable & Rice Soup [Instant Pot® recipe] [Vegan optional]

0

Please, anything but this.

This soup was borne out of a need to use up a bunch of celery before it went south. [Seems like I make a lot of “necessity” soups.] Being an enterprising lad, I Googled “celery soup,” and got about 1.83 bazillion recipes for Cream of Celery Soup. I don’t want to demean the good folks whose soup provided Andy Warhol such a rich vein to mine for his art, but the cream of celery soup of my youth was possibly the worst-period-soup-period-ever. It was always the last can in the cupboard, and was only ever served out of dire necessity. To be fair, I think the only reason my mom kept any in the first place was so that it could be used as a sauce for some sort of ’60s casserole that has mercifully and permanently gone out of fashion. Fortunately, my Google Fu skills are strong, and I eventually landed on what appeared to be a terrific recipe by Martha Rose Shulman of the NY Times. It was modified to fit my ingredients, but it’s fairly faithful to the original.

Stop me if I’m sounding like a broken record here, but if there are two things I could ever want you to take away from this blog, they are these:

    1) You can do this. Goodness knows, I’m no chef. But I can make a tasty meal; that’s all anyone ever asks from an amateur.
    2) A recipe is a roadmap. There’s always more than one route to your destination. And, failing that, there are always other destinations.

Perhaps the two most delightful aspects to this recipe are 1) you don’t have to pre-cook the rice (a few minutes at pressure in the Instant Pot® does the job); and 2) you can make it vegan simply by removing the Parmesan cheese. If you can operate a knife, a spoon, a can opener, and a measuring cup, you can make this. You don’t even really need an Instant Pot®. It just will take longer on the stove (probably about 45 minutes to an hour of simmering, depending on how quickly your rice cooks up).

Doesn’t that look like a bowl full of healthy goodness? And we haven’t even added the tomatoes or the stock yet.

Vegetable & Rice Soup
Makes approximately 16 cups / 4 liters

INGREDIENTS
6 celery stalks / 400 g, diced
1/2 red cabbage / 400 g, shredded
1 medium onion, chopped
1 medium carrot, diced
1 bell pepper, de-seeded and diced (I used 6 mini peppers instead)
6 garlic cloves, minced
Salt (preferably kosher) and pepper (preferably ground white) to taste
1 cup / 180 g uncooked rice (I used brown basmati)
3 tbsp. / 45 ml extra virgin olive oil (spring for some good oil!)
1 28-ounce / 794 g can chopped tomatoes, with liquid
1 1/2 quarts / 1.5 liters water or vegetable stock (Better Than Bouillon enhanced my stock)
2 tbsp. / 50 g tomato paste
1 teaspoon / 4 g dried thyme
2 tbsp. / 3 g dried parsley flakes (or 1 tbsp. / 4 g fresh parsley)
A small (50 g / 1.75 oz.) Parmesan rind
Celery leaves for garnish (optional)
Freshly grated Parmesan cheese for serving (optional)

DIRECTIONS
Chop up celery, cabbage, onion, carrot, bell pepper, and garlic cloves; place in Instant Pot® container. Sprinkle salt and pepper over vegetables and stir. Add olive oil and uncooked rice to container. Set Instant Pot® to “Sauté” and sweat vegetables, stirring occasionally, for about 10-15 minutes, until they soften a bit. Add chopped tomatoes, vegetable stock, tomato paste, thyme, parsley, and Parmesan rind (if desired — omit for vegan version). Mix briefly with spoon or spatula. Turn Instant Pot® to “Keep Warm / Cancel,” which will end the sauté function.

Place lid on Instant Pot®, making sure vent is turned toward “Sealing” rather than “Venting.” Press “Soup” button, making sure pressure is on “High.” Set timer for 16 minutes. Go answer some email or vacuum your front room.

When timer goes off, allow Instant Pot® to decompress naturally, or at least for 10 minutes, before carefully switching vent from “Sealing” to “Venting.” Remove lid, and adjust spices as necessary (soup will be hot). Ladle directly into bowls or mugs and garnish with celery leaves and/or grated Parmesan (omit latter for vegan version).

To borrow a phrase, “Mmmm-mmmm good.”

Tourtière Végétalienne [Vegan Vegetable Pie]

0

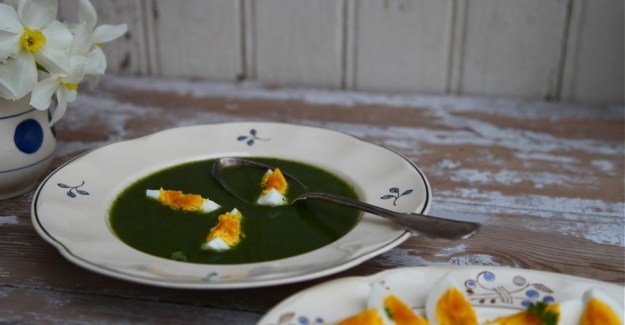
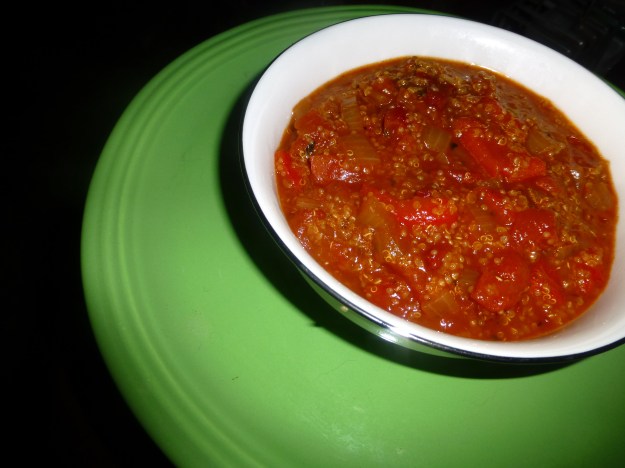
Chef Marie (l.) and cousin Sheryl (r.) performing the Ritual Admiration of the Tourtière ceremony last December.

My great-great-great-great-great grandfather Pierre would disown me.

The very idea of making a vegetable tourtière would be as alien and outlandish to him as, um, reading Gwyneth Paltrow’s Twitter feed. As every Canadian knows, the only way to make this traditional Québécois holiday dish is with pork. Or a blend of pork and another meat. Or wild game. Or maybe the occasional bird. Spice, too, is highly variable from region to region. In fact, Susan Semenak of the Montreal Gazette suggests that each particular recipe may be a “tell” as to one’s genealogy. As you might have intuited, it’s quite the subject of debate, and if you thought Canadians are unfailingly polite, donnybrooks over the dish’s “authenticity” will disabuse you of that notion for good. [Although, to be fair, the CBC Radio host in the previous link responded individually — and no doubt courteously — to all the hate mail she got over a network story on the subject.]

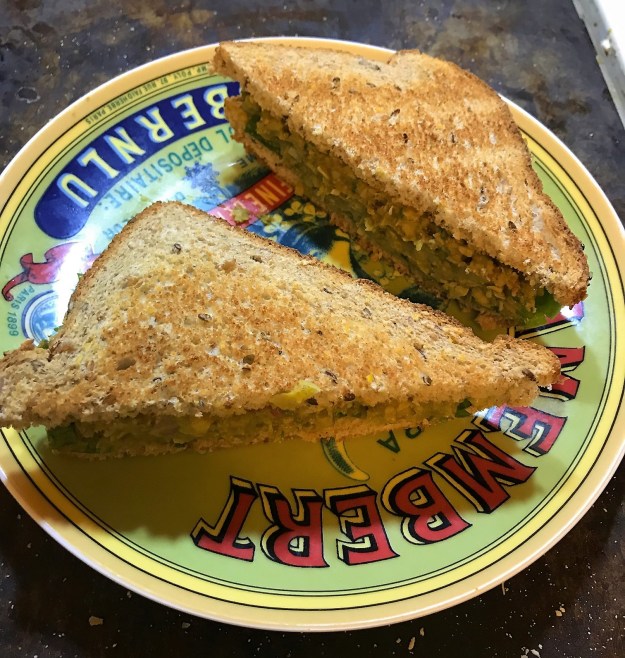
I had a delicious tourtière in Vancouver this past holiday season (see picture at top), but for Lent this year, we’re all vegetarian all the time, so salty tasty pig parts are right out. In my scent memory, tourtière was always more redolent of warm winter spices (cloves, cinnamon, nutmeg) than pork, though, so I figured if I got the seasoning right and the filling didn’t clash, I could pull a decent vegan version together. Since I’ve always found a grilled portabello cap an acceptable substitute for a burger, I started with mushrooms. Potatoes and onions could make the leap from the trad version to this one without effort, but it still seemed to be missing something. I knew that certain ersatz meat-like products are made with lentils, and I had the dregs of a box of lentilles du Puy in the pantry, so in they went. If nothing else, at least they were French. Plus, I love their peppery bite.

[Sidebar: Le Puy lentils ain’t your standard ranch stash legumes. Known as “the poor man’s caviar” and “the pearls of central France,” the lentilles vertes du Puy are sufficiently distinctive to have been awarded their own AOC, much like Champagne and Roquefort cheese. So please don’t just wander down to your local south Asian market and load up on urad dal, good though it may be. Not for this dish.]

I’m not going to lie to you: this is not the sort of recipe of which you can say, “I just tossed everything in the microvection pot, and twelve-point-four minutes later, my family and I were discussing Corsi stats for the Vegas Golden Knights while shoveling forkfuls of a storied Québécois holiday dish into our cavernous pieholes.” On the other hand, none of the steps require a whole lot of sophistication or attention, so it’s pretty easy to pull this together while you are assembling your personal Death Star, extracting ink from a squid, or knitting handcuffs for children.

Tourtière in situ, avec des feuilles d’érable pour l’authenticité.

Tourtière Végétalienne
(serves 8-12)

INGREDIENTS

Tourtière Spice Blend
2 teaspoons / 12 g salt
2 teaspoons / 1 g Herbes de Provence
1 teaspoon / 1½ g thyme
½ teaspoon / 1 g cinnamon
½ teaspoon / 1 g ground ginger
½ teaspoon / 1/3 g marjoram
½ teaspoon nutmeg / 1 g (fresh ground if possible)
½ teaspoon / 1/3 g sage
½ teaspoon / 1/3 g savory
¼ teaspoon / ½ g allspice
¼ teaspoon / ½ g coriander
¼ teaspoon / 1/5 g dry mustard
⅛ teaspoon / ¼ g ground cloves
dash white pepper

Tourtière Filling
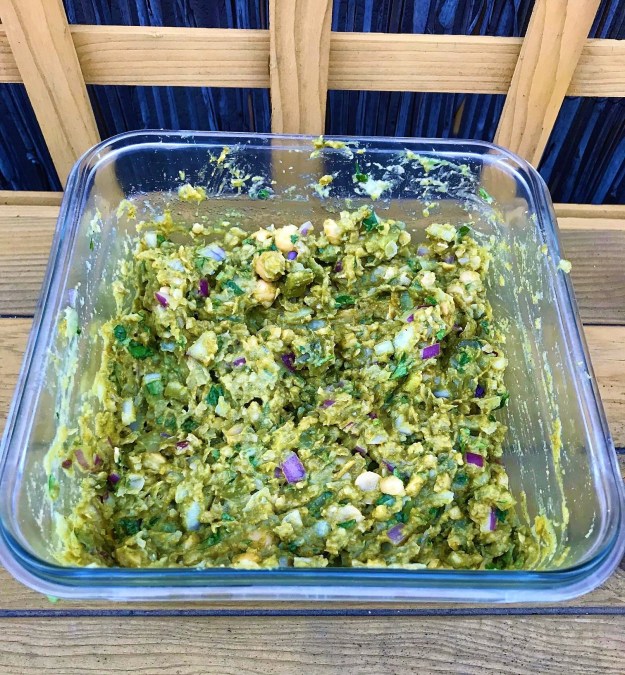
2 lb. / 1 kg potatoes, peeled, cooked, and mashed
1 lb. / 500 g crimini mushrooms
75 g dried porcini and Chilean Bolete mushroom mix (about 2 cups rehydrated, or just add another pound of fresh mushrooms)
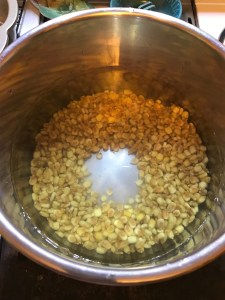
1 cup / 200 g Le Puy French lentils, cooked (this is a type, not a brand name)
1 large onion, diced
2 ribs celery, minced
4 cloves garlic, minced
2 tbsp. / 30 ml olive oil

Tourtière Crust
12 oz. / 340 g (about 2¼ – 2½ cups) all purpose flour
½ teaspoon / 3 g salt
1 cup / 2 sticks / 225 g Earth Balance Vegan Buttery Sticks (or some other vegan shortening product)
8-12 tbsp. / 120-175 ml ice water (REALLY COLD!)
1 – 2 teaspoons / 5-10 ml vinegar

DIRECTIONS

For the Tourtière Filling:

You might want to read the directions all the way through once before leaping in; I tried to arrange several discrete steps to minimize waste of time and resources (like hot water). But if you’re doing other things in the meantime, feel free to rearrange the process to suit your schedule.

Assemble the spice blend, stir with a fork to mix, and set aside.

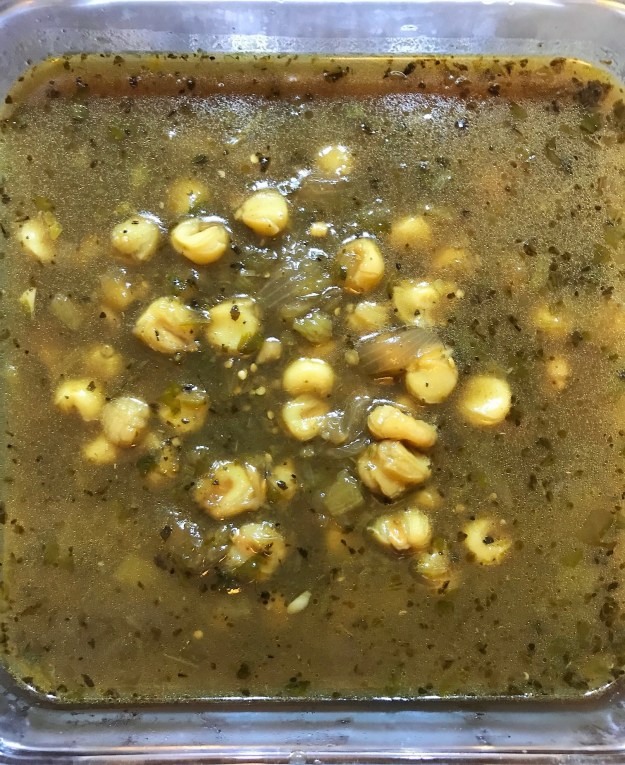
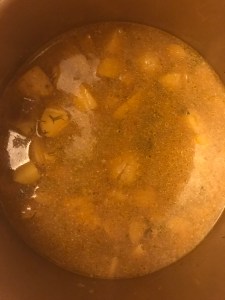
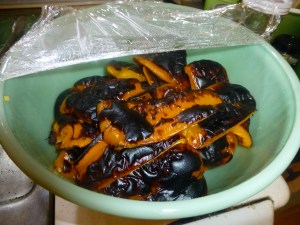
Rehydrate the dried mushrooms in warm water; this will take about half an hour or a bit more, depending on the mushrooms and their thickness. When they are plump, remove them from the water (reserving the water in the process) and rinse the grit off in a colander. Strain the reserved mushroom liquid through a fine sieve and set aside. [It can be used for a sauce or in stock later. It will keep in the fridge for a week, or it can be frozen for future use.] Chop the washed mushrooms and set aside in a bowl. Of course, if you are using all fresh mushrooms, you can skip this step. Wash the fresh mushrooms, chop them roughly, and set aside in a bowl.

Peel potatoes (this can be done while the mushrooms are rehydrating) and cut into quarters. Cover with about 1 – 2 inches (2½ – 5 cm) of water and boil gently in saucepan for between 15-25 minutes, until a knife slides in without resistance. Remove potatoes with slotted spoon and transfer to bowl. Mash potatoes with a pinch of salt and pepper, but no liquid (although if they are too much of a challenge, you could add 1/4 cup or 60 ml of the boiling water and give them a little bit of help).

While potatoes are boiling, rinse lentils and remove debris, if any. After potatoes have been removed from the saucepan, you can cook the lentils in the already-warm potato water, boiling gently for 20 minutes. When they are done, drain them, discarding the potato water, and set aside.

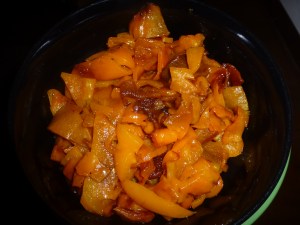
Dice onion, and add it along with the olive oil to a large pan (big enough to hold all the ingredients, which it eventually will). Brown onion, stirring occasionally, about 25 minutes or so.

While onions are browning, mince celery and garlic, setting them aside in separate bowls.

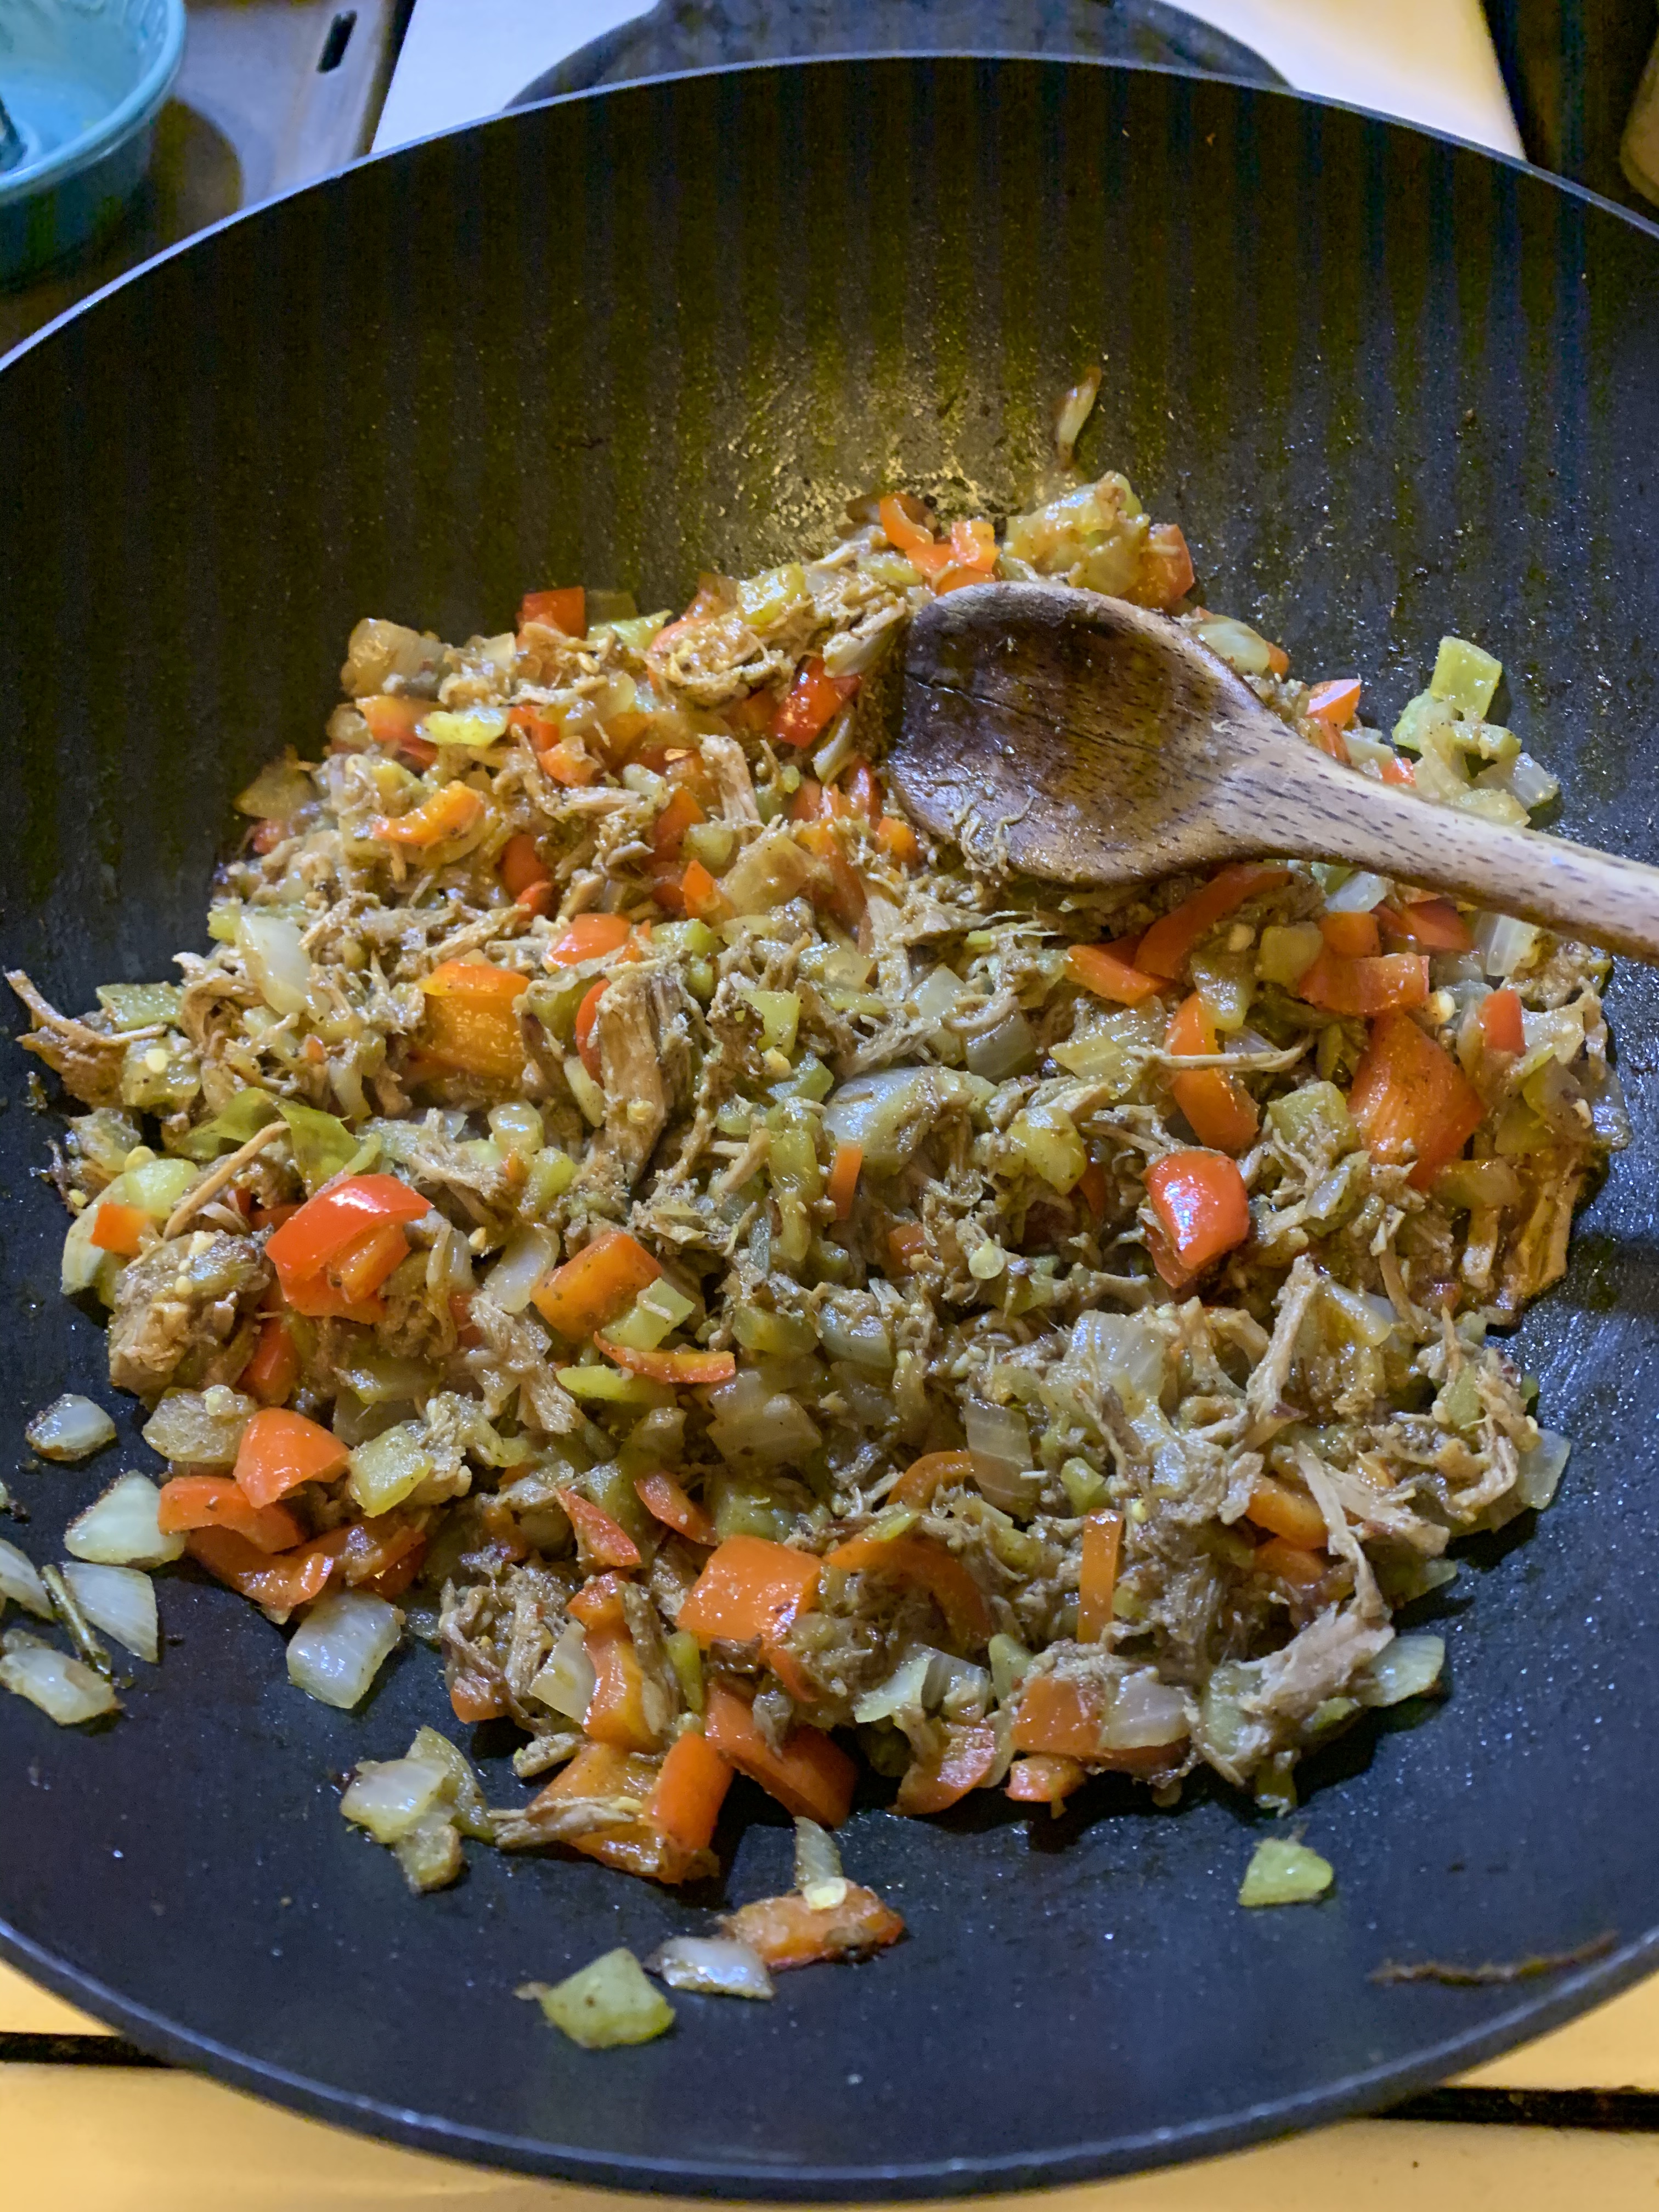
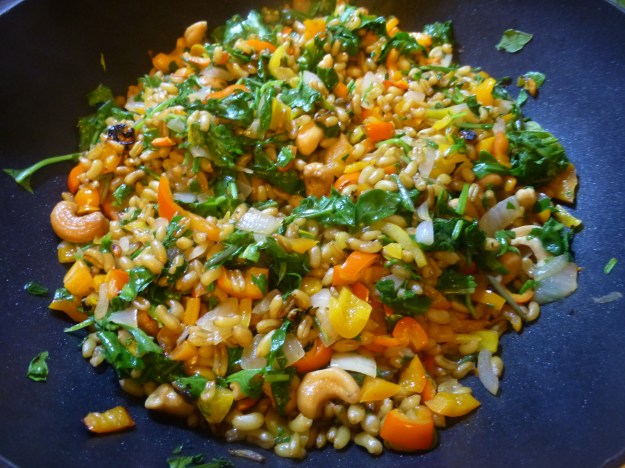
After onions have browned, increase the heat under the pan, add minced celery, and sweat it for a couple of minutes, stirring occasionally. Then stir in lentils, minced garlic and spice mix, and cook for about 2-3 more minutes. Reduce heat and fold in mushrooms; simmer, stirring occasionally, until mushrooms have softened and released their liquor, about 15 minutes. If mixture seems too dry at any point along the way, add between 2 tablespoons and 1/4 cup (30 – 60 ml) of reserved mushroom rehydrating broth. When mushrooms are cooked, fold in mashed potatoes and mix with wooden spoon so that all ingredients are distributed evenly throughout. When it’s all warm (about 5-10 minutes), taste and adjust spices as necessary. [This usually means a bit of salt and pepper, but if your palate is discerning, you may detect that one element or another of your spice blend has disappeared, so you can fix that as well. Be forewarned: cloves, cinnamon, and ginger are very assertive, so add with caution, if at all.]

Remove from heat and allow to cool at least to room temperature before filling pie.

Here’s your shortening.

DIRECTIONS

For the Tourtière Crust:

Freeze shortening overnight. Chop shortening into small chunks. Add, along with salt and flour, to food processor bowl fitted with “S” blade. Pulse until a “gravelly” dough comes together that will adhere to itself if you pinch it in your hand (think wet sand). Notice little clump at left of photo.

Not quite ready, but close.

Begin adding ice water and vinegar solution a tablespoon or two at a time, and pulsing until dough begins to have enough moisture to cohere. There’s not a great way to explain this in print, which is why there are apprentices and grandmothers. Once you feel it, you will understand. In the meantime, check this vid, and you’ll get a sense of the process. [The video version is done with a pastry cutter rather than a food processor, but you’ll see how the chef gets where she needs to go.]

IMPORTANT SIDEBAR: Keep everything as cold as you can! Warm dough is greasy and soggy dough.

Not quite a 50-50 spilt.

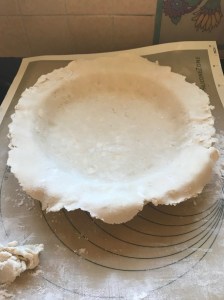
Empty dough from processor and mold into a round-ish lump, wrap with cling film, and pop it into the chill chest — you know it as the refrigerator — to rest for AT LEAST an hour, though overnight is even better. When dough has rested, bring it out onto your rolling surface (I used a big cutting board with a floured silicone mat on top) and cut it in half-ish (the bottom crust needs to be bigger than the top).

In the pan, ready to be filled.

Roll out the dough from the center outwards until you have a sufficiently large crust for the bottom, two to three inches (5 – 7.5 cm) bigger than the pan. Don’t worry about overhang; that will be incorporated later. Once bottom crust is set in pan, fill with mushroom/lentil/potato mix, making sure to distribute it evenly.
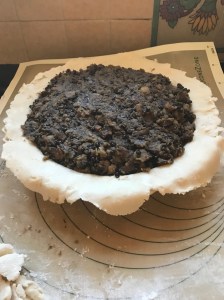
Man, I’m stuffed.

Roll out top crust and place on top. This video shows not only shows about how to crimp the dough together, it’s a useful instruction tool on how to make pie dough period (even if his version is not vegan). You’ll need to vent your tourtière just like any pie, to allow steam to escape. You may choose to cut your vents in the shape of maple leaves, or you can just poke the crust a few times with a knife or fork. Have a little fun with it; after all, you’re making pie for dinner. How cool is that?

Vented and crimped.

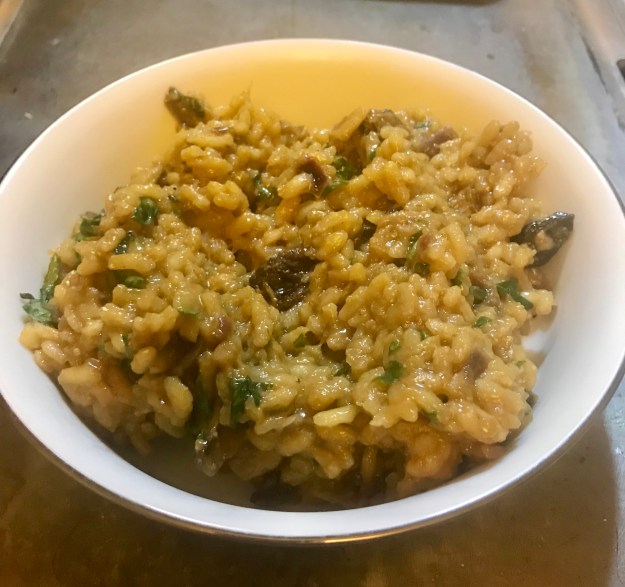
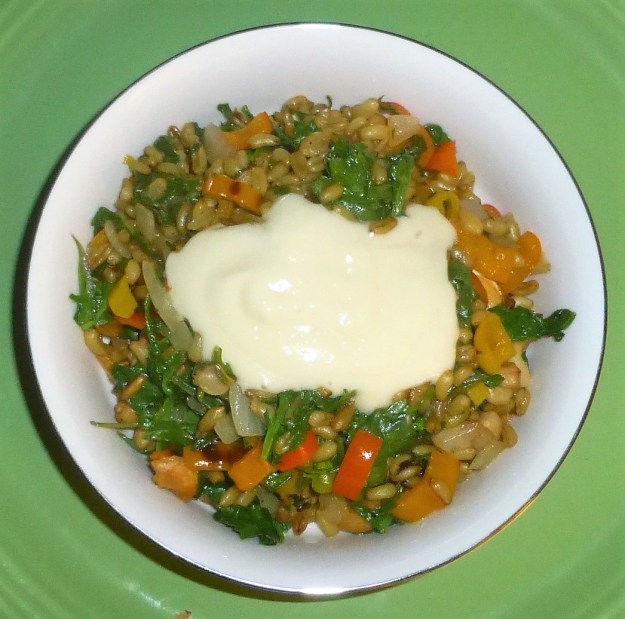
Bake the filled tourtière for approximately 50 minutes at 175°C / 350°F. Serve warm, or allow to cool to room temp and serve then. Mushroom gravy, a wine reduction sauce, or a vegan mustard “cream” sauce are delightful accompaniments, but they’re going to have to wait for another post, I’m afraid.

Soupe de la Semaine: Sopa de Fideo… sin fideo [Gluten-Free & Vegan] [Instant Pot® recipe]

0

¿Dónde está el fideo?

Because I’m not Mexican, I hesitate to call sopa de fideo the ultimate Mexican comfort food soup — probably sopa de tortilla or caldo Mexicano de albóndigas gets the nod there — but it’s certainly in the running for the propreantepenultimate Mexican comfort food soup. For those of you unfamiliar with fideo noodles, they’re like a thin vermicelli (itself the Kate Moss of the spaghetti world), and usually cut in short pieces (generally somewhere between an inch and 4 cm).

Given that the bride is currently on a carb-cutting crusade, I thought spaghetti squash might suitably supplant the original fideo. Nestled in broth, it doesn’t need to bear the weight of being the dish’s focal point, which it does when being substituted, rather unsatisfactorily, for actual spaghetti under a blanket of Bolognese. The Instant Pot® pulls double duty here, both cooking the squash and making the soup. All you need to do between steps is to remove the steamer insert and squash, then dump out the remaining water. No need for cleaning along the way, since the squash that just came out is going right back in.

[This recipe, of course, can be made on the stovetop as well; the spaghetti squash can either be roasted or microwaved beforehand (fire up the Internet Machine and ask the Google for advice on that). Once that’s done, you can pretty much follow the general directions under the “For the soup” section; allow about 30 minutes for simmering after all ingredients are added.]

As with many classic soups, recipes for this vary widely. While mine hews fairly closely to the down-the-middle basic version, I did add one exotic ingredient as a nod to the soup’s probable Spanish heritage: pimentón de la Vera, the Spanish smoked paprika whose mere scent sends me off dreaming Gallego dreams. If you want to keep it more anchored to the New World, you could sub chipotle chile powder, regular chile powder, or even a diced jalapeño or two. Look, some people put cayenne, cinnamon, and allspice(!) in this soup, so feel free to follow your tastebuds.

Sin fideo, incidentally, means “without fideo.”

Sopa de Fideo… sin fideo
(makes about 3.5 liters / 15 cups)

Spring onion, sometimes known as Mexican onion.

INGREDIENTS

1 spaghetti squash (approx. 3 lb. / 1½ kg.)
2 spring onions (or 5-6 scallions), sliced thin
3-4 garlic cloves, minced
2 tbsp. / 30 ml olive oil
½ teaspoon / 1.5 g cumin
1 teaspoon / 1 g oregano (preferably Mexican oregano)
½ tbsp. / 4 g pimentón de la Vera (or smoked paprika)
½ tbsp. / 9 g salt
1 can (28 oz. / 794 g) diced tomatoes
6 cups / 1½ liters vegetable broth
chopped cilantro leaves for garnish
slice of lime for garnish (optional)
thinly sliced radish for garnish (optional)
slice (or chunk) of avocado for garnish (optional)
salt to taste
pepper to taste

The Instant Pot® fits like a glove… if your hand is cylindrical and about seven inches deep. Or a spaghetti squash.

DIRECTIONS

For the spaghetti squash:

Take off store sticker, rinse squash and pat dry. Insert steamer trivet into Instant Pot® inner pot. Add 1 cup / 250 ml water. Place squash in Instant Pot®. Close and lock lid, making sure that release vent is set to “Sealing.” Press button for Bean/Chili (set pressure to “high”) and adjust timer to 18 minutes. When squash is finished, you can allow natural pressure release or use quick release; either works fine. Remove squash from pot, remove steamer insert, and discard steaming water when sufficiently cool. Cut squash in half, remove seeds and stringy debris. Scrape out “spaghetti” with fork, chop strands into short, fideo-like length (between an inch and 4 cm) and set aside in bowl.

All star alliums: garlic and spring onions prepare for what chef José Andrés calls “a dance” with olive oil.

For the soup:

Set Instant Pot® to “Sauté.” Add olive oil to inner pot insert and allow to warm, then add garlic and spring onions. Sweat the onions and garlic until soft, stirring occasionally, for maybe 4-5 minutes. [No big deal if they begin to brown, but don’t let them burn or stick to the pot.] Add spaghetti squash and spices, stir to mix. Add tomatoes (with juice) and vegetable broth (you can use the tomato can for measuring the broth if you wish; add two cans). Secure lid, making sure vent is set to “sealing.” Press the “Keep Warm/Cancel” button once to stop the sauté function. The press the “Soup” button, adjust pressure to “high” (if necessary) and time to 10 minutes. When soup is finished, either natural pressure release or quick release work fine. Adjust seasonings and ladle into bowls. Garnish with cilantro leaves and the optional avocado, radish, and lime.

Soupe de la Semaine: Bowl of Sunshine — Vegan Yellow Squash & Corn Soup [Instant Pot® recipe]

0

Last night, I re-watched most of High Fidelity for millionth time. It’s one of those movies that resonates with my inner record geek and reminds me what, but for the grace of my bride, I might easily have become. In this scene, Jack Black starts his shift at Championship Vinyl by subjecting the rest of the store to the almost oppressively upbeat ’80s hit “Walking on Sunshine” by Katrina & The Waves. It got me to thinking: could I build a bowl of sunshine?

Short answer: yes.

A few days ago, I visited the “we’re selling this produce cheap” bin at the market and picked up half a dozen yellow squash — a kilo and a half — for 99¢. Coulda wound up in lasagna. Coulda wound up in cornbread. But I’ve been on a bit of a soup kick lately.

Yellow squash by themselves are not particularly assertive, taste-wise, so I knew they’d need a little help. A little spice. A little sweetness. And nothing that would detract from the yellow. The spice comes from white pepper and a jalapeño pepper (which is green, but tiny in volume compared to the rest of the soup). Coconut milk and corn provide the sweetness. And because my vegetable stock base is the colour of Vegemite™, the main bulk of liquid in the soup is water. For a moment, I considered making it a curry-based soup (the Flavor the Moments blog has an excellent vegan take on that here), but ultimately this recipe from the Love & Olive Oil blog resonated with me most.

Like many Instant Pot® recipes, this adapts easily to the stovetop; just add enough time to soften the squash. And boy freakin’ howdy, is this easy. The entire soup is made in the Instant Pot®, so no other pots and pans to clean up. [It’s even done in a single pot on the stovetop.] Prep is not at all demanding, because everything’s getting blitzed at the end (even the cook, should you so choose).

Unsquashed squash.

Vegan Bowl of Sunshine
(makes about 3.5 liters / 15 cups)

INGREDIENTS

6 yellow squash, roughly chopped (approx. 3 lb./ 1½ kg.)
1 sweet onion, roughly chopped
10 oz. / 300 g frozen, fresh, or canned corn kernels (drained if using latter)
1 jalapeño pepper, minced (optional, but recommended)
2 teaspoons / 12 g sea salt
2 sprigs fresh thyme
3 cups / 750 ml vegetable broth or water
1 can (13½ oz. / 400 ml) coconut milk (preferably the “fat” kind)
2 tbsp. / 30 ml olive (or neutral) oil for sweating veggies
1 teaspoon / 2½ g white pepper
2 tbsp. / 30 ml olive oil to finish (optional)
zest of one lemon (optional)
salt to taste
pepper to taste

Sweating the small stuff.

DIRECTIONS

Chop onion and jalapeño and add them to the Instant Pot®’s inner cooking pot; set to “Sauté” function. Sweat the onions and pepper until somewhat softened, then add the chopped squash and continue to sauté for another three or four minutes, stirring occasionally to make sure nothing adheres to the pot. Add salt, water (or stock), coconut milk, thyme sprigs, corn, and white pepper; stir together. Hit the red “Keep Warm/Cancel” button on the control panel.

Ready for pressure.

Cover pot and lock lid (making sure the vent is set to “Sealing”), select “Soup,” set pressure to “High,” and time to 15 minutes. When finished, you may allow pressure to release naturally before unlocking lid, or you can do a “quick release” by turning the vent to “Venting.” [Be careful not to steam your hand.]

Make me smooth, chef.

Remove thyme sprigs, add lemon zest if desired, then process soup with immersion blender or in batches with a blender/food processor. [If you’re using either of the latter, drape a towel over the input tube or lid to allow the steam to vent.] Stir and allow soup to sit for a couple of minutes before tasting and adjusting spices. [NOTE: The immersion blender won’t make the soup silky smooth, so if that is your aim, use a Vita-Mixer and strain through a china cap.

Ladle soup into bowls, drizzle in a teaspoon (5 ml) or so of olive oil if desired, then garnish with a few grains of black pepper and bit of chopped parsley, basil, chives, or green onion.

Soupe de la Semaine: Vegan Potato Pickle Pot [Instant Pot® recipe]

0

Not the prettiest soup, but it has a great personality.

One happy consequence of my current sixty-day Facebook cleanse is that I am spending more time researching (and cooking) recipes of all sorts.

If ever there were a happier marriage between a vegetable and an herb than potato with dill, I don’t think I’ve found it. And while I’m sure some of you might respond reflexively with “Yeah, what about tomato and basil, smart guy,” I’ll meet your snark with the pedantic retort that the tomato is technically a fruit and move on. The Potato Pickle Pot moniker is a nod to the Afro-Caribbean soup/stew known as Pepper Pot, although this particular soup’s roots seem to be Polish, where it, like its African cousin, is often made with cheap cuts of meat and is known as Zupa Ogórkowa. [My rebranding it as Polish Peasant Potato Pickle Pot seemed to be dipping an already gilded lily into Belgian chocolate fondue, so I dialed it back.] Both soups historically depended on available ingredients (peasants, y’know, can’t be choosers), so you’re welcome to think of this more as a template than a recipe. I’m sure no gendarmes from the local potagerie will be dispatched if you sneak in a turnip, some carrots, a rutabaga, or even some cabbage.

Many non-vegan iterations contain butter, milk, and even sour cream, but I was committed to a vegan version, and much like Magda at the I Deliciate.com blog, I considered — and then rejected — adding cashew cream. The puréed taters bring a rustic silkiness to the broth on their own. As with yesterday’s “Sofrito” Soup recipe, I opted to employ my Instant Pot® as a time-saving device to soften the potatoes, but the recipe is easily transferable to the stovetop. Just follow the directions for sautéing the onion, garlic, and potato, then add the broth/almond milk combo and simmer it until the potatoes are fork-tender (as if ready to be mashed). I expect that would take about 40-ish minutes, depending on how small your potato chunks were cut.

Of all the versions of this soup I researched, the one to which I owe the greatest debt came from a fellow Canadian, the woman who ran the One Vivacious Vegan blog out of Winnipeg, Manitoba. It’s little wonder she wanted a sturdy soup back in the fall of 2012; winters up there are doggone cold, and surprisingly long.

VEGAN POTATO PICKLE POT
Makes about 10 cups (about 2¼ liters)

INGREDIENTS

2 tbsp / 30ml olive oil
1 large onion, diced
6 cloves garlic, minced
3 pounds / 1.5 kg potatoes, scrubbed and diced, but not peeled
3 cups / 700ml vegetable stock
3 cups / 700ml unflavoured and unsweetened almond milk (soy milk or rice milk should also be fine)
⅔ cup / 7g chopped fresh dill (or 3-4 tbsp. / 9-12g dried), plus a few extra sprigs for a garnish
½ cup / 120ml pickle brine (straight from the jar)
½ cup / 30g nutritional yeast
1 cup / 170g chopped dill pickles
salt and pepper to taste (remember, the brine is salty, so add it AFTER, if necessary)

Halfway through, it’s really not a pretty sight.

DIRECTIONS [Instant Pot®]

Chop onion, garlic, and potatoes and put them in separate bowls. Add oil to inner cooking pot, and set the Instant Pot® to its “Sauté” function. Sweat the onions until somewhat softened, then add the garlic and continue to sauté for another two minutes, stirring occasionally to make sure nothing adheres to the pot. Add chopped potatoes and continue to sauté for 3-5 more minutes, just to warm the potatoes a bit and get them interacting with the onion and garlic. Add stock, almond milk, and chopped dill; stir together. Hit the red “Keep Warm/Cancel” button on the control panel.

Cover pot and lock lid (making sure the vent is set to “Sealing”), select “Soup,” set pressure to “High,” and time to 20 minutes. When finished, you may allow pressure to release naturally before unlocking lid, or you can do a “quick release” by turning the vent to “Venting.”

Process soup with immersion blender or in batches in a blender/food processor. [If you’re using either of the latter, drape a towel over the input tube or lid to allow the steam to vent.] You can pureé all of the soup at this point, but I like to leave a few of the chunks of potato intact. Add nutritional yeast, pickle brine, and chopped pickles. Stir and allow soup to sit for a couple of minutes before tasting and adjusting spices. Depending on your taste, you might want to add a little more pickle brine or dill to the mix, along with salt and pepper.

Ladle soup into bowls and garnish with a sprig of chopped dill. A baguette would be nice with this, although prudence would mitigate; you’ll have had a full day’s worth of carbs in the soup.

Soupe de la Semaine: Vegan “Sofrito” Soup [Instant Pot® recipe]

1

Leaves you “sofrito” experiment.

This is not going to be so much a recipe for a soup (although there will be one) as a roadmap to soup. Please keep all your appendages inside the vehicle while it’s moving.

Like many people, I occasionally find that I have a few vegetables in the fridge that really call for imminent use, lest they turn into science experiments. Today, that happened to be a two-pound package of carrots, some celery, a yellow bell pepper, and the better part of a bunch of cilantro, plus an onion that was in the unrefrigerated veggie basket. Because February is traditionally a vegetarian month for the bride and me, I decided to fold the ingredients into a soup, rather than use them as a sofrito/soffritto, mirepoix, refogado, or Suppengrün for a meat or poultry dish. [The terms in italics are all variants on the same concept, which is that a group of chopped vegetables can serve as a flavour base for stews, gravies, sauces, and the like. Ingredients and proportions vary from country to country (and from kitchen to kitchen), but not so widely that they aren’t all kissin’ culinary cousins.]

Here’s where it gets interesting: with the possible exception of the cilantro, all the vegetables can easily be enhanced to make soups that will fit in a variety of culinary traditions. For example, if I’d added lemongrass, ginger, and soy sauce to the soup (even keeping the cilantro), it would have taken a turn for Southeast Asia. Some garlic, basil, oregano, rosemary, and marjoram would have pushed it toward Italy. Turmeric, ginger, cinnamon, cardamom, coriander, and cumin would lend it an Indian or Sri Lankan vibe. I decided I wanted something else, a kind of mutt — er, hybrid — cuisine with elements of both Spanish and Tex-Mex.

And while this can definitely be made on the stovetop, it would take way longer than it does in a pressure cooker (Instant Pot® to the rescue again!). Basically, you’d follow all the main steps, but I would chop the vegetables into much smaller pieces to soften them more quickly. I’m guessing that 45 minutes to an hour in the stock at a high simmer (just below boiling) would do it. Then purée the vegetables and adjust spices as in the directions below.

WARNING: I like, and am accustomed to, spicy food. I would advise anyone trying out this recipe to cut the pimentón de la Vera and chipotle powder IN HALF to start. You can always make it spicier later in the process, if you wish. [If you cut the spices, you will also need only about half of the carob molasses as a consequence.]

Vegan “Sofrito” Soup
Makes about 10 cups (about 2¼ liters)

Carrots of many colours.

INGREDIENTS
2 lbs. / 1kg carrots, roughly chopped
1 onion, roughly chopped
1 red or yellow bell pepper, roughly chopped
3 stalks celery (need I say roughly chopped?)
1½ cups / 30g chopped fresh cilantro
5 cups / 1.25 liters vegetable stock (I used Better Than Bouillon and water)
1-2 teaspoons / 2-4g hot pimentón de la Vera (or smoked paprika)*
½-1 teaspoon / 1.5-3g chipotle powder (or other chili powder)*
1½-3 tbsp. / 33-66g carob (or regular) molasses*
½ teaspoon / 1g cumin
½ teaspoon / 3g salt
½ tbsp. / 8g apple cider vinegar (or other vinegar, or lemon juice)

Chopped up, mixed up.

DIRECTIONS [Instant Pot®]

Chop vegetables and cilantro and add them all to inner cooking pot. Add vegetable stock, pimentón de la Vera*, and chipotle powder*.

Lock lid (making sure the vent is set to “Sealing”), select “Soup,” set pressure to “High,” and time to 20 minutes. When finished, you may allow pressure to release naturally before unlocking lid, or you can do a “quick release” by turning the vent to “Venting.”

[At this juncture, the soup will look like you left your vegetables in dishwater overnight. Don’t be discouraged!]

Process soup with immersion blender or in batches in a blender/food processor. [If you’re using either of the latter, drape a towel over the input tube or lid to allow the steam to vent.] Add cumin, carob molasses, salt, and cider vinegar. Stir and allow soup to sit for a couple of minutes before tasting and adjusting spices. It’s at this juncture that you would add the remaining half of the pimentón de la Vera, chipotle powder, and carob molasses, should you choose.

Ladle soup into bowls and garnish with a little extra chopped cilantro. I forgot to reserve some and wound up using bread crumbs and chopped parsley for the photo. If you’re not concerned about being vegan, a dollop of sour cream and/or a sprinkle of cotija cheese would go nicely. Cashew cream is a fine vegan alternative.

*Please read the warning in red in the fifth paragraph; it’s there for your own good.

***********************************************************************

P.S. I’m perfectly happy if you want to replicate this recipe step by step, but it would bring me (and you!) greater joy if you use it as a “serving suggestion” instead, playing around with spices and quantities so that you can truly make it your own. Plus, you can clean out your fridge a bit in the process.

Soupe de la Semaine: Coconut Tomato [Vegan]

0

The turmeric makes it yellow.

The bride and I just got back from Paris, where we dined somewhat indiscriminately. Maybe that’s not the precise word, because we were pretty careful (bordering on obsessive) about choosing our restaurants. We certainly dined well, if perhaps excessively. But since the scale ticked a little higher upon our return, we decided to dial it back a bit.

February is normally one of our two vegetarian months per year (and not because it’s the shortest, since our other is October), but we’re kickstarting it off a few days early as part of our “Going Clean in ’18” campaign. I saw a version of this soup in Urvashi Pitre’s Indian Instant Pot® Cookbook, and it’s very close to this one, but I adjusted some of the portions because I love cilantro and ginger, and I’m not afraid of a little pepper. While she prepares it in an Instant Pot®, it works just fine as a stovetop recipe. It’s easy and delicious both ways.

Three quick notes: Should you be using fresh tomatoes, the immersion blender (or food processor) might not decimate all the seeds to your satisfaction. If you’re fussy about that, you could strain the soup (I didn’t). Second, this could easily be adapted for omnivores; some shrimp or cooked chicken (especially thighs) would make an excellent complement. Finally, this is pretty great served cold as well, just in case you want to make it in summer.

Coconut Tomato Soup
Makes about 8 cups (about 2 liters)

INGREDIENTS
3 lbs. / 1.5 kilos tomatoes, roughly chopped
(you can use canned if they are unseasoned)
1 red onion, diced
3 cloves minced garlic
1 chunk minced ginger (approx. 1 inch / 2.5cm) (approx 2.5g)
¾ cup / 15g chopped fresh cilantro
1 can coconut milk (13.5 oz. / 400ml) (I prefer the “fat”/”whole” variety)
1-2 teaspoons / 6-12g salt
¾ teaspoon / 1.5g ground white pepper (or cayenne pepper or Piment d’Espelette)
1 teaspoon / 3g ground turmeric
1 tablespoon / 22g agave syrup or honey (the latter is not vegan)

DIRECTIONS [Stovetop]

Chop tomatoes (unless using canned), dice onion. mince garlic, peel and grate ginger, wash and chop cilantro and add them all to soup pot. Add coconut milk, remaining spices, and agave syrup or honey.

Heat over medium heat until just about boiling, then back the heat off and allow to simmer for 30 minutes.

Process soup with immersion blender or in batches in a blender/food processor. [If you’re using either of the latter, drape a towel over the input tube or lid to allow the steam to vent, or you will Jackson Pollock your kitchen walls — and yourself — with hot soup.]

Ladle soup into bowls and garnish with a little extra chopped cilantro.

Before the magic of the immersion blender.

DIRECTIONS [Instant Pot®]

Chop tomatoes (unless using canned), dice onion. mince garlic, peel and grate ginger, wash and chop cilantro and add them all to inner cooking pot. Add coconut milk, remaining spices, and agave syrup or honey.

Lock lid (making sure the vent is set to “Sealing”), select “Manual,” set pressure to “High,” and time to 5 minutes. When finished, allow pressure to release naturally before unlocking lid.

Process soup with immersion blender or in batches in a blender/food processor. [If you’re using either of the latter, drape a towel over the input tube or lid to allow the steam to vent, or you will Jackson Pollock your kitchen walls — and yourself — with hot soup.]

Ladle soup into bowls and garnish with a little extra chopped cilantro.

Here Comes That Grain Again: Vegan Kamut® Bowl With Peppers, Greens, and Toum

0

The bride’s keen on grain bowls lately, and I’m about 47.8% less enthusiastic about quinoa than she is, so I have been poking around for alternatives. While at the store, ostensibly to pick up some farro, I saw this thing in the grain section that looked like a sibling (of farro’s, not of mine): Kamut®. I had no idea what Kamut® was, but that didn’t stop me from bringing it home like a stray culinary puppy. Long story short, it’s a variety of wheat, whose journey out of Egypt was perhaps less tortuous than, but nearly as interesting as, the Jews’.

Allow me to quote from the trademark owner’s website:

    The story of KAMUT® Brand khorasan wheat began in 1949, when Earl Dedman, a US Airman stationed in Portugal, received some unusual looking grain from a friend who claimed to have taken it from a tomb in Egypt. More likely, the friend had purchased it from a street vendor in Cairo, Egypt with the story that it had come from an ancient Egyptian tomb. Earl sent thirty-six kernels of the wheat to his father, R. E. Dedman, a farmer near Fort Benton, Montana. Within six years, the elder Dedman had grown the small number of seeds into 1,500 bushels, calling it “King Tut’s Wheat.”

In 1977, it fell into the hands of Robert Quinn, who tried unsuccessfully to get the people who make Corn Nuts to manufacture a wheat version of the snack with this grain. But Quinn and his dad continued to grow it on his family farm, which went completely organic in 1989. The following year, the USDA recognized the grain as a protected variety officially named “QK-77,” and the Quinns registered Kamut® as a trademark to guarantee that the original grain would remain unmodified and always be grown organically. From there, it got licenced to dozens of producers and is used in products from cereal to pizza… to this grain bowl.

This recipe follows a general formula I’ve developed for grain bowls: grain, some roasted/pan-fried vegetables, an element to add at least a bit of crunch to the texture, wilted greens for a little bitterness, some salt, and an acid (tomatoes, lemon juice, vinegar, or, in this case, toum) as a brightening agent. Please don’t shackle yourself to this recipe! It was created and modified on the fly, riffing on literally dozens of other options I sifted through from Pinterest pages and Google searches.

Instant veggie stock enhances the water.

A NOTE ON COOKING KAMUT®: A little searching on the Internets yielded some insight on how to cook it in an Instant Pot. Much like dried beans, the typical method for preparing Kamut® is to soak it overnight in water (or, in my case, vegetarian bouillon), but I didn’t have the time for that, and I — quite fortuituously — did have an Instant Pot. Much thanks to cookbook author Kathy Hester, whose The Ultimate Vegan Cookbook for Your Instant Pot: 80 Easy and Delicious Plant-Based Recipes That You Can Make in Half the Time yielded the info that if you press the “Adjust” button once after having set the Instant Pot up on the “Multigrain” cycle, “it will look like it’s going to cook for a normal 60 minutes. But on this setting — only on the multigrain 60-minute cycle — the grain first gets a 45-minute warm water soaking before the 60 minutes pressure cooking time. It’s great for Kamut® and other long-cooking grains.” If you don’t have one of these marvelous devices, you can just soak the grain overnight and prepare it according to the directions on the package. That method works just fine, even if it’s a little (well, a lot) longer. [Reminder from Russ Parsons, former LA Times food editor: “Rinse thoroughly. I mean thoroughly. In a strainer under running water.”]

One cup of dry Kamut® looks like this when cooked.

A NOTE ABOUT TOUM: Toum is a garlic-based Lebanese dipping sauce not far removed from aioli or the Ligurian agliata. The best recipe for it that I’ve found is at the Tori’s Kitchen website (she even thoughtfully includes step-by-step photography). If I deviate from her recipe at all, it’s usually to add more garlic, the cowbell of the pantry. There’s just never enough. When you’re making it, be sure your water and lemon juice are really cold, or the sauce might break up. But it’s super tasty, simple to make, and you will discover a million applications for it, from grilled veggie sandwiches to tater tots to pasta.

A Cuisinart full of toum.

Vegan Kamut® Bowl With Peppers, Greens, and Toum

INGREDIENTS:

For the grain:
1 cup / 225g dried Kamut® khorasam wheat
3 cups / 700ml water
1 tbsp. / 15ml Better Than Bouillon Seasoned Vegetable Base (or other vegan bouillon cube)

For the bowl:
2 cups / 325gm cooked Kamut® khorasam wheat
12 baby bell peppers or 2 medium sized regular bell peppers (red/orange/yellow, chopped)
1/2 onion, finely diced
5 oz. / 1 cup / 150g cashews, preferably roasted and salted
sea salt to taste
5 oz. / 140g coarsely chopped greens (this time it was kale, baby spinach, and arugula)
2 tbsp. / 30ml olive oil

For the toum:
3 1/2 – 4 cups / 700ml sunflower or canola oil, chilled
1/2 cup / 70g / about 1 head peeled garlic cloves
1/2 cup / 120ml lemon juice, divided
1/2 cup / 120ml ice cold water, divided
1 3/4 / 10g tsp salt (preferably Kosher salt, fleur de sel, or sea salt)

I was generous with the toum.

INSTRUCTIONS:

Cook Kamut® according to instructions (see A NOTE ON COOKING KAMUT®, above). Set aside.

Make toum according to instructions (see link in A NOTE ABOUT TOUM, above). Set aside.

Chop onion and bell peppers, place in bowl, and set aside. Meanwhile, heat olive oil in large pan on high heat until just about smoking. Add cooked Kamut® and toast, stirring occasionally, about 5 minutes or until slightly browned. Lower heat to medium and stir in onion and peppers. Cook for about 8-10 minutes, or until veggies have softened, stirring occasionally. Meanwhile, wash and chop greens. When vegetables have softened, add chopped greens and stir until wilted. Add cashews, stir, and salt to taste. Top with toum and serve. Serves 2-3 as main or 4-6 as side dish.

Soupe de la Semaine: Turkish Roasted Red Pepper & Tomato Soup -or- Közlenmiş Kırmızı Biberli ve Domatesli Çorba [Gluten-Free and Vegan]

0

I was tempted to call it the “Istanbowl.” Shame on me.

Yeah, the title is a mouthful. Happily, though, so is the soup.

I didn’t sample this when I visited Istanbul back in the ’80s, but I think I have some general sense of the Turkish flavour palate, and since this dish is reputed to be much like chicken soup is in America (which is to say that there are a quadzillion variations), this should be on pretty safe ground. I consulted with my Turkish pal Nil ex post facto (sending her the picture you see above), and she confirmed that I was in the ball park, and that I had nailed the spelling. I’d hate to give y’all a recipe for Turkish Roasted Red Bat Turd Soup thanks to a typo.

Many recipes call for bulgur wheat as the thickening agent and starchy backbone, but I opted for quinoa, since it’s gluten-free and generally considered safe for celiac patients, depending on whose article you read. If that’s not an issue for you, help yourself to bulgur wheat, rice, or even Israeli couscous (which is actually a pasta) in its stead. The smokiness comes not only from the roasted peppers, but also from the fire-roasted tomatoes and the pimentón de la Vera (or smoked paprika). You may add a pinch of smoked salt to finish before serving if you wish. Lots of bass notes to be had here. You can always add the zest of 1/2 lemon or a teaspoon (5 ml) of vinegar if you feel it needs to be brightened up, but I don’t think you’ll need it, as the acid in the tomatoes should balance it nicely. Some recipes also call for cornstarch as a thickening agent; I would deploy a tablespoon / 10 g of potato starch in a slurry if I thought it needed it. You be the judge.

The biggest downside of this soup is that it requires some time to bring together, unless you happen already to have roasted red peppers (not the marinated kind) and cooked quinoa in your fridge. In that case, it’s a snap. But it will take somewhere between 30-40 minutes-ish to cook the quinoa, and maybe 35 minutes to groom your peppers to soup-readiness. Your patience and dedication will be rewarded!

INGREDIENTS

    3 red bell peppers, halved, de-seeded, and roasted, with skins removed
    3/4 cup / 135 g dry quinoa, cooked (use package instructions) [will yield 2 1/4 cups / 415 g]
    2 tablespoons / 30 ml olive oil
    1 onion, diced
    3-4 garlic cloves, peeled and finely chopped
    2 tablespoons / 5 g sun-dried tomatoes, chopped (or red pepper paste or tomato paste)
    1 teaspoon / 2.5 g smoked paprika (I prefer Spanish pimentón de la Vera, and I used picante/hot rather than dulce/sweet)
    1/2 teaspoon / 1.5 g red pepper flakes, to taste
    1 teaspoon / 2.5 g dried mint (maybe double that if using fresh)
    28 oz. / 793 g can fire-roasted tomatoes (or 10-12 fresh tomatoes, roasted and chopped)
    8 oz. / 227 g tomato sauce
    4 cups / 950 ml vegetable broth
    Salt & coarsely ground black pepper
    OPTIONAL: 1 tablespoon / 10 g potato starch for thickening
    OPTIONAL: Fresh mint for garnish
    OPTIONAL: Sour cream (or vegan alternative) as garnish

Simmerin' away.

Simmerin’ away.

DIRECTIONS

Roast the peppers: Turn on broiler. Spread peppers on an aluminum foil lined cookie sheet, skin side up, in a single layer (you may need to repeat this step to roast all your peppers). Place cookie sheet about 3″ / 8 cm below broiler element. Roast until peppers are blackened across the top, around 10-15 minutes.

Transfer roasted peppers to a medium-sized bowl and cover with plastic wrap, allowing them to steam for 15 minutes minimum. Using your fingers, peel off the charred top layer of skin and discard. Give peeled pepper slices a rough chop, small enough to fit easily on a soup spoon, because they will not be puréed. Return to steaming bowl and reserve, along with any juices they shed, for later.

Cook the quinoa according to instructions on the label. I find that the stove-top method, while longer, produces superior results to the microwave method. YMMV. Set aside cooked quinoa for later use.

Cook the soup: In a 3½ quart or larger Dutch oven or heavy-bottomed pot, warm olive oil and onion on fairly low heat. Sauté, stirring occasionally, until softened and turning translucent, about 5 to 8 minutes. Add the roasted peppers (with any liquid they’ve thrown off), sun-dried tomatoes (or tomato or pepper paste), and garlic; cook a further 3-4 minutes until garlic is slightly less aggressive. Add smoked paprika/pimentón de la Vera, pepper flakes, amd mint; cook for about 30 seconds to release aromas. Add the can of tomatoes, the tomato sauce, vegetable broth, and cooked quinoa. Cook over medium heat for 30-40 minutes, stirring occasionally. After the first 5 minutes or so, add salt and pepper to taste, but not too heavily; you will adjust the seasonings just before serving. Taste periodically along the way (clean spoons each time!). If you think the consistency is too thin, whisk in 1 tablespoon / 10 g of potato starch with a little of the soup broth in a bowl, and add to the pot. Soup should thicken noticeably within five minutes. Taste at 30 minute mark, adjust seasonings (and thickness, if necessary), and allow to thicken if need be. Remove from heat and ladle into bowls. Garnish with mint sprigs and/or sour cream (or vegan alternative) if so desired. Serves 6 to 8 as an opening course, 4 as a main.

Soupe de la Semaine: Celeriac, Fennel, & Apple Chowder (Gluten-Free and Vegan)

0

Chowdah!

Chowdah!

It would seem that the most likely derivation of the word chowder comes from the French chaudière, meaning “boiler” (and is also an archaic French word for cauldron or kettle, from the Latin calderia). The Brits, though, not wanting to be left out of the linguistic fun, claim that the word springs from their jowter, or fishmonger. To be sure, many of the best known chowders do contain fish, but this one is a vegetable and fruit chowder that’ll stick to your ribs on a chilly night.

The original recipe was published in the excellent Cook’s Illustrated All Time Best Soups volume, and this variation was also influenced by a post on the terrific Big Girls, Small Kitchen blog and Ina Garten’s recipe for Celery Root and Apple Purée (which is very much like this soup without the vegetable broth).

I took two significant detours: I omitted the heavy cream (thus keeping the soup vegan), and substituted potato starch for wheat flour (which makes it gluten-free). Trust me, you won’t miss the cream a bit; if you process in a Vita-Mix, it will be plenty creamy, but even if you just use an immersion blender the soup will emerge a tiny bit more rustic, while still maintaining that silky mouthfeel.

When it comes to the wine, you don’t really need to use a $38 bottle of Roche 2014 Carneros Chardonnay French Oak Reserve, but damn, it was good (and you only need half a cup (or 120ml).

Special note for celiac patients: Be extra-sure that your vegetable broth is free of wheat or barley or malt products. These often show up in commercial vegetable broths and broth bases.

INGREDIENTS

    2 tablespoons / 30g Earth Balance Vegan Buttery Sticks (or unsalted butter, for non-Vegan version)
    1 onion, cut into 1/2-inch pieces
    1 fennel bulb, halved, cored, and cut into 1/2-inch pieces, plus 1 tablespoon minced fronds
    Salt and pepper
    6 garlic cloves, minced
    2 teaspoons / 1.6g minced fresh thyme (or 3/4 teaspoon / .75g dried)
    2 tablespoons / 20g potato starch
    1/2 cup / 120ml dry white wine
    5 1/2 cups / 1.3 liters vegetable broth
    1 celeriac (also known as celery root) (14 ounces / 400g), peeled and cut into 1/2-inch pieces
    12 ounces / 350g red potatoes, scrubbed but unpeeled, cut into 1/2-inch pieces
    2 Golden Delicious or Granny Smith apples, peeled and cut into 1/2-inch pieces
    zest of 1 lemon or orange
    1 bay leaf

Soup on the boil.

Soup on the boil.

DIRECTIONS

Put butter, onion, fennel, and a couple of pinches of salt in a heavy-bottomed pot or Dutch oven, cook over medium heat until translucent, about 5-8 minutes. Add garlic and thyme, cook for 30 seconds to a minute until fragrant. Raise heat to high and add potato starch, stirring continuously, and cook for another 2 minutes or so. Add the wine to deglaze the pot, making sure to scrape up all the bits on the bottom; let most of the wine boil off.

Stir in the vegetable broth, celeriac, potatoes, and apples. Add bay leaf and zest your citrus over the pot. Bring to a boil and then back the heat off to a high simmer. Cover pot and cook for 35-40 minutes, stirring occasionally, until vegetables are all tender.

Remove from heat. Discard the bay leaf. Process 2/3 soup in batches; if you are using a blender or Vita-Mix, making sure to cover feed tube loosely with tea towel (do not plug it up, because steam needs to escape). Return processed soup to pot. [Alternatively, use an immersion blender to process soup, making sure to leave at least 1/3 chunky.] Season with salt and pepper to taste, and ladle into bowls. Garnish with fennel fronds and serve. Makes 6 servings.

Soupe de la Semaine: Roasted Pepper Soup with Cilantro Cream

0

p1050126

My pal Beth, herself no slouch around the kitchen, dropped a UXB (UneXpected Book) into our mailbox earlier this week: Cook’s Illustrated All-Time Best Soups. It boasted a number of recipes that will serve as inspiration during soup season — which is all year, of course, but especially in the winter. I had my eyes set on a celeriac, fennel, and apple chowder for the opening salvo, but the bride had other ideas, and she wins.

Over the course of due diligence (I almost never cook a recipe without scanning the Interwebs to see if someone has concocted a more interesting version), I came across the Cookie + Kate blog, in which she lays out several entertaining reasons for not making this soup. Long story short, it’s not particularly cheap to make (unless you grow your own peppers), and the pepper roasting process is both time-consuming and a wee bit tedious. That said, just like her, I concluded that this soup is so tasty that any quibbles about prep were overcome mere nanoseconds after the intersection of tongue and spoon. [All the original recipes I consulted to arrive at this one called for red bell peppers, but the local supermercado‘s red peppers looked a little sketchy, so I made it with orange ones instead. I presume yellow bell peppers, or a mix of all three, would work equally well.]

For those of you who are interested, the recipe is easily vegan-adaptable (see notes below); while the half and half is a tasty touch, I tasted the puréed soup prior to its addition, and I could easily have stopped there, ingredient-wise. Recipe yields 4-6 large servings.

INGREDIENTS

Cilantro Cream

    3/4 cup / 170g sour cream (or soy yogurt for vegan version)
    2 tablespoons / 30ml half and half (or cashew cream for vegan version)
    2 tablespoons / 5.3g fresh minced cilantro leaves
    zest of 1 lime, plus juice from half of that lime (approximately 2 tablespoons / 30ml)

Soup

    8 red (or orange, or yellow) bell peppers, roasted, skins removed, and chopped
    1 tablespoon / 15ml olive oil (I used basil-infused EVOO) (double if making tortilla strips)
    2 medium garlic cloves, minced
    1 medium red onion, chopped
    1 teaspoon / 2.5g ground cumin
    1 teaspoon / 2.5g smoked paprika (I prefer Spanish pimentón de la Vera, and I used picante/hot rather than dulce/sweet)
    3 tablespoons / 50g tomato paste (or 8 oz. / 227g tomato sauce)
    1 tablespoon / 10g potato starch
    4-6 cups / 950ml-1.4l vegetable broth; start with smaller amount, adjusting for consistency as desired
    2 bay leaves
    1/2 cup /120ml half and half (or 100ml cashew cream + 20ml coconut oil for vegan version)
    2 tablespoons / 30ml dry sherry
    2 tablespoons / 5.3g minced fresh cilantro
    salt and pepper, to taste

Garnish (optional)

    3 corn tortillas, sliced into thin, 2-inch long strips, fried in oil until crispy

INSTRUCTIONS

For the Cilantro Cream:
Whisk all the ingredients together in a small bowl. Cover with plastic and refrigerate until serving.

For the Crispy Tortilla Strips:
Cut tortillas into strips about 2″ (5cm) long and 1/4″ (2/3cm) wide. Warm 1 tablespoon / 15ml olive oil in a large sauté pan over medium heat. Add tortilla strips and salt. Stir to coat the strips with the oil, and fry until both sides are golden and crispy, about 3 to 5 minutes. Transfer to a plate lined with a paper towel to cool. NOTE: If you are making the vegan version, be sure no lard was used in the tortilla manufacture! Corn tortillas are gluten-free, if you are concerned about that.

Peppers pre-peeling.

Peppers pre-peeling.


Post-peeling pepper perfection.

Post-peeling pepper perfection.

For the Soup:
Roast the peppers: Spread peppers on an aluminum foil lined cookie sheet, skin side up, in a single layer (you may need to repeat this step several times to roast all your peppers). Place cookie sheet about 3″ below broiler element. Roast until peppers are blackened across the top, around 10 minutes.

Transfer roasted peppers to a medium-sized bowl and cover with plastic wrap, allowing them to steam for 15 minutes. Using your fingers, peel off the charred top layer of skin and discard. Take peeled pepper slices and give them a rough chop (they will be puréed later, so no need to be fussy about it).

Cook the soup: In a 3½ quart or larger Dutch oven or heavy-bottomed pot, warm olive oil and minced garlic on fairly low heat. Sauté, stirring occasionally, until the garlic gets a little foamy and sticky, about 6-7 minutes. Increase heat to medium, add onions and sauté until softened and turning translucent, about 5 to 8 minutes. Add the cumin and smoked paprika/pimentón de la Vera and cook for about 30 seconds to release aromas. Add the potato starch (or flour) and cook for one minute, stirring constantly. Add the tomato paste (or sauce) and gradually whisk in the stock, stirring to prevent lumps. Add the peeled red/orange/yellow peppers and stir. Bring the soup to a gentle boil, then reduce heat to maintain a simmer and cook for 15 minutes, stirring occasionally.

Once your soup is done cooking, remove it from heat and allow it to cool for 5 minutes.

Blend the soup: Transfer soup to a blender or Vita-Mix (do NOT fill it over halfway, unless you wish to decorate your walls and person with hot soup); drape a kitchen towel over the blender (so the escaping steam doesn’t build up or burn your hands) and process in batches. Transfer puréed soup to another pot and continue until all of the soup is blended. Alternatively, use an immersion blender to blend the soup in the pot. Blend until the mixture is smooth and creamy. If soup is too thick, add vegetable stock to achieve desired consistency.

Transfer soup back to cooking pot and rewarm gently on the stove; add the half & half (or vegan substitute), dry sherry, and chopped cilantro. Divide soup into individual bowls, and drizzle in cilantro cream. Top with crispy tortilla strips (optional) and serve.

Soupe de la Semaine: Pasilla, Potato, & Garlic Soup — Vegan-style

0

p1050061

I’ve got a beef (no pun intended) with the Food Network and the Cooking Channel. Much like MTV, they drifted away from their original vision and began offering a schedule filled with fake drama and connerie that has precious little to do with anything that happens in a kitchen, professional or amateur. People being tasked to make dishes with ingredients like licorice, chicory, hickory, foie gras, and lima beans. The self-appointed Mayor of Flavourtown swanning around the country, sunglasses dangling ridiculously off the back of his bleach-tipped head like an errant swath of toilet paper attached to a shoe. And the content-free talking-head programs where workaday foodstuffs such as pretzels and cupcakes are routinely characterized by the multiple hosts as amazing. Look: if you can be amazed by a pretzel, your kidney is going to rocket out of your dorsal abdomen when you see the northern lights or the Eiffel Tower. Also, any native English speaker who modifies the word “unique” deserves to be banished to an asteroid outside the Van Allen Belt. So I’ve pretty much gone cold turkey (albeit heirloom breed, free-range, and antibiotic-free) on them.

But when one network closes, another one opens. I discovered that one of my local PBS station’s digital sub-channels features programming from a sort of network-within-a-network: Create TV. It’s excellent, and filled with cooking friends both old and new. Julia Child. Andreas Viestad (of New Scandinavian Cooking). Rick Bayless. Steven Raichlen. Hubert Keller. And the timeless Jacques Pépin.

It was Pépin’s show that inspired me to make this soup; his version is potato-free and employs sour cream (I wanted to make mine vegan). I also wanted to tone down the heat a bit, and give it some more body. As it turned out, I had half a dozen Yukon Gold potatoes lying around, and they filled the bill nicely. But to add an extra bass note, I roasted them first. I should also offer up a hat-tip to the Kevin Is Cooking blog, whose Roasted Pasilla Chile and Potato Soup with Shredded Chicken recipe also inspired me.

Before I get into the nuts and bolts, don’t blanch at the concept of the soup using a whole head of garlic. (Don’t skimp, either.) Because the garlic is added initially as whole cloves, it’s not overwhelming (even though it is puréed later). Which reminds me: if you are using pre-minced garlic or garlic paste, dial it back… A LOT.

Ingredients

8 large dried Pasilla chile peppers, rehydrated (Ancho or Guajillo peppers may be substituted if necessary)
8 cups / 1.8 litres vegetable stock or water
6 medium-to-large Yukon Gold potatoes (about 3 lbs. / 1.5 kg)
2 large yellow onions, diced (about 4 cups / 600g)
1 head garlic (approximately 20-25 whole cloves)
2 + 2 tablespoons / 30ml + 30ml oil (I used garlic-infused olive oil)
1 large can (28-ounce / 793g) diced tomatoes — fire-roasted if you can get them
1 tablespoon / 3g dried oregano leaves
Salt and pepper to taste
Chopped fresh cilantro, if desired, for garnish
Vegan sour cream substitute, if desired, for garnish
Fried tortilla strips or crumbled tortilla chips, optional (check to see that they are made without lard if you are cooking for vegans)
1 sunny side up egg per bowl, optional (this invalidates the vegan-ness, so have a care)

Onion family reunion.

Onion family reunion.

Preparation

1. Soak dried Pasilla chile peppers in vegetable broth for approximately two hours. When they are rehydrated, remove them from broth, seed them and chop them roughly. Set aside. Be sure to reserve soaking broth.

2. Preheat oven to 400°F/200°C. Wash and dice potatoes into 1″ / 2.5cm cubes (you may peel them if you prefer, but it is not necessary). Place cubed potatoes into plastic bag with 2 tbsp / 30ml oil), and shake to coat. Dump potatoes out on a cookie tray and spread out into a single layer (you can line the pan with aluminum foil or parchment paper for easier cleanup). Salt lightly. Roast for 45-60 minutes, until nicely browned. [If you wish, you can turn them over midway through the roasting process, but it’s not strictly necessary.]

3. Peel garlic and dice onions. [No need to be too fancy here, since it’s all getting puréed later.] Place in large pot or Dutch oven with the remaining two tablespoons / 30ml of oil, and cook over medium heat until onions are translucent, approximately 5-7 minutes.

4. Strain in the reserved vegetable stock (this will catch any remaining seeds from the Pasilla soaking), and add chiles, potatoes, tomatoes, oregano, plus a little salt and pepper to taste (be frugal; you can always add some more later).

5. Bring soup to a boil, then reduce heat, cover partially, and cook at a simmer for 60 minutes (or longer, if you have the time). Process soup with immersion blender, food processor, or Vita-Mix. [Be very careful when you purée hot soup — leave room for steam to get out (I cover the feed tube loosely with a dish towel), and if using an immersion (stick) blender, be careful when it exits the surface of the soup, so as to avoid coating both chef and walls.] Adjust spices as necessary and serve.

Before the blend.

Before the blend.

Celebrating Celeriac with a Superb Soup [Vegan]

4

Celeriac, before and after a trim.

Celeriac, before and after a trim.

If there is an uglier vegetable on the planet Earth than celeriac (Apium graveolens variety rapaceum), I have yet to find it. Fortunately, much as beauty is only skin deep, in the case of this magnificent and underappreciated vegetable, so is ugly.

While celeriac itself doesn’t grow very deep — maybe six inches or so beneath the surface of your average garden plot — its roots in food history are deep indeed. In Book V of Homer’s Odyssey, it’s described as a component of Calypso’s garden, albeit in the Greek it is referred to as selinon. In one passage, Hermes admires the environs of Calypso’s cave, festooned with grapes, violets, and wild celery before stepping inside to beseech her to let Odysseus go and finish his journey back to Ithaca. But that’s another, much longer, story.

In ancient times, and for much of their early history, both celery and celeriac were regarded more as medicines than as foodstuffs. Pliny the Elder claimed that the so-called helioselinon was “possessed of peculiar virtues against the bites of spiders.” He also suggested that it could be used to revive sick fish. But by the 17th century, it was being cultivated in France, and by the 18th, it was being used in England for soups and broths.

Fast forward to today: soups and broths! For your consideration, here’s a soup that contains not just one, but two of the planet’s least photogenic vegetables (the latter being parsnips), along with a little ginger (no beauty contest winner itself), some onion, tarragon, and lemon thyme.

CELERIAC AND PARSNIP VELOUTÉ WITH GINGER AND LEMON THYME

Ingredients
48 oz./1.42 litres vegetable broth
2 large celeriac roots, peeled and roughly cubed
3 large parsnips, peeled and chopped
1 large onion, roughly chopped
1 tablespoon (or more, to taste) fresh ginger root, finely chopped
2 tsp./1.2g dried tarragon (it’s what I had at the time; fresh is good too, but use less)
4 sprigs fresh lemon thyme
1 carrot, cut into “coins” (optional)

Before you get all huffy, this is not technically a velouté, inasmuch as it is not thickened with a roux and cream, but it resembles one in texture. If you just want to call it soup, you have my blessing.

Cleaning the celeriac is best done with a very sharp knife, and it may be treated the same way you would strip off the rough outer skin of a pineapple; ideally, you’ll get off all the brown bits underneath the skin, but don’t make yourself crazy (or whittle the vegetable down to half its original size) getting there. Chopping the peeled celeriac is a bit of a chore, and may require rocking your knife back and forth a bit to get through the dense root. Alternatively, you can use a cleaver, if you have one. The parsnips should be scraped with a vegetable peeler, much like carrots, then chopped. As for the ginger, I started with a segment that was about the size of my thumb and scraped off the peel with a spoon before mincing it as finely as my admittedly mediocre knife skills would permit.

Once the prep is completed, making the soup is a snap; basically, you just dump all the ingredients into a big pot, bring it to a boil, and back it off to a simmer for about an hour to soften up the veggies and give the flavours a chance to blend. Then remove the thyme sprigs (which will have shed their leaves), and transfer the soup, in batches, to a food processor, blender, or Vita-Mix. [IMPORTANT NOTE: Do NOT clamp down the lid on your food processor/blender in such a way that steam cannot easily escape, or you will run the risk of both scalding yourself and decorating your walls with hot soup. I leave the top plug out of my Vita-Mix’s “Action Dome” and drape a tea towel over the opening to allow steam, but not solids, to egress.] Alternatively, the soup can be processed in situ with an immersion blender. Process until smooth.

Perhaps not the root of all soups, but it is a soup of all -- well, almost all -- roots.

Perhaps not the root of all soups, but it is a soup of all — well, almost all — roots.

You might note that salt is not a component of the ingredients list, and that’s because the vegetable broth I used (I’m ashamed to admit that I didn’t have any vegetable stock of my own lying around) contained 570mg of sodium, presumably in the form of sodium chloride, which was plenty salty for my taste. Your taste (and your broth) may vary.

To finish the soup off, I sliced a small carrot on a hand-held mandoline, arranged the carrot “coins” into a small “flower,” and sprinkled a few leftover thyme leaves on top. I might drizzle a few drops of olive oil on it as well next time, but it’s by no means necessary. Serves 6-8 (easily!) as an opening course.

You can call me Al. Albóndigas.

2

Believe it or not, the red colour comes mostly from the chorizo, not the tomatoes.

Believe it or not, the red colour comes mostly from the chorizo, not the tomatoes.

One inevitable responsibility after Thanksgiving dinner is the disposal of the turkey carcass. Picked clean for sandwiches and goodness knows what all else — tamales? sliders? pot pie? — there’s still a significant heap of bones and attached bits that deserve a better resting place than the rubbish bin.

Around our house, we generally made turkey and vegetable soup, but it just seemed too… turkey-ish. By the time we’d gotten down to the carcass, believe me, most of the members of our household were all done with turkey. This year, I decided to make some simple turkey stock (something on the order of four liters, as it turned out, because I wasn’t patient enough to let it condense into what Julia Child called a “semi-demi-glace”). But not for turkey soup. No. I figured it would make an excellent base for one of my favourite Mexican dishes, sopa de albóndigas (meatball soup).

While this soup is decidedly Mexican, its roots go back to the times that Arabs ruled Spain. The word “albóndigas” is derived from the Arabic word for hazelnut, “al-bunduq,” because the meatballs of the era were about the size and shape of said nuts. Their preparation was described in one of the great cookbooks of its day (its day being the 13th century), Kitab al- tabikh fi Maghrib wa al-Andalus (An Anonymous Andalusian Cookbook). Not too surprisingly, the meatballs emigrated to the New World with the conquistadores (along with smallpox and syphilis, albeit with a happier outcome for the locals). The use of mint in this recipe is almost certainly a descendant from a Middle Eastern predecessor, given the region’s historic proclivity for employing the herb as a seasoning for meats.

Far as I’ve been able to discover, there are two general schools of thought on sopa de albóndigas. One holds that it’s primarily a tomato-based soup, and the broth ought to be more or less jam-packed with tomato-y goodness and coloured fire engine red (PMS 199); the other is that tomatoes play a role, but not the lead. I opted for the latter. After all, I’d gone to some trouble to make the turkey stock, and I didn’t want it completely buried in the mix. The soup ultimately turned out a rich red colour, but that was thanks to the chorizo, not the tomatoes (as you can see in the picture below, when it was just the veggies and stock).

ALBÓNDIGAS SOUP

Carrots, planed on the mini-mandoline. I then cut the "coins" in half.

Carrots, planed on the mini-mandoline. I then cut the “coins” in half.


Ingredients
Broth
12 cups/3 liters turkey stock (or chicken, or vegetable, or beef)
2 carrots, sliced
1 large onion, chopped
4 stalks celery, diced
1 (14 ounce/411 g) can diced tomatoes (these were fire roasted)
1 (7 ounce/198 g) can diced green chiles, drained
1 cup/150 g cooked rice
2 teaspoons/2 g dried oregano
2 teaspoons/2 g ground cumin
1 clove garlic, minced
1 to 3 tablespoons/15-45 ml sauce from a can of Chipotle chiles in adobo sauce, to taste
1 seeded Chipotle chile in adobo sauce, optional
Sea salt and pepper to taste (smoked salt works well in this)

Here’s a trick for the rice; just cook 1 cup/180 g of dried rice (I used Brown Jasmine), put 2/3 of it in the soup and reserve 1/3 for the meatballs.

[A NOTE ABOUT CHILES: If you’re seeding Chipotle chiles in adobo sauce, wear gloves. Even the sauce is pretty hot, and if you touch your face… well, you won’t do it a second time. For the uninitiated, add the adobo sauce a tablespoon at a time, stir the broth, taste, and decide if you want to add more. If you dump it all in at once, good on you, you brave soul, but remember that this is a bell that can’t be unrung. Also, if you don’t have Chipotles in adobo sauce handy, you can get Chipotle pepper powder; use 1-3 teaspoons/1-3 g, tasting as you go.]

Broth and veggies. Mmmm.

Broth and veggies. Mmmm.

Making the broth is super easy; basically, you just dump it all into a big pot, bring it to a boil, and then back it off to a simmer. I let mine simmer for a couple of hours, because I started making it one evening after dinner. [In fact, I put the broth in the refrigerator overnight and finished the soup the following day.] If, however, you are doing a same-day soup, allow it to simmer for about an hour, so you can soften up the celery and onions and carrots, and give the flavours a chance to blend.

Meatballs (makes about 50 small meatballs)
1 lb/.5 kg lean ground beef
1 lb/.5 kg chorizo sausage, casing removed (not the fully cooked kind)
2 eggs, beaten
1/2 cup/70 g cooked rice
2 garlic cloves, minced
5-10 mint leaves, chopped
1/2 cup/25 g cilantro leaf, chopped
1/2 teaspoon/3 g salt
1/4 teaspoon/.5 g freshly ground black pepper

Full disclosure: I had about 100 g of turkey bits that I ran through a food processor and added to the meatballs. It’s not part of the “official” recipe, but it did taste good.

Mint and garlic get all muddled up.

Mint and garlic get all muddled up.

Some people say to make the meatballs first, but there’s really no need; getting the broth together and letting it simmer will afford you more than enough time to make them. The only trick to assembling the meatballs is that you should mash the garlic and the chopped mint into a sort of paste; otherwise, it’s just a matter of mixing it all up and rolling little meatballs (albóndigas) to about 1″/2.5 cm each. Heat up the broth to a low boil and lower the albóndigas — gently — into the broth. Let the meatballs cook at that temp for 5 minutes, then back the heat off, and simmer a further 20 minutes. Remember, at this point, your chief aim is to cook the meatballs through. That’s why smaller is better.

Tiny little soldiers of meat, preparing to parachute into -- quite literally -- the soup.

Tiny little soldiers of meat, preparing to parachute into — quite literally — the soup.

You can serve it straight, or if you want to get extra fancy, you can make corn tortilla ribbons for garnish. Just quarter small corn tortillas, stack the quarters, then slice the edges into ribbons. Heat 2 tablespoons of oil in a frying pan, dump the ribbons inthe pan and stir until slightly browned. Remove them to a paper towel to drain and crisp up. Sprinkle over soup.

With the fried corn tortilla strips; these were spinach corn tortillas, for colour primarily.

With the fried corn tortilla strips; these were spinach corn tortillas, for colour primarily.