Gazpacho, pacho man! I want to be a gazpacho man!

0
With croutons, parsley, and cilantro.

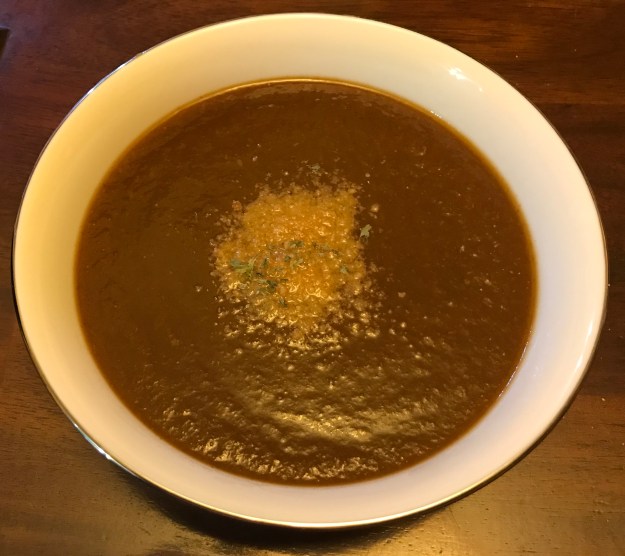
Still summer, still hot. Time again for a simple cold soup (many call it “liquid salad”), perfect for that moment your garden is in its annual throes of tomatorrhea, when your plants imitate the ketchup bottle in Richard Armour‘s famous poem: “none will come / and then a lot’ll.” Even if you don’t grow your own tomatoes, local supermercados, feiras, and grocery stores will be happy to provide you with a cornucopia of ingredients.

This particular verion of gazpacho was built from a foundation laid by the Spanish chef and international hero, José Andrés, and published in the Washington Post. I guarantee that if you follow his instructions to the letter, you will have an excellent bowl of soup, if slightly different from the one offered here.

Some people claim that the word gazpacho originated in Arabic, others say it came from Greek; the Real Academia de la Lengua Española, which is the final word on Spanish words, has come down firmly in the camp of “we aren’t sure.” One thing that IS clear is that the modern version of red gazpacho dates back no further than the 16th century, because the Old World (although they didn’t know it) was waiting for Columbus to bring back tomatoes and peppers. [Rock fans know this from the Neon Park illustration on the cover of Little Feat‘s album Waiting for Columbus. But I digress.]

[One further digression: other scholars assert that Hernán Cortés, not Columbus, introduced the Peruvian tomato to Spain in 1521. Regardless of who performed the introduction, it was widely embraced.]

Most culinary historians date gazpacho’s birth sometime between the 8th and 15th centuries, when the Ottoman Empire’s reach extended to Spain; others credit the Moors with a roughly contemporaneous version. Still others say an early precursor dates to the Roman Empire, and there are even some who push the date back as far as the Biblical book of Ruth. One thing that virtually all of them agree on, though, is that the first person to publish a recipe for it was the chief confectioner at the court of the Spanish kings Felipe V and Fernando VI, Juan de la Mata.

Looks good for being nearly 300 years old.

His treatise, Arte de Repostería (Art of Confectionery), was published in 1747 and is still studied. Even at that late date, tomato had not gained the preeminence it has today, and de la Mata’s recipe called for bread, water, anchovy bones, garlic cloves, vinegar, sugar, salt, and oil. [For more on the history of gazpacho, I commend the James Beard Award-winning author Clifford A. Wright, who not only has his observations on the origins of this delightful soup, but recipes as well.]

Throughout its ancestral home of Andalucia, and indeed throughout the entire Iberian peninsula, gazpacho evinces itself in a wide variety of textures and flavour profiles. Some are chunky, others puréed; some feature tomato and some don’t; certain cooks absolutely insist that bread crumbs have to be in the mix, while others are happy to incorporate such exotic flavours as watermelon or avocado. So my advice to you would be to keep an open mind, paw through a bunch of recipes, and find the one that zings the strings of your papillae.

Please don’t feel any sense of shame if you use canned tomatoes rather than fresh; some days, the local crop may be woody or just plain bland, and the canned option (particularly if fire-roasted) may yield a better finished product. But please do use the best olive oil and vinegar that your budget will allow. My last batch contained some artisanal olive oil we purchased directly from the producer in Marvão, just barely on the Portuguese side of the Spanish border. The vinegar was hand-carried home from Brauerai Gegenbauer in Vienna, and their products are just crazy great. You can use a good Sherry vinegar, but I like to add some Gegenbauer tomato vinegar to a glug of Lustau Sherry, both for the sweetness and the rounded texture.

As is true with many of my recipes, this is merely one of a gaggle of routes to the destination of yum. To usurp (and slightly corrupt) the title of a famous book/movie, Eat, Play, Love.

INGREDIENTS

1 liter / 4 cups polpa de tomate/tomato sauce (a combination of tomato paste and tomato juice can be substituted)
390g / 14 oz. can chopped tomatoes (check to see if salted or not)
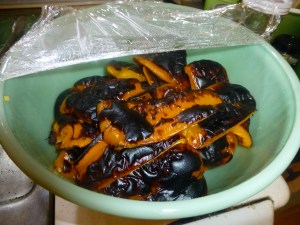
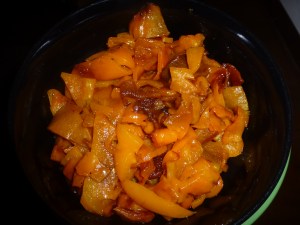
600g / 21 oz. Padrón peppers (shishito peppers can be substituted)
1 cucumber, peeled and chopped (seeding optional)
5-6 cloves garlic (but I’m a garlic fiend, so you may want fewer)
100ml / 3.5 oz Sherry
250ml / 14 oz. extra virgin olive oil
100ml / 3.5 oz vinegar
Optional toppings/add-ins: croutons, parsley, diced tomato or bell pepper, toasted almonds, piri-piri sauce or Tabasco, cilantro

DIRECTIONS
Put all the ingredients into a blender. Blend on medium until desired texture is reached. Transfer to pitcher and chill (both you and the soup) for at least 2-3 hours to allow flavours to meld (the garlic may not completely mellow out until the following day). Garnish as the spirit moves. Serve.

Split Belly (Karniyarik) — or — The Imam Fainted a Second Time When He Had a Mouthful of Meat

0
10237637-391f-406e-865f-da239fe55a04.jpeg

No, it’s NOT just stuffed eggplant! Well, maybe.

First and foremost, this is a recipe — well, actually a roadmap — for stuffed aubergine (a/k/a eggplant), loosely adapted from a Turkish recipe for karniyarik, which I have read translates literally to “split bellies.” I don’t speak Turkish, and I’m guessing you don’t either, so we’ll just have to rely on the experts.

Karniyarik is a meat-enhanced dish, apparently loosely based on a vegetarian version of stuffed aubergine known as Imam Bayildi (literally, “the imam fainted”). Some stories would have it that he fainted because it was so delicious, and I will take that at face value, because stuffed aubergine is indeed swoonworthy.

Those of you who follow the blog will know it’s not uncommon for me to plunge headlong down the rabbit hole of a recipe’s provenance and expression; this one was no different. I viewed no fewer than a dozen recipes, and found no definitive formula, nor did I discover its origin. I don’t consider the investigatory time wasted, though, because I discovered several variants on the recipe that may find their way into my oven sometime in the future. I have to hand big props to Chef John at foodwishes.blogspot.com, whose video popped up in my YouTube feed and started me down this road to begin with.

Typically, the meat in this recipe is ground, generally beef or lamb. As it happened, I had excess smoked pork shoulder hanging about in the fridge, so that was my meat of choice. The balance of my ingredients hew fairly closely to the harmonized medium of the canon: tomato paste, onion, garlic, cumin, peppers, etc. Some versions include cheese in the filling, but I wasn’t feeling it (although I might in future). Many would have you serve this over (or with) rice or orzo. Fine, but not strictly necessary.

f45b12ec-33a4-4ef3-933b-817b836e0729

The semi-peeling keeps them from bursting, and gives you a flat surface they can sit on.

INGREDIENTS
2 similarly-sized aubergines (a/k/a eggplant)
.75 lb / .33 kg roasted pork shoulder, shredded
6 mini red bell peppers, diced
1/2 large or 1 small onion, diced
2 cloves garlic, minced
1 can (7 oz. / 198 g) diced roasted green chilies (with juice)
1 tbsp / 7 g cumin powder
1 tsp / 2.5 g ground cinnamon
2 tbsp / 15 g tomato paste
2 tbsp / 15 g Darrell & Nil’s Turkish Spice Blend*
salt and black pepper to taste
2 tbsp / 30 ml olive oil
1 cup / 250 ml chicken stock

*This is a custom spice blend made by some friends. It’s made from paprika, black pepper, cumin, coriander, allspice, cassia, sumac, oregano, Maras chile, clove, cardamom, and nutmeg. Maybe I can get them to cough up the actual recipe, but if not, make sure you include the sumac and Maras chile, which really push the blend toward Istanbul


8dd089f7-8330-4b8c-b4f7-ad9595e31b01

Stuff for the stuffing.


DIRECTIONS
Wash the aubergines, peel four equally spaced strips and set aside. The peel allows them to sit flat in the casserole dish or roasting tin.
Preheat oven to 400°F / 205°C.
Drizzle a little olive oil into a casserole dish or small roasting pan sufficient to hold the two aubergines, then pop the veggies into the dish and pop the dish into the oven.
You’ll want to roast the aubergines for 45 minutes to an hour, depending on their size. You don’t want them cooked all the way, because you will be stuffing them. When you take them out of the oven, they should still be fairly firm and holding their shape.

During that time, you can prepare your filling.
Warm a frying pan over a medium heat, and put in the cumin, cinnamon, spice blend, and black pepper; toast the spices for 1-2 minutes, just to bring out a little more flavour. The add the salt, onion, green chilies, and bell peppers; cook for 5-8 minutes, or until the bell peppers are softened and the onions are translucent. You don’t need to brown them, but don’t freak out if they take on a little colour or if they’re still slightly firm. Remember, they have more time to cook when you stuff the aubergine.
Add the garlic and tomato paste, and cook for a couple of minutes more, just to take the rough edges off the garlic. Then remove the pan from the heat and set aside until it’s time to stuff the aubergines.

7d973c03-e5db-4565-b288-4929f98bdf50

Fit to be stuffed.

When the aubergines are partially cooked, but still firm(-ish), take them out of the oven and allow them to cool sufficiently that you can stuff them without burning your fingers. Take a knife and “split their bellies” (vertically of course), then spoon in a generous amount of filling. Don’t pack it in too much, though, or the aubergines will split during their second oven sojourn. Pour the chicken stock into the pan (but not over the aubergines), so they don’t burn. You can also use the resulting sauce to spoon over the finished dish, although in my case most of the liquid had evaporated.

Return the stuffed aubergines to the oven for 30-35 minutes, or until a knife can pierce their flesh without resistance. Allow them to cool for about 10 minutes, because they are molten lava hot straight from the furnace. Plate, spoon over some of the drippings, and serve. [Although inauthentic, cheese, sour cream, or crème fraîche could be used as toppings. You could also sprinkle some fresh chopped parsley on top for colour. ]

This is scalable, depending on the number of diners, and is quite mutable while still staying within the parameters of karniyarik. Find the ingredients that exist in your pantry and/or suit your palate, pour yourself a glass of raki for a job well done, and offer a hearty şerefe to your dining companions.


Soupe de la Semaine: Vegetable & Rice Soup [Instant Pot® recipe] [Vegan optional]

0

Please, anything but this.

This soup was borne out of a need to use up a bunch of celery before it went south. [Seems like I make a lot of “necessity” soups.] Being an enterprising lad, I Googled “celery soup,” and got about 1.83 bazillion recipes for Cream of Celery Soup. I don’t want to demean the good folks whose soup provided Andy Warhol such a rich vein to mine for his art, but the cream of celery soup of my youth was possibly the worst-period-soup-period-ever. It was always the last can in the cupboard, and was only ever served out of dire necessity. To be fair, I think the only reason my mom kept any in the first place was so that it could be used as a sauce for some sort of ’60s casserole that has mercifully and permanently gone out of fashion. Fortunately, my Google Fu skills are strong, and I eventually landed on what appeared to be a terrific recipe by Martha Rose Shulman of the NY Times. It was modified to fit my ingredients, but it’s fairly faithful to the original.

Stop me if I’m sounding like a broken record here, but if there are two things I could ever want you to take away from this blog, they are these:

    1) You can do this. Goodness knows, I’m no chef. But I can make a tasty meal; that’s all anyone ever asks from an amateur.
    2) A recipe is a roadmap. There’s always more than one route to your destination. And, failing that, there are always other destinations.

Perhaps the two most delightful aspects to this recipe are 1) you don’t have to pre-cook the rice (a few minutes at pressure in the Instant Pot® does the job); and 2) you can make it vegan simply by removing the Parmesan cheese. If you can operate a knife, a spoon, a can opener, and a measuring cup, you can make this. You don’t even really need an Instant Pot®. It just will take longer on the stove (probably about 45 minutes to an hour of simmering, depending on how quickly your rice cooks up).

Doesn’t that look like a bowl full of healthy goodness? And we haven’t even added the tomatoes or the stock yet.

Vegetable & Rice Soup
Makes approximately 16 cups / 4 liters

INGREDIENTS
6 celery stalks / 400 g, diced
1/2 red cabbage / 400 g, shredded
1 medium onion, chopped
1 medium carrot, diced
1 bell pepper, de-seeded and diced (I used 6 mini peppers instead)
6 garlic cloves, minced
Salt (preferably kosher) and pepper (preferably ground white) to taste
1 cup / 180 g uncooked rice (I used brown basmati)
3 tbsp. / 45 ml extra virgin olive oil (spring for some good oil!)
1 28-ounce / 794 g can chopped tomatoes, with liquid
1 1/2 quarts / 1.5 liters water or vegetable stock (Better Than Bouillon enhanced my stock)
2 tbsp. / 50 g tomato paste
1 teaspoon / 4 g dried thyme
2 tbsp. / 3 g dried parsley flakes (or 1 tbsp. / 4 g fresh parsley)
A small (50 g / 1.75 oz.) Parmesan rind
Celery leaves for garnish (optional)
Freshly grated Parmesan cheese for serving (optional)

DIRECTIONS
Chop up celery, cabbage, onion, carrot, bell pepper, and garlic cloves; place in Instant Pot® container. Sprinkle salt and pepper over vegetables and stir. Add olive oil and uncooked rice to container. Set Instant Pot® to “Sauté” and sweat vegetables, stirring occasionally, for about 10-15 minutes, until they soften a bit. Add chopped tomatoes, vegetable stock, tomato paste, thyme, parsley, and Parmesan rind (if desired — omit for vegan version). Mix briefly with spoon or spatula. Turn Instant Pot® to “Keep Warm / Cancel,” which will end the sauté function.

Place lid on Instant Pot®, making sure vent is turned toward “Sealing” rather than “Venting.” Press “Soup” button, making sure pressure is on “High.” Set timer for 16 minutes. Go answer some email or vacuum your front room.

When timer goes off, allow Instant Pot® to decompress naturally, or at least for 10 minutes, before carefully switching vent from “Sealing” to “Venting.” Remove lid, and adjust spices as necessary (soup will be hot). Ladle directly into bowls or mugs and garnish with celery leaves and/or grated Parmesan (omit latter for vegan version).

To borrow a phrase, “Mmmm-mmmm good.”

The Return of Be a Star and Save the Bucks — Breakfast Egg Bites [No Instant Pot® Needed Version]

1

The so-called Balneo Mariæ, as seen in “The Newe Jewell of Health,” 1576. The one we’re going to use is a little simpler to operate.

In the wake of my recent post about trying to duplicate the Starbucks® sous vide egg bites in an Instant Pot®, a couple of things happened that occasioned this revisit. 1) The bride said I’d gotten the origin story all wrong (she recalls it as having happened this past summer when we were headed out of the Denver metro area on the way to South Dakota in a rented monster truck, and she’s right, as per usual); and 2) my pal Sharon asked via Facebook (and hence via the bride, as I’m still on my 60-day Facebook vacation) whether the recipe could be replicated without benefit of sous vide machine or Instant Pot®.

On the latter point, I had some experience with a technique that I was confident would point me in the right direction.

The low-tech version I’m about to describe has a lot in common with making oeufs en cocotte or, as they’re known in English-speaking countries, shirred eggs. In both of those recipes, though, the yolks are still quite liquid, which means they’re probably not the best option for food destined for on-highway consumption. Also, I wanted to mimic the approximate size of the Starbucks® bites, and all the cocottes (or ramekins) in our pantry are too large for a single-egg bite, unless you’re willing for it to be more puck-shaped than ovoid.

Now that I have you intrigued, frightened, or both, it’s time to introduce you to the delights of the hot water bath known as the bain-marie.

Ever wonder for whom the bain-marie was named? Take a guess: Marie Antoinette? Marie Curie? Marie Osmond? Wrong, wrong, wrong.

Maria the Jewess, chemist and process engineer.

Maria the Jewess (a/k/a Maria Prophetissima, Maria Hebræa, Miriam the Prophetess, and Maria of Alexandria, among others) is credited with creating the water bath process that bears her name. Although none of her manuscripts survive, she was cited by the Gnostic mystic Zosimos of Panopolis in the 4th century and the noted physician Arnaldus de Villa Nova in the 13th century for her accomplishments, which also are said to have included the invention of the alembic (an early still). And while Italian cookbook author Giuliano Bugialli is quoted as saying the device is actually named after a 16th century Florentine named Maria de’Cleofa, that seems to be a somewhat dubious claim, given the way earlier Villa Nova citation.

Yeah, great, but what does all this have to do with my eggs?

At sea level, the water in a bain-marie can’t exceed 212°F / 100°C, because it turns into steam. Duh. So the technique is often employed in the creation of cheesecakes, custards, and warm emulsions (such as Hollandaise sauce) that need to be cooked gently. One serious egg-cooking challenge is that the proteins in their whites and yolks coagulate (technically denature) at slightly different temperatures. Cook an egg too long (or hot), it gets rubbery like a Super Ball. Not long enough, and it comes out like a big yellow sneeze. The way these silicone pans are constructed, the bain-marie water can flow around almost all of the egg’s exterior, which makes them an efficient option (as opposed to ramekins or cocottes, whose thicker ceramic sides inhibit the transfer of heat).

Upside-down silicone egg tray.

My silicone tray holds seven servings of 75 ml / 5 tbsp. each, although you won’t want to fill each cup up to the tippy-top, since the egg mixture expands. [If you don’t have (or are not willing to purchase) a silicone egg tray, but you have ramekins/cocottes, by all means give this recipe from the FatLossFoodies blog a shot. I haven’t tried it personally, but it looks legit; read the comments on it as well for some interesting insights.]

All the ingredients in this recipe came directly from the fridge, although over the course of being mixed together and awaiting the water to come to a boil (maybe 10-15 minutes total), I’m sure they warmed considerably. When I put them in the oven, I draped the top of the tray loosely with aluminum foil to prevent the egg bites’ tops from being exposed directly to the oven’s hotter ambient air, which could toughen their texture.

Chillaxin’ in the bain-marie.

I also changed up the recipe a bit from the one in the other post.

INGREDIENTS
4 eggs
2 tbsp. / 30 g sour cream (or crema Mexicana, Salvadoreña, Hondureña, or Centroamericana)
½ cup / 100 g tomato artichoke bruschetta mix
1 cup / 125 g grated cheese (I used queso de bufala from Spain, but any melty cheese works)
2 tbsp. / 11 g fresh basil, chopped
pinch pepper
olive oil or canola oil spray to coat the molds
6 cups / 1½ liters boiling tap water for bain-marie
aluminum foil

DIRECTIONS
Set water on to boil. Preheat oven to 300°F / 150°C. [Alternatively, you can put your bain-marie tray and the water — even warm tap water — in the oven as it heats, and let it all come to temp together. It will save you a pot, if not any huge amount of time.] Oil egg bite tray and set aside. Chop basil, grate cheese, and set aside. In a medium size bowl, whisk the eggs, sour cream, and tomato artichoke bruschetta mix together until smooth. Fold in the basil and grated cheese. Spoon mixture evenly into oiled cups in the egg tray. Sprinkle pepper evenly over egg cups. Add the boiling water to the bain-marie, if you haven’t already done so. Lower the egg tray (or ramekins/cocottes) into the bain-marie. Cover the egg tray loosely with aluminum foil, and cook for 50 minutes. Remove bain-marie from oven, remove egg tray from bain-marie (the easy, non-finger-burning method is to slide a spatula under the tray and lift it while balancing it against the potholder in your other hand), and then allow egg bites to cool for 10 minutes before unmolding. Eat immediately, or refrigerate in sealed container for up to five days. Reheat for 30 seconds on “high” in microwave.

Silky and seductive.

Soupe de la Semaine: Vegan “Sofrito” Soup [Instant Pot® recipe]

1

Leaves you “sofrito” experiment.

This is not going to be so much a recipe for a soup (although there will be one) as a roadmap to soup. Please keep all your appendages inside the vehicle while it’s moving.

Like many people, I occasionally find that I have a few vegetables in the fridge that really call for imminent use, lest they turn into science experiments. Today, that happened to be a two-pound package of carrots, some celery, a yellow bell pepper, and the better part of a bunch of cilantro, plus an onion that was in the unrefrigerated veggie basket. Because February is traditionally a vegetarian month for the bride and me, I decided to fold the ingredients into a soup, rather than use them as a sofrito/soffritto, mirepoix, refogado, or Suppengrün for a meat or poultry dish. [The terms in italics are all variants on the same concept, which is that a group of chopped vegetables can serve as a flavour base for stews, gravies, sauces, and the like. Ingredients and proportions vary from country to country (and from kitchen to kitchen), but not so widely that they aren’t all kissin’ culinary cousins.]

Here’s where it gets interesting: with the possible exception of the cilantro, all the vegetables can easily be enhanced to make soups that will fit in a variety of culinary traditions. For example, if I’d added lemongrass, ginger, and soy sauce to the soup (even keeping the cilantro), it would have taken a turn for Southeast Asia. Some garlic, basil, oregano, rosemary, and marjoram would have pushed it toward Italy. Turmeric, ginger, cinnamon, cardamom, coriander, and cumin would lend it an Indian or Sri Lankan vibe. I decided I wanted something else, a kind of mutt — er, hybrid — cuisine with elements of both Spanish and Tex-Mex.

And while this can definitely be made on the stovetop, it would take way longer than it does in a pressure cooker (Instant Pot® to the rescue again!). Basically, you’d follow all the main steps, but I would chop the vegetables into much smaller pieces to soften them more quickly. I’m guessing that 45 minutes to an hour in the stock at a high simmer (just below boiling) would do it. Then purée the vegetables and adjust spices as in the directions below.

WARNING: I like, and am accustomed to, spicy food. I would advise anyone trying out this recipe to cut the pimentón de la Vera and chipotle powder IN HALF to start. You can always make it spicier later in the process, if you wish. [If you cut the spices, you will also need only about half of the carob molasses as a consequence.]

Vegan “Sofrito” Soup
Makes about 10 cups (about 2¼ liters)

Carrots of many colours.

INGREDIENTS
2 lbs. / 1kg carrots, roughly chopped
1 onion, roughly chopped
1 red or yellow bell pepper, roughly chopped
3 stalks celery (need I say roughly chopped?)
1½ cups / 30g chopped fresh cilantro
5 cups / 1.25 liters vegetable stock (I used Better Than Bouillon and water)
1-2 teaspoons / 2-4g hot pimentón de la Vera (or smoked paprika)*
½-1 teaspoon / 1.5-3g chipotle powder (or other chili powder)*
1½-3 tbsp. / 33-66g carob (or regular) molasses*
½ teaspoon / 1g cumin
½ teaspoon / 3g salt
½ tbsp. / 8g apple cider vinegar (or other vinegar, or lemon juice)

Chopped up, mixed up.

DIRECTIONS [Instant Pot®]

Chop vegetables and cilantro and add them all to inner cooking pot. Add vegetable stock, pimentón de la Vera*, and chipotle powder*.

Lock lid (making sure the vent is set to “Sealing”), select “Soup,” set pressure to “High,” and time to 20 minutes. When finished, you may allow pressure to release naturally before unlocking lid, or you can do a “quick release” by turning the vent to “Venting.”

[At this juncture, the soup will look like you left your vegetables in dishwater overnight. Don’t be discouraged!]

Process soup with immersion blender or in batches in a blender/food processor. [If you’re using either of the latter, drape a towel over the input tube or lid to allow the steam to vent.] Add cumin, carob molasses, salt, and cider vinegar. Stir and allow soup to sit for a couple of minutes before tasting and adjusting spices. It’s at this juncture that you would add the remaining half of the pimentón de la Vera, chipotle powder, and carob molasses, should you choose.

Ladle soup into bowls and garnish with a little extra chopped cilantro. I forgot to reserve some and wound up using bread crumbs and chopped parsley for the photo. If you’re not concerned about being vegan, a dollop of sour cream and/or a sprinkle of cotija cheese would go nicely. Cashew cream is a fine vegan alternative.

*Please read the warning in red in the fifth paragraph; it’s there for your own good.

***********************************************************************

P.S. I’m perfectly happy if you want to replicate this recipe step by step, but it would bring me (and you!) greater joy if you use it as a “serving suggestion” instead, playing around with spices and quantities so that you can truly make it your own. Plus, you can clean out your fridge a bit in the process.

Here Comes That Grain Again: Vegan Kamut® Bowl With Peppers, Greens, and Toum

0

The bride’s keen on grain bowls lately, and I’m about 47.8% less enthusiastic about quinoa than she is, so I have been poking around for alternatives. While at the store, ostensibly to pick up some farro, I saw this thing in the grain section that looked like a sibling (of farro’s, not of mine): Kamut®. I had no idea what Kamut® was, but that didn’t stop me from bringing it home like a stray culinary puppy. Long story short, it’s a variety of wheat, whose journey out of Egypt was perhaps less tortuous than, but nearly as interesting as, the Jews’.

Allow me to quote from the trademark owner’s website:

    The story of KAMUT® Brand khorasan wheat began in 1949, when Earl Dedman, a US Airman stationed in Portugal, received some unusual looking grain from a friend who claimed to have taken it from a tomb in Egypt. More likely, the friend had purchased it from a street vendor in Cairo, Egypt with the story that it had come from an ancient Egyptian tomb. Earl sent thirty-six kernels of the wheat to his father, R. E. Dedman, a farmer near Fort Benton, Montana. Within six years, the elder Dedman had grown the small number of seeds into 1,500 bushels, calling it “King Tut’s Wheat.”

In 1977, it fell into the hands of Robert Quinn, who tried unsuccessfully to get the people who make Corn Nuts to manufacture a wheat version of the snack with this grain. But Quinn and his dad continued to grow it on his family farm, which went completely organic in 1989. The following year, the USDA recognized the grain as a protected variety officially named “QK-77,” and the Quinns registered Kamut® as a trademark to guarantee that the original grain would remain unmodified and always be grown organically. From there, it got licenced to dozens of producers and is used in products from cereal to pizza… to this grain bowl.

This recipe follows a general formula I’ve developed for grain bowls: grain, some roasted/pan-fried vegetables, an element to add at least a bit of crunch to the texture, wilted greens for a little bitterness, some salt, and an acid (tomatoes, lemon juice, vinegar, or, in this case, toum) as a brightening agent. Please don’t shackle yourself to this recipe! It was created and modified on the fly, riffing on literally dozens of other options I sifted through from Pinterest pages and Google searches.

Instant veggie stock enhances the water.

A NOTE ON COOKING KAMUT®: A little searching on the Internets yielded some insight on how to cook it in an Instant Pot. Much like dried beans, the typical method for preparing Kamut® is to soak it overnight in water (or, in my case, vegetarian bouillon), but I didn’t have the time for that, and I — quite fortuituously — did have an Instant Pot. Much thanks to cookbook author Kathy Hester, whose The Ultimate Vegan Cookbook for Your Instant Pot: 80 Easy and Delicious Plant-Based Recipes That You Can Make in Half the Time yielded the info that if you press the “Adjust” button once after having set the Instant Pot up on the “Multigrain” cycle, “it will look like it’s going to cook for a normal 60 minutes. But on this setting — only on the multigrain 60-minute cycle — the grain first gets a 45-minute warm water soaking before the 60 minutes pressure cooking time. It’s great for Kamut® and other long-cooking grains.” If you don’t have one of these marvelous devices, you can just soak the grain overnight and prepare it according to the directions on the package. That method works just fine, even if it’s a little (well, a lot) longer. [Reminder from Russ Parsons, former LA Times food editor: “Rinse thoroughly. I mean thoroughly. In a strainer under running water.”]

One cup of dry Kamut® looks like this when cooked.

A NOTE ABOUT TOUM: Toum is a garlic-based Lebanese dipping sauce not far removed from aioli or the Ligurian agliata. The best recipe for it that I’ve found is at the Tori’s Kitchen website (she even thoughtfully includes step-by-step photography). If I deviate from her recipe at all, it’s usually to add more garlic, the cowbell of the pantry. There’s just never enough. When you’re making it, be sure your water and lemon juice are really cold, or the sauce might break up. But it’s super tasty, simple to make, and you will discover a million applications for it, from grilled veggie sandwiches to tater tots to pasta.

A Cuisinart full of toum.

Vegan Kamut® Bowl With Peppers, Greens, and Toum

INGREDIENTS:

For the grain:
1 cup / 225g dried Kamut® khorasam wheat
3 cups / 700ml water
1 tbsp. / 15ml Better Than Bouillon Seasoned Vegetable Base (or other vegan bouillon cube)

For the bowl:
2 cups / 325gm cooked Kamut® khorasam wheat
12 baby bell peppers or 2 medium sized regular bell peppers (red/orange/yellow, chopped)
1/2 onion, finely diced
5 oz. / 1 cup / 150g cashews, preferably roasted and salted
sea salt to taste
5 oz. / 140g coarsely chopped greens (this time it was kale, baby spinach, and arugula)
2 tbsp. / 30ml olive oil

For the toum:
3 1/2 – 4 cups / 700ml sunflower or canola oil, chilled
1/2 cup / 70g / about 1 head peeled garlic cloves
1/2 cup / 120ml lemon juice, divided
1/2 cup / 120ml ice cold water, divided
1 3/4 / 10g tsp salt (preferably Kosher salt, fleur de sel, or sea salt)

I was generous with the toum.

INSTRUCTIONS:

Cook Kamut® according to instructions (see A NOTE ON COOKING KAMUT®, above). Set aside.

Make toum according to instructions (see link in A NOTE ABOUT TOUM, above). Set aside.

Chop onion and bell peppers, place in bowl, and set aside. Meanwhile, heat olive oil in large pan on high heat until just about smoking. Add cooked Kamut® and toast, stirring occasionally, about 5 minutes or until slightly browned. Lower heat to medium and stir in onion and peppers. Cook for about 8-10 minutes, or until veggies have softened, stirring occasionally. Meanwhile, wash and chop greens. When vegetables have softened, add chopped greens and stir until wilted. Add cashews, stir, and salt to taste. Top with toum and serve. Serves 2-3 as main or 4-6 as side dish.

Soupe de la Semaine: Roasted Pepper Soup with Cilantro Cream

0

p1050126

My pal Beth, herself no slouch around the kitchen, dropped a UXB (UneXpected Book) into our mailbox earlier this week: Cook’s Illustrated All-Time Best Soups. It boasted a number of recipes that will serve as inspiration during soup season — which is all year, of course, but especially in the winter. I had my eyes set on a celeriac, fennel, and apple chowder for the opening salvo, but the bride had other ideas, and she wins.

Over the course of due diligence (I almost never cook a recipe without scanning the Interwebs to see if someone has concocted a more interesting version), I came across the Cookie + Kate blog, in which she lays out several entertaining reasons for not making this soup. Long story short, it’s not particularly cheap to make (unless you grow your own peppers), and the pepper roasting process is both time-consuming and a wee bit tedious. That said, just like her, I concluded that this soup is so tasty that any quibbles about prep were overcome mere nanoseconds after the intersection of tongue and spoon. [All the original recipes I consulted to arrive at this one called for red bell peppers, but the local supermercado‘s red peppers looked a little sketchy, so I made it with orange ones instead. I presume yellow bell peppers, or a mix of all three, would work equally well.]

For those of you who are interested, the recipe is easily vegan-adaptable (see notes below); while the half and half is a tasty touch, I tasted the puréed soup prior to its addition, and I could easily have stopped there, ingredient-wise. Recipe yields 4-6 large servings.

INGREDIENTS

Cilantro Cream

    3/4 cup / 170g sour cream (or soy yogurt for vegan version)
    2 tablespoons / 30ml half and half (or cashew cream for vegan version)
    2 tablespoons / 5.3g fresh minced cilantro leaves
    zest of 1 lime, plus juice from half of that lime (approximately 2 tablespoons / 30ml)

Soup

    8 red (or orange, or yellow) bell peppers, roasted, skins removed, and chopped
    1 tablespoon / 15ml olive oil (I used basil-infused EVOO) (double if making tortilla strips)
    2 medium garlic cloves, minced
    1 medium red onion, chopped
    1 teaspoon / 2.5g ground cumin
    1 teaspoon / 2.5g smoked paprika (I prefer Spanish pimentón de la Vera, and I used picante/hot rather than dulce/sweet)
    3 tablespoons / 50g tomato paste (or 8 oz. / 227g tomato sauce)
    1 tablespoon / 10g potato starch
    4-6 cups / 950ml-1.4l vegetable broth; start with smaller amount, adjusting for consistency as desired
    2 bay leaves
    1/2 cup /120ml half and half (or 100ml cashew cream + 20ml coconut oil for vegan version)
    2 tablespoons / 30ml dry sherry
    2 tablespoons / 5.3g minced fresh cilantro
    salt and pepper, to taste

Garnish (optional)

    3 corn tortillas, sliced into thin, 2-inch long strips, fried in oil until crispy

INSTRUCTIONS

For the Cilantro Cream:
Whisk all the ingredients together in a small bowl. Cover with plastic and refrigerate until serving.

For the Crispy Tortilla Strips:
Cut tortillas into strips about 2″ (5cm) long and 1/4″ (2/3cm) wide. Warm 1 tablespoon / 15ml olive oil in a large sauté pan over medium heat. Add tortilla strips and salt. Stir to coat the strips with the oil, and fry until both sides are golden and crispy, about 3 to 5 minutes. Transfer to a plate lined with a paper towel to cool. NOTE: If you are making the vegan version, be sure no lard was used in the tortilla manufacture! Corn tortillas are gluten-free, if you are concerned about that.

Peppers pre-peeling.

Peppers pre-peeling.


Post-peeling pepper perfection.

Post-peeling pepper perfection.

For the Soup:
Roast the peppers: Spread peppers on an aluminum foil lined cookie sheet, skin side up, in a single layer (you may need to repeat this step several times to roast all your peppers). Place cookie sheet about 3″ below broiler element. Roast until peppers are blackened across the top, around 10 minutes.

Transfer roasted peppers to a medium-sized bowl and cover with plastic wrap, allowing them to steam for 15 minutes. Using your fingers, peel off the charred top layer of skin and discard. Take peeled pepper slices and give them a rough chop (they will be puréed later, so no need to be fussy about it).

Cook the soup: In a 3½ quart or larger Dutch oven or heavy-bottomed pot, warm olive oil and minced garlic on fairly low heat. Sauté, stirring occasionally, until the garlic gets a little foamy and sticky, about 6-7 minutes. Increase heat to medium, add onions and sauté until softened and turning translucent, about 5 to 8 minutes. Add the cumin and smoked paprika/pimentón de la Vera and cook for about 30 seconds to release aromas. Add the potato starch (or flour) and cook for one minute, stirring constantly. Add the tomato paste (or sauce) and gradually whisk in the stock, stirring to prevent lumps. Add the peeled red/orange/yellow peppers and stir. Bring the soup to a gentle boil, then reduce heat to maintain a simmer and cook for 15 minutes, stirring occasionally.

Once your soup is done cooking, remove it from heat and allow it to cool for 5 minutes.

Blend the soup: Transfer soup to a blender or Vita-Mix (do NOT fill it over halfway, unless you wish to decorate your walls and person with hot soup); drape a kitchen towel over the blender (so the escaping steam doesn’t build up or burn your hands) and process in batches. Transfer puréed soup to another pot and continue until all of the soup is blended. Alternatively, use an immersion blender to blend the soup in the pot. Blend until the mixture is smooth and creamy. If soup is too thick, add vegetable stock to achieve desired consistency.

Transfer soup back to cooking pot and rewarm gently on the stove; add the half & half (or vegan substitute), dry sherry, and chopped cilantro. Divide soup into individual bowls, and drizzle in cilantro cream. Top with crispy tortilla strips (optional) and serve.