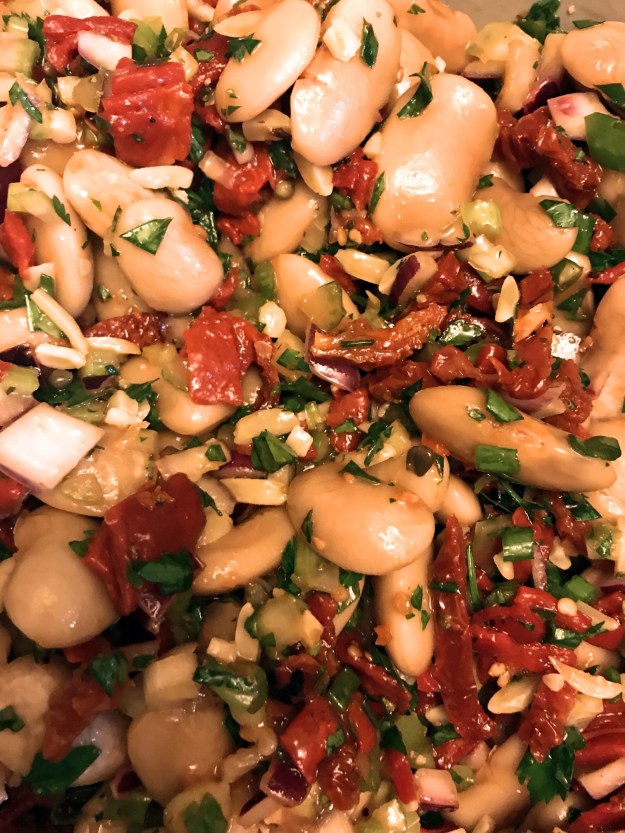
Cherry Tomatoes Stuffed with Feta and Nectarine

0

Summertime, and a warm day just cries out for a cool, cool, treat. Especially here in São João do Estoril, Portugal, where it’s supposed to be 33°C (or 92°F) tomorrow.

It’s tomato season, and stone fruit season, and the two fit together in a tangy yin-yang, especially with a little cheese to bind them. I have to admit I stumbled across the idea by accident, when I was slicing a nectarine with a knife I’d previously used for Feta (kids, don’t try this at home; I should have used a fresh knife to avoid cross-contamination). The salt of the cheese and the sweet of the fruit reminded me of kissing Kim Wilson sometime back in the Pleistocene. Wherever that taste came from, I wanted more.

I’m guessing that this could work equally well with apricot or plum or peach, and bleu cheese or Roquefort or Gorgonzola (though they are more pungent than Feta, so you might have to adjust the ratio). Why nectarine? In the words of my pal Mel Brooks, “Half a peach, half a plum, it’s a helluva fruit!”

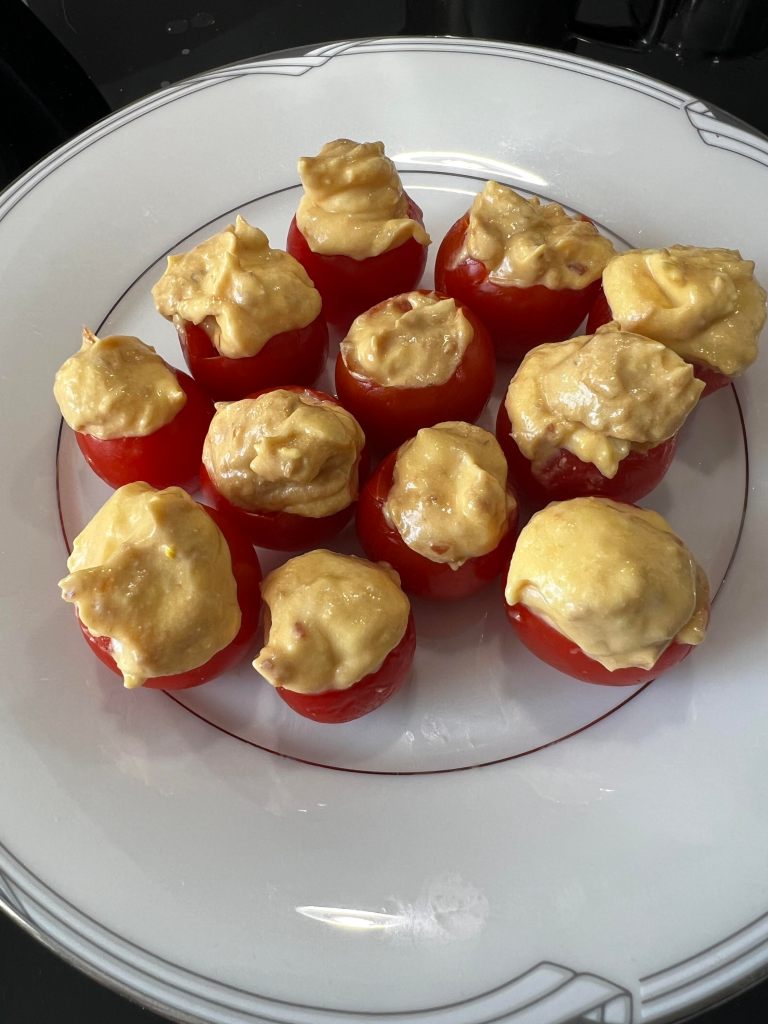
This is easy to make, unless you wanna get all super fancy. Mix the cheese and fruit in a food processor, chill it, pipe it into the tomato, chill until serving. I could have blanched and peeled the nectarine, but firstly, you will want to use a ripe nectarine, and secondly, did I mention it was summer? Too darn hot to be boiling water if you don’t have to.

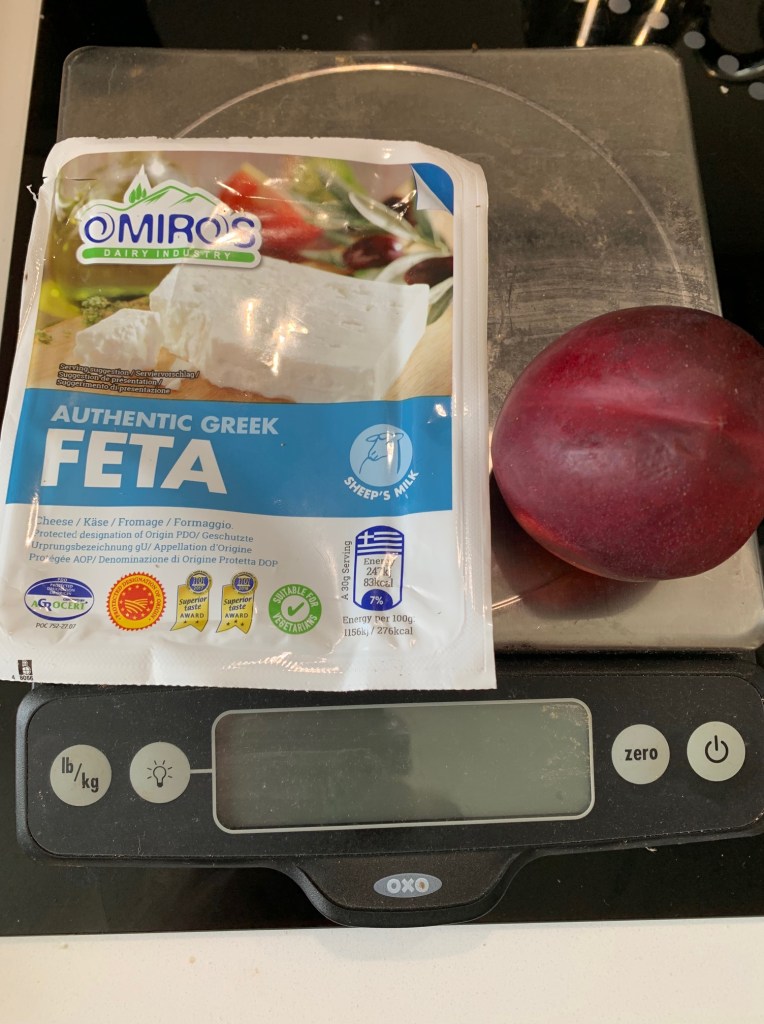
The recipe is simple: two parts nectarine to one part Feta. I used two sizeable nectarines totalling about 300 grams, and one 150g package of Feta (drained). Blend in a food processor. Scoop out the guts of your cherry tomatoes (this will fill a couple dozen easily), and pipe in the mix. Because I was only making a dozen, I just spooned in the mix with a demitasse spoon, so the final product didn’t look quite as elegant as it could have. Our guests were kind enough to pretend not to notice.

INGREDIENTS (makes about two dozen tomatoes)

1 package cherry tomatoes (the larger the tomato, the better, as far as ease of stuffing goes)
2 nectarines, ripe (a little over 300g / 10 oz.)
150g / 5 oz. Feta cheese

My Favourite Summer Salad (adaptable for winter, too!)

0

Leave it to me to post my favourite summer salad on the 20th of September, right?

But it’s still warm here in São João do Estoril, Portugal, and more importantly, couve (cabbage) is in season, while couves de bruxelas (Brussels sprouts) are not.

This salad originated at the wonderful food blog Love & Lemons, where it was featured as an only-seven-ingredient Shaved Brussels Sprout Salad. [Although it really really originated on our pal Karen’s Facebook page, which was what tipped the bride to the recipe.] Needless to say, when my betrothed first prepared it, I was sceptical. Maybe even dubious. But it was terrific, and light, and whenever she made it, we dove into our bowls like a pair of Tasmanian Devils on a meth bender. Brussels sprouts are a seasonal thing round these parts, though, and the frozen sprouts are not a good substitute — much like Christopher Lloyd, they are fairly unshavable.

Fortunately, cabbage — Savoy, or green, or red, or some combination of the three — is a highly acceptable stand-in during those months when sprouts are on the outs. And the absolutely brilliant bit about this salad (in either form) is that it will keep overnight in the fridge without going all wilty. Plus, even I can make it, which means that even you can make it. If you can operate a knife, a spoon, a whisk, and a bowl, you’re good to go.

Okay, I lied. You’re going to have to toast some slivered almonds. Trust me, it’s worth it. You can do it in the oven, or like I did, on the stovetop in a dry frying pan. Here’s a good article about the different ways of achieving this miracle of aromatic nuttiness. And yes, you’re probably — no, if my experience is any guide, definitely — going to overtoast on occasion. The good news is that, unless they’re blackened, the almonds can almost always go in the salad and work just fine.

Don’t burn your nuts.

My other favourite thing is that the salad hits every taste note: the cranberries bring sweetness, the feta is salty, the lemon has acid, the chives contribute a bit of herbaceousness to the mix, the cabbage and toasted almonds have a slightly bitter edge, and the olive oil adds umami. I’m going to sound like a bit of a broken record to longtime readers here, but I implore you to use the best olive oil you can get your hands on, and it’s worth squeezing fresh lemons for the dressing — if you can get hold of Meyer lemons, even better!

Feel free to adjust the amounts — and even ingredients — to suit your palate. Some folks prefer Parmesan or another salty cheese to Feta, and that’s just fine. No chives? Maybe you have some green onions. Walnuts rather than almonds? Go right ahead. Pomegranate seeds rather than dried cranberries? Okay. But please do give this version a go before you start your own mods, because the bride and I feel like we hit on a really good balance of elements.

INGREDIENTS

1 small (or 1/2 large) head of cabbage
240g / 1.5 cups dried sweetened cranberries (often marketed in the US as Craisins)
1 small bunch / 20g chives, finely chopped (scallions will work in a pinch)
400g / 14 oz. feta cheese, cubed or crumbled (if there’s not too much water in the pkg, you can add it to the salad)
150g / 1 cup toasted slivered almonds
FOR THE DRESSING
150ml / 5 oz. fresh-squeezed lemon juice (or about 2 lemons)
150ml / 5 oz. extra virgin olive oil (equal to lemon juice)

DIRECTIONS
Toast the almonds [see above for method(s)], and set aside to cool. Using a cleaver or large knife, shred the leafy part of the cabbage (food processors shred too finely for this salad). The solid center stalk can be discarded or julienned for use in the salad (I did the latter). Place in a large bowl. Add the dried cranberries. Chop the chives, and add them to the bowl. Crumble or dice the feta, and add it to the bowl (you can give this all a stir if you wish). Add the cooled toasted almonds.

Simple dressing — EVOO and lemon juice.

Squeeze juice of two lemons into a 500 ml / 2 cup or larger measuring cup, then add an equal amount of extra virgin olive oil. Whisk the two together for about 20-30 seconds to emulsify. Pour dressing over salad, taking care not to overdress. Toss salad so it is completely coated. For best results, return salad to refrigerator for 1-2 hours to cool. Re-toss salad immediately before serving.

Gazpacho, pacho man! I want to be a gazpacho man!

0
With croutons, parsley, and cilantro.

Still summer, still hot. Time again for a simple cold soup (many call it “liquid salad”), perfect for that moment your garden is in its annual throes of tomatorrhea, when your plants imitate the ketchup bottle in Richard Armour‘s famous poem: “none will come / and then a lot’ll.” Even if you don’t grow your own tomatoes, local supermercados, feiras, and grocery stores will be happy to provide you with a cornucopia of ingredients.

This particular verion of gazpacho was built from a foundation laid by the Spanish chef and international hero, José Andrés, and published in the Washington Post. I guarantee that if you follow his instructions to the letter, you will have an excellent bowl of soup, if slightly different from the one offered here.

Some people claim that the word gazpacho originated in Arabic, others say it came from Greek; the Real Academia de la Lengua Española, which is the final word on Spanish words, has come down firmly in the camp of “we aren’t sure.” One thing that IS clear is that the modern version of red gazpacho dates back no further than the 16th century, because the Old World (although they didn’t know it) was waiting for Columbus to bring back tomatoes and peppers. [Rock fans know this from the Neon Park illustration on the cover of Little Feat‘s album Waiting for Columbus. But I digress.]

[One further digression: other scholars assert that Hernán Cortés, not Columbus, introduced the Peruvian tomato to Spain in 1521. Regardless of who performed the introduction, it was widely embraced.]

Most culinary historians date gazpacho’s birth sometime between the 8th and 15th centuries, when the Ottoman Empire’s reach extended to Spain; others credit the Moors with a roughly contemporaneous version. Still others say an early precursor dates to the Roman Empire, and there are even some who push the date back as far as the Biblical book of Ruth. One thing that virtually all of them agree on, though, is that the first person to publish a recipe for it was the chief confectioner at the court of the Spanish kings Felipe V and Fernando VI, Juan de la Mata.

Looks good for being nearly 300 years old.

His treatise, Arte de Repostería (Art of Confectionery), was published in 1747 and is still studied. Even at that late date, tomato had not gained the preeminence it has today, and de la Mata’s recipe called for bread, water, anchovy bones, garlic cloves, vinegar, sugar, salt, and oil. [For more on the history of gazpacho, I commend the James Beard Award-winning author Clifford A. Wright, who not only has his observations on the origins of this delightful soup, but recipes as well.]

Throughout its ancestral home of Andalucia, and indeed throughout the entire Iberian peninsula, gazpacho evinces itself in a wide variety of textures and flavour profiles. Some are chunky, others puréed; some feature tomato and some don’t; certain cooks absolutely insist that bread crumbs have to be in the mix, while others are happy to incorporate such exotic flavours as watermelon or avocado. So my advice to you would be to keep an open mind, paw through a bunch of recipes, and find the one that zings the strings of your papillae.

Please don’t feel any sense of shame if you use canned tomatoes rather than fresh; some days, the local crop may be woody or just plain bland, and the canned option (particularly if fire-roasted) may yield a better finished product. But please do use the best olive oil and vinegar that your budget will allow. My last batch contained some artisanal olive oil we purchased directly from the producer in Marvão, just barely on the Portuguese side of the Spanish border. The vinegar was hand-carried home from Brauerai Gegenbauer in Vienna, and their products are just crazy great. You can use a good Sherry vinegar, but I like to add some Gegenbauer tomato vinegar to a glug of Lustau Sherry, both for the sweetness and the rounded texture.

As is true with many of my recipes, this is merely one of a gaggle of routes to the destination of yum. To usurp (and slightly corrupt) the title of a famous book/movie, Eat, Play, Love.

INGREDIENTS

1 liter / 4 cups polpa de tomate/tomato sauce (a combination of tomato paste and tomato juice can be substituted)
390g / 14 oz. can chopped tomatoes (check to see if salted or not)
600g / 21 oz. Padrón peppers (shishito peppers can be substituted)
1 cucumber, peeled and chopped (seeding optional)
5-6 cloves garlic (but I’m a garlic fiend, so you may want fewer)
100ml / 3.5 oz Sherry
250ml / 14 oz. extra virgin olive oil
100ml / 3.5 oz vinegar
Optional toppings/add-ins: croutons, parsley, diced tomato or bell pepper, toasted almonds, piri-piri sauce or Tabasco, cilantro

DIRECTIONS
Put all the ingredients into a blender. Blend on medium until desired texture is reached. Transfer to pitcher and chill (both you and the soup) for at least 2-3 hours to allow flavours to meld (the garlic may not completely mellow out until the following day). Garnish as the spirit moves. Serve.

Chilled Avocado Soup (Vegan)

1

It’s a little warm and muggy today in São João do Estoril, Portugal, though I am not complaining. It appears from the news that much of the northern hemisphere is experiencing a heat wave right now, which makes it an ideal time for a super-easy-to-prepare chilled soup, especially one that requires exactly zero time on the stove. [Well, unless your bride asks you to make homemade croutons for it.]

A note about stock and salt: I use a Spanish commercial vegetable stock by Aneto that already has a little salt in it, so I let diners add some finishing salt if they wish. American cooks using commercial vegetable stocks will likely find them to be sodium bombs, so I would advise y’all to take it easy on the salt. Better Than Bouillon makes an excellent vegetarian stock base, but it’s not readily available here in Europe. Making your own vegetable stock so you can control the salt content is an option, but you certainly don’t want to do it on a hot day. At least I don’t.

INGREDIENTS

1 liter / 4 cups vegetable stock
125ml / ½ cup fresh lemon juice (lime juice can be substituted)
30g / ½ cup chopped fresh cilantro
3 ripe avocados (minus skin and seeds)
3 green onions (scallions), chopped
4 cloves garlic (but I’m a garlic fiend, so you may want less)
1.25g / ½ teaspoon pimentón de la Vera
Optional toppings: croutons, parsley, diced tomato or bell pepper, toasted almonds, piri-piri sauce or Tabasco, cilantro

DIRECTIONS
Put all the ingredients into a blender. Blend on medium until desired texture is reached. Transfer to pitcher and chill (both you and the soup) for at least 1 hour to allow flavours to meld. Garnish as the spirit moves. Serve.


A Seasoning for All Seasons

1
Even our huge Le Creuset Dutch oven couldn’t hold it all; this is about 20% of the finished goods.

For those of you who have followed the blog, you may have noticed my absence for what seems like an unconscionably long time. Which it has been. In the interim, a giant plague hit the world, I leaned into my semi-retirement, and our family — me, the bride, and two cats — moved to Portugal. While I’m sure at some point I will miss southern California, it hasn’t happened yet, and we’ve been here six months.

Life in Portugal has been pretty great, but it is not without its challenges. The ancient O’Keefe and Merritt gas stove that had been my constant companion for nearly thirty years now belongs, as does our house, to someone else. Its replacement, an electric convection oven, acts up in different ways that the old one did, so it’s taken some getting used to. The oven is also physically smaller than the O’K & M, which meant that some much beloved sheet pans had to go. Our induction range top, while brilliant for boiling water, tends to develop hot spots, which I’m not so crazy about. First world problems.

Our local grocery store(s) also have an irregular supply of spices, and some American staples, such as Italian seasoning and vanilla extract, are vanishingly rare. When you can get Italian seasoning, it often looks like this:

Now I don’t know about you, but I believe no Italian seasoning component should be red. As it turns out, this is just a mixture of sun-dried tomatoes and oregano. Some segredo do mundo (secret of the world).

I tapped my inner pioneer on the shoulder and asked, “What would Vasco da Gama have done?” Had he been interested in Italian seasoning — and there’s zero evidence he was, though his voyages to India sparked a global spice trading market — he would have had his cook make it. So I had my cook make it.

That would be me.

One can find any number of recipes for Italian seasoning out there on the Interwebs, and this one is an amalgam of many. Some omit parsley and marjoram (mine doesn’t), some omit sage (mine does), and the precise balance of ingredients varies, but I think I hit on a blend that seems “authentic” to me.

The one problem I had was that I made too much. Much too much. Like 1.7 kilos. A typical bottle of McCormick’s Italian Seasoning has a net weight of .75 ounces, which equates to 0.02 kilos. I’ll save you the step of getting out your calculator here: I made about 85 bottles’ worth. I am about to become the local Oprah of Italian seasoning. “And you get a jar of Italian seasoning! And you get a jar of Italian seasoning! And you get a jar of Italian seasoning! And you get a jar of Italian seasoning!”

Don’t do that.

This looks more like a drug bust than an overabundance of a pantry staple.

I’ve cut my recipe down to 10%, which will still yield plenty of the herb blend for any normal human. I wrote the recipe by weight rather than volume, but you could probably get away with using the ratio with tablespoons (5-3-3-3-2-1.5-1), since dried leaves all pretty much weigh the same.

Just put the herbs in a big bowl and give them a good stir, or, if you prefer, put them in a sealable bag and give them a good shake. If you want to go the heroic route (and you happen to be near Lisbon), I still have all the constituent components, because I bought them all in 1 kg bags. I’ll sell them to you real cheap… but you also have to take a jar of you-know-what.

INGREDIENTS (all leaves, not ground)

  • 50 g Oregano
  • 30 g Marjoram
  • 30 g Basil
  • 30 g Thyme
  • 20 g Rosemary
  • 15 g Parsley
  • 10 g Summer Savory

Polvo Guisado a/k/a Portuguese Octopus Stew

1
Portuguese Octopus Stew Completed

Seems like almost exactly a year ago I was writing about pulpo/polvo/octopus, then I got caught up in the business of actually moving to Portugal (not there yet), and then the plague hit. Although I have been in the kitchen a fair bit, I’ve been away from the blog. I am intending to change that, but it is subject to intervention from a couple of governments, a shipping company, a real estate agent, and life during COVID-19.

Since I can’t be in Portugal (as is the case for most of us living in America at present), the next best thing is to bring a bit of Portugal to California.

This particular stew is by no means uniquely Portuguese; in Catalunya, there’s a version known as Estofat de pop i patata; in Greece, you can find the very similar Octapodi Kokkinisto, though it’s usually served over rice or orzo rather than with potatoes; in Italy, it’s Polpi in Umido and Polpo alla Luciana, often including clams or other seafood and served with pasta or just bread. And in Galicia, Pulpo a la Gallega omits the tomatoes, but is frequently served over boiled potatoes. I’m sure if I dug a bit deeper, I could find Croatian and Turkish versions of the dish; heck, even the French might have one, although their version would probably be more elegant, since that’s what they do. From what I can gather, this one originated in the Azores, some say specifically on Pico Island.

In most Mediterranean (and Mediterranean-adjacent) countries, polvo guisado is peasant food; the cephalopod was pulled out of the sea, and the tomatoes and potatoes came out of your garden. No real fancy ingredients are necessary (although I did use a South African Pinotage Rosé, because the South African wine industry is currently in desperate straits due to COVID-19).

One quick note before we get to the actual recipe: a number of friends and acquaintances on social media find the eating of octopuses distasteful. They (the cephalopods) seem to be intelligent creatures, and many people, myself included, find them endearing. I understand and respect those whose ethics have led them away from creature consumption, and am happy to engage in conversation on that topic over the telephone or in person, but social media lack the capacity for nuance, so comments will be moderated. If this recipe is not to your taste, please feel free to avail yourself of one of the many vegetarian and vegan options on the blog.

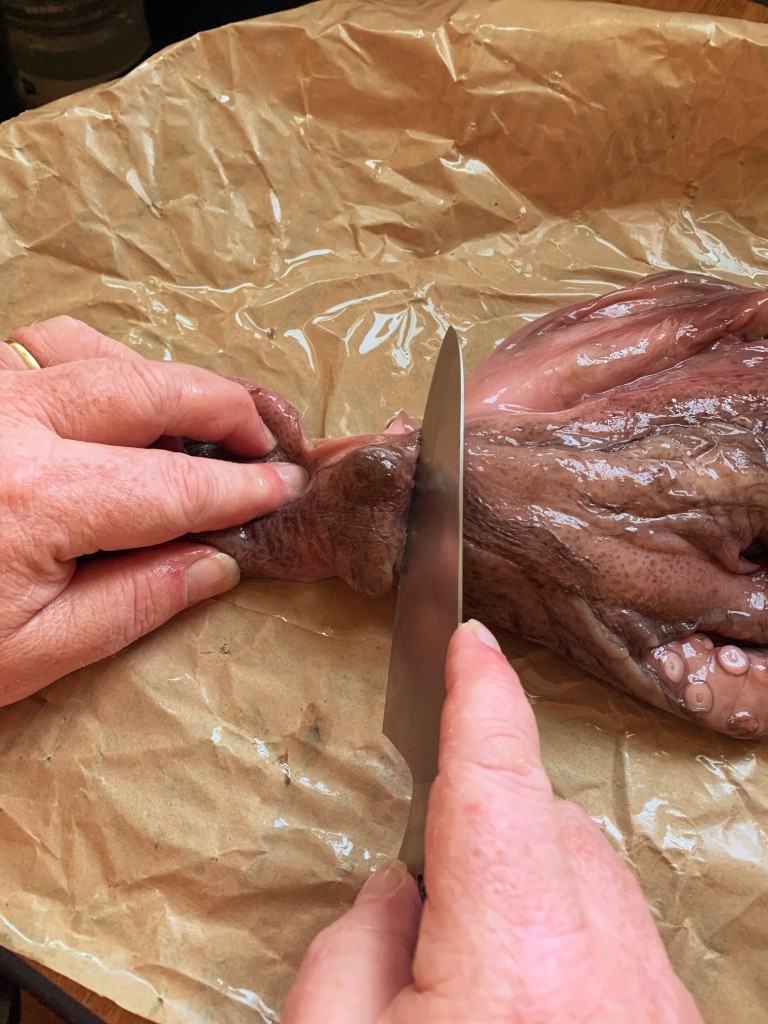
You may be able to get the octopus pre-cleaned from your fishmonger, but if not, you have a little cutting to do.
You may be able to get the octopus pre-cleaned from your fishmonger, but if not, you have a little cutting to do. Removing the eyes, the ink sacs, and the beak are not difficult, and there are many YouTube vids to guide you.

INGREDIENTS
2 lbs. / 1kg octopus, blanched and cleaned
2-3 tbsp. / 30-45ml olive oil
2 large onions, chopped
4 large cloves minced garlic
3 bay leaves
4.25 cups / 1000ml chicken or fish stock (I used Aneto)
2 cups / 500ml wine (rosé, white, and red all work fine)
2 lbs. / 1kg fresh (or canned) tomatoes, chopped (peeling optional)
2 lbs. / 1kg new potatoes (or fingerlings, or whatever you have)
1 thsp. / 5g crushed red pepper flakes
1 bunch fresh cilantro (coriander), chopped
1 bunch fresh parsley, chopped
1-2 small lemons, juiced (or 2-3 tbsp. / 30-45ml lemon juice)
Salt and pepper (to taste)

Our octopus turns a pinky-purple during its five-minute bath.

DIRECTIONS
Set a large pot of salted water on the stovetop to boil.
Remove the octopus’ eyes, ink sacs, beak, and interior of the head (if not pre-cleaned by your fishmonger) then rinse under cold water and set aside.
If you’re using medium or large potatoes, wash and quarter them (peeling is optional), and set aside.
Chop onions and mince garlic and set aside.
Chop cilantro and parsley fairly fine and set aside.
Dip the octopus three times into the salted boiling water to curl the tentacles, then submerge it for 5 minutes.


Drain and let it cool, then cut the tentacles and body into 2-inch lengths or chunks and reserve.
In that same pot, add the olive oil; add the onions, garlic, pepper flakes, and bay leaves, stirring occasionally. Fry in the oil for 6 to 7 minutes, until slightly wilted and beginning to brown.
Deglaze the pan with the wine, bring the liquid up to a boil and reduce it by half.
Stir in the tomatoes, season with salt and pepper, add the potatoes, the octopus, and stock. (Note: I used chicken stock, but fish or vegetable stock will also work, and if necessary, you could just use water with perhaps a bouillon cube or paste.)
Bring the liquid up to a boil and reduce to a simmer.


Cover the pot and simmer for about 90 minutes on low heat.
Add the lemon juice, fresh chopped cilantro (a/k/a coriander), and parsley. Simmer for another 5 minutes or so (it’s okay to go longer).
Adjust the salt and pepper (if necessary), fish out the bay leaves (if you can), allow the stew to cool slightly and serve.
Serve with crusty bread or rolls (optional) for mopping up the sauce.
Incidentally, a nice vinho verde goes nicely with the stew, but don’t be fussy about red or white; both are fine.

Split Belly (Karniyarik) — or — The Imam Fainted a Second Time When He Had a Mouthful of Meat

0
10237637-391f-406e-865f-da239fe55a04.jpeg

No, it’s NOT just stuffed eggplant! Well, maybe.

First and foremost, this is a recipe — well, actually a roadmap — for stuffed aubergine (a/k/a eggplant), loosely adapted from a Turkish recipe for karniyarik, which I have read translates literally to “split bellies.” I don’t speak Turkish, and I’m guessing you don’t either, so we’ll just have to rely on the experts.

Karniyarik is a meat-enhanced dish, apparently loosely based on a vegetarian version of stuffed aubergine known as Imam Bayildi (literally, “the imam fainted”). Some stories would have it that he fainted because it was so delicious, and I will take that at face value, because stuffed aubergine is indeed swoonworthy.

Those of you who follow the blog will know it’s not uncommon for me to plunge headlong down the rabbit hole of a recipe’s provenance and expression; this one was no different. I viewed no fewer than a dozen recipes, and found no definitive formula, nor did I discover its origin. I don’t consider the investigatory time wasted, though, because I discovered several variants on the recipe that may find their way into my oven sometime in the future. I have to hand big props to Chef John at foodwishes.blogspot.com, whose video popped up in my YouTube feed and started me down this road to begin with.

Typically, the meat in this recipe is ground, generally beef or lamb. As it happened, I had excess smoked pork shoulder hanging about in the fridge, so that was my meat of choice. The balance of my ingredients hew fairly closely to the harmonized medium of the canon: tomato paste, onion, garlic, cumin, peppers, etc. Some versions include cheese in the filling, but I wasn’t feeling it (although I might in future). Many would have you serve this over (or with) rice or orzo. Fine, but not strictly necessary.

f45b12ec-33a4-4ef3-933b-817b836e0729

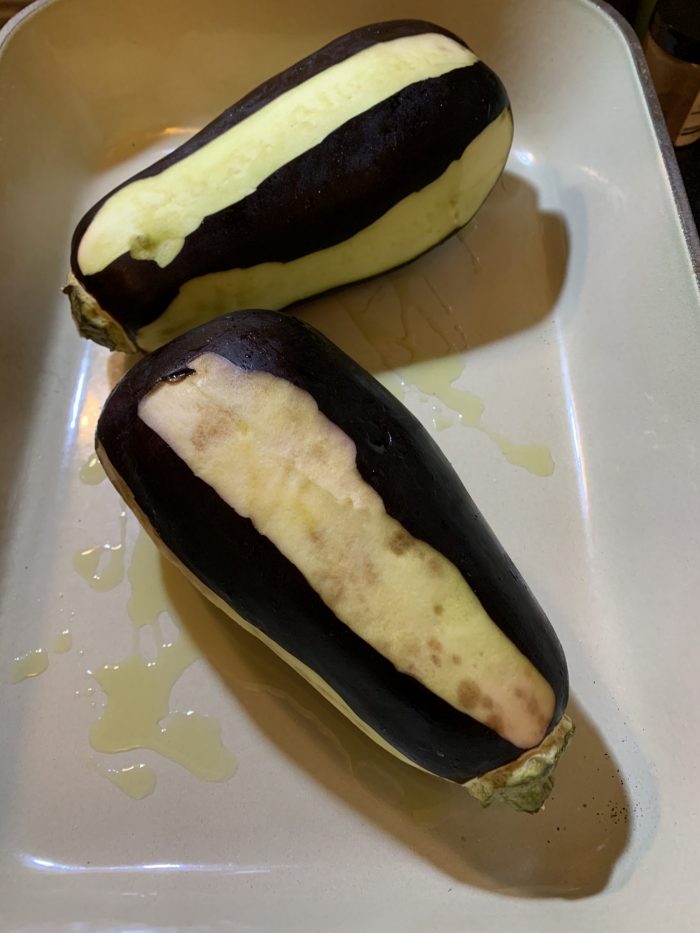
The semi-peeling keeps them from bursting, and gives you a flat surface they can sit on.

INGREDIENTS
2 similarly-sized aubergines (a/k/a eggplant)
.75 lb / .33 kg roasted pork shoulder, shredded
6 mini red bell peppers, diced
1/2 large or 1 small onion, diced
2 cloves garlic, minced
1 can (7 oz. / 198 g) diced roasted green chilies (with juice)
1 tbsp / 7 g cumin powder
1 tsp / 2.5 g ground cinnamon
2 tbsp / 15 g tomato paste
2 tbsp / 15 g Darrell & Nil’s Turkish Spice Blend*
salt and black pepper to taste
2 tbsp / 30 ml olive oil
1 cup / 250 ml chicken stock

*This is a custom spice blend made by some friends. It’s made from paprika, black pepper, cumin, coriander, allspice, cassia, sumac, oregano, Maras chile, clove, cardamom, and nutmeg. Maybe I can get them to cough up the actual recipe, but if not, make sure you include the sumac and Maras chile, which really push the blend toward Istanbul


8dd089f7-8330-4b8c-b4f7-ad9595e31b01

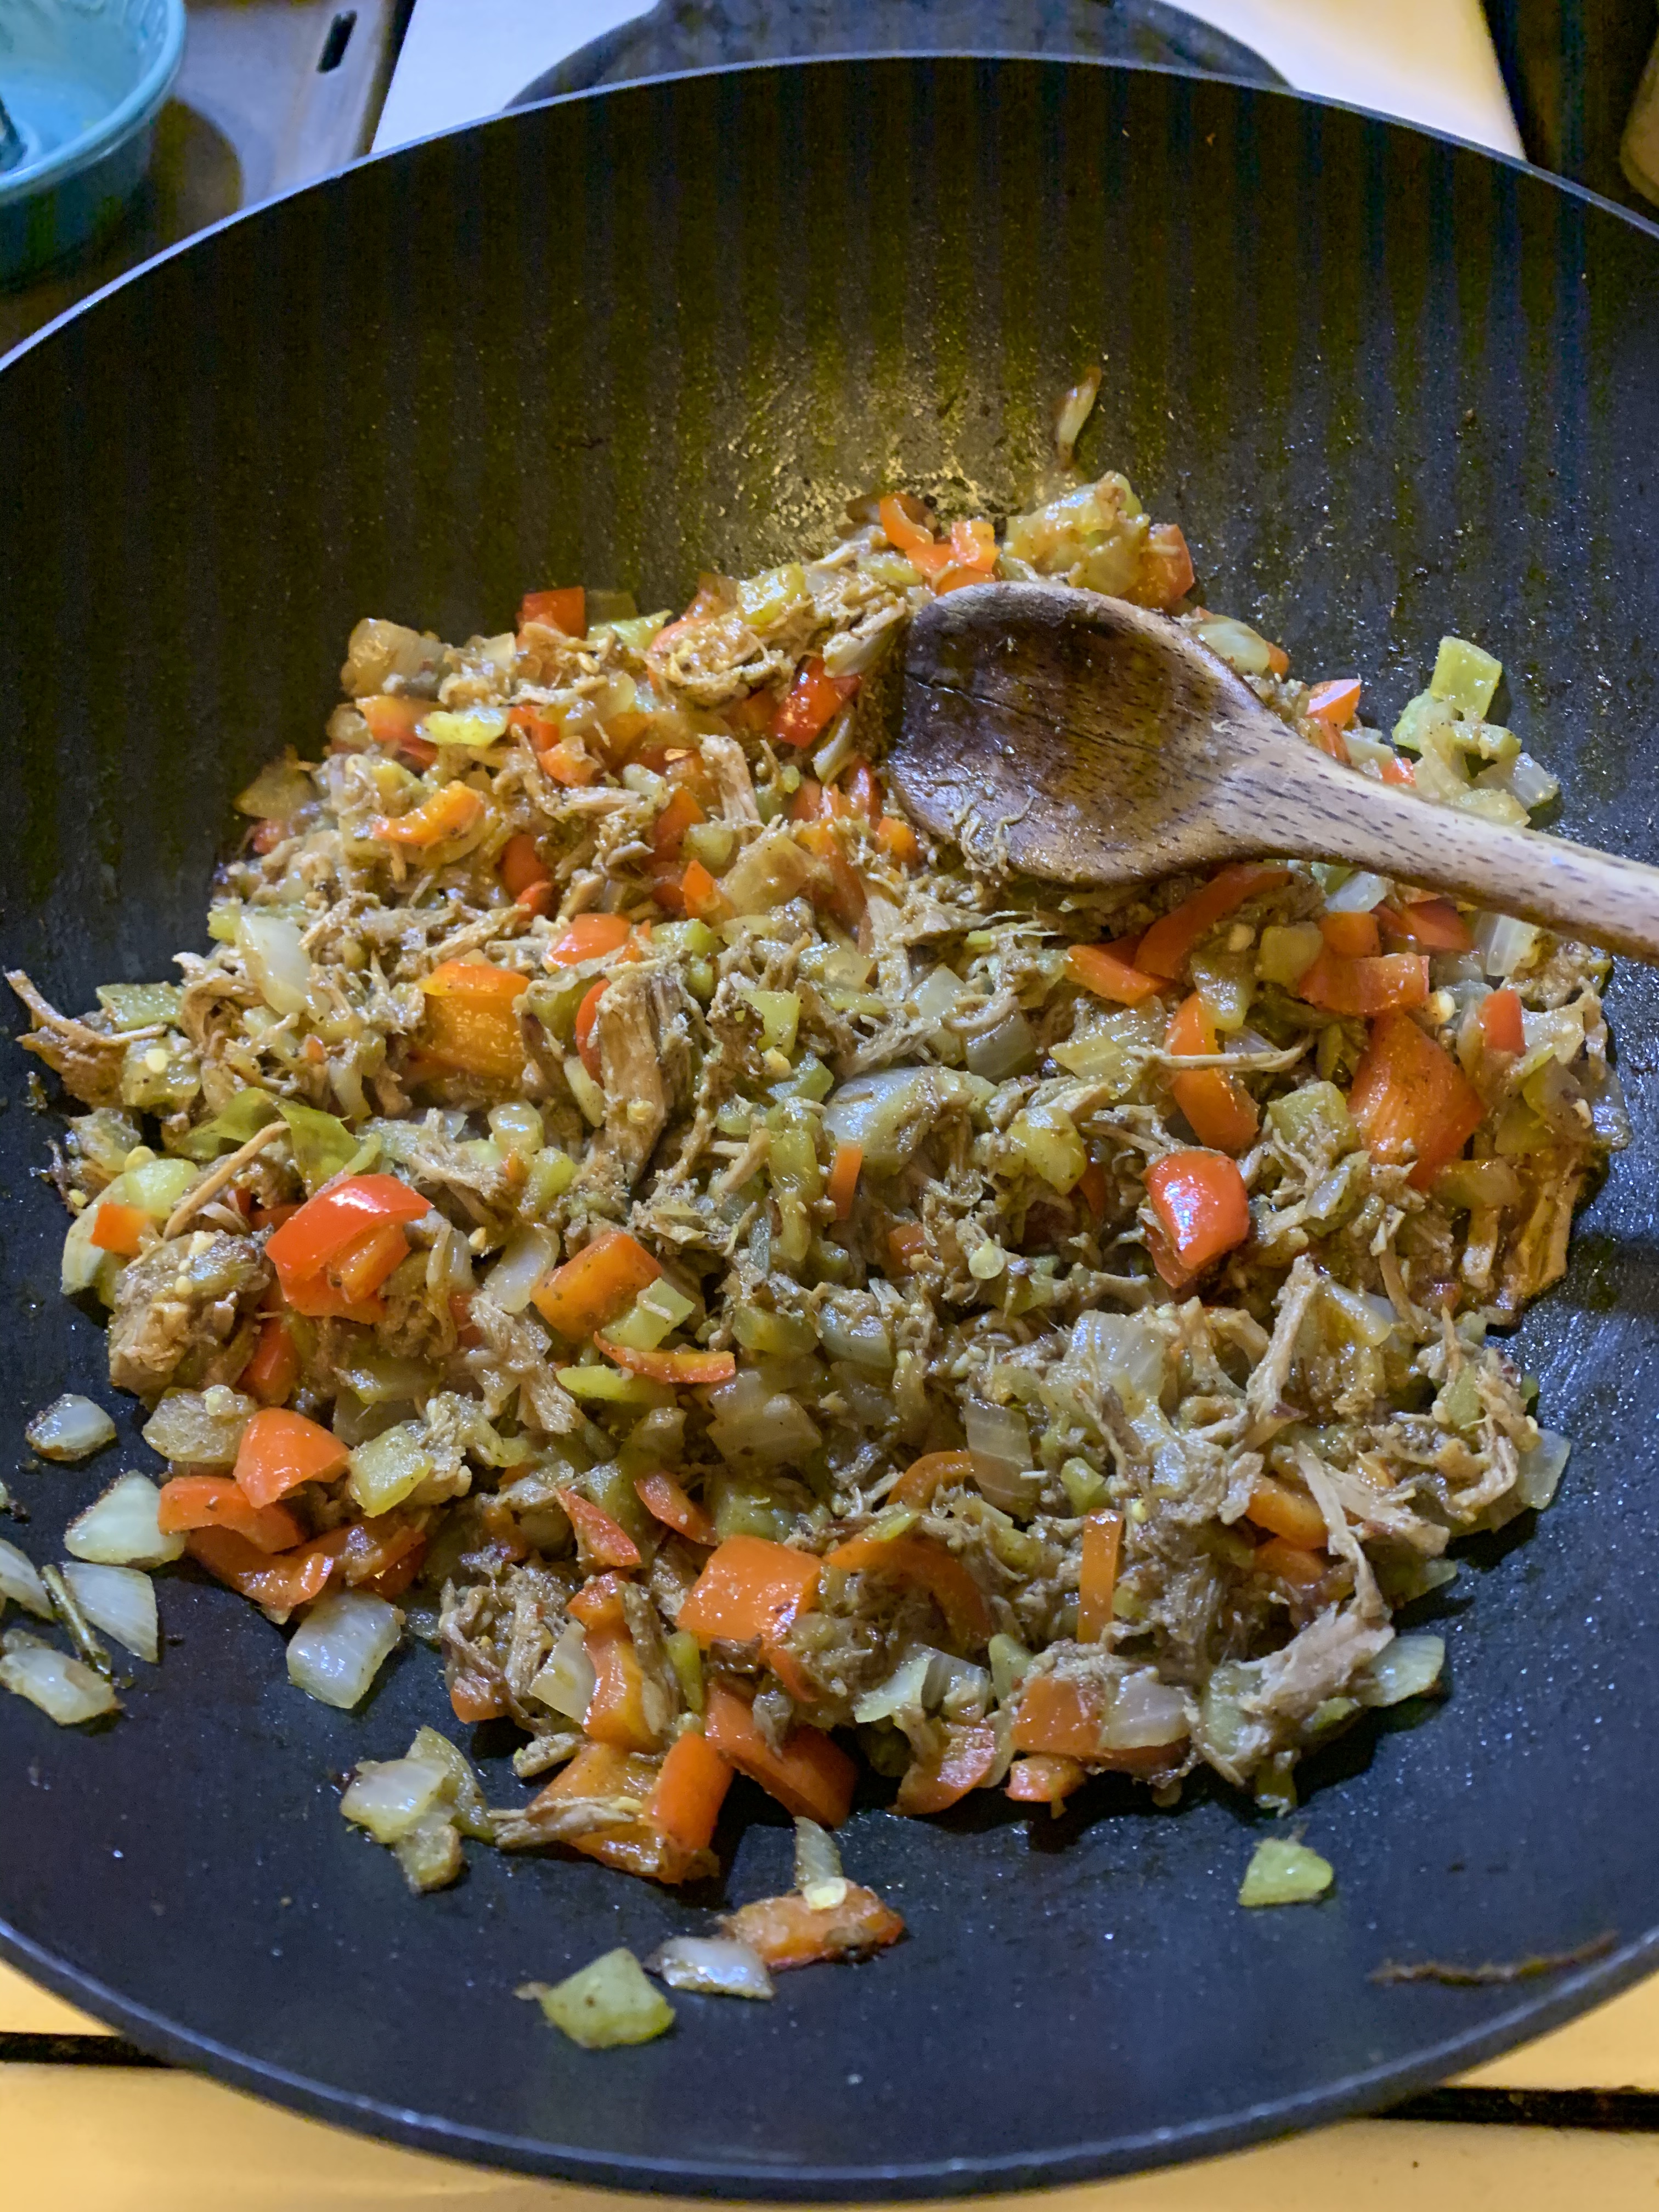
Stuff for the stuffing.


DIRECTIONS
Wash the aubergines, peel four equally spaced strips and set aside. The peel allows them to sit flat in the casserole dish or roasting tin.
Preheat oven to 400°F / 205°C.
Drizzle a little olive oil into a casserole dish or small roasting pan sufficient to hold the two aubergines, then pop the veggies into the dish and pop the dish into the oven.
You’ll want to roast the aubergines for 45 minutes to an hour, depending on their size. You don’t want them cooked all the way, because you will be stuffing them. When you take them out of the oven, they should still be fairly firm and holding their shape.

During that time, you can prepare your filling.
Warm a frying pan over a medium heat, and put in the cumin, cinnamon, spice blend, and black pepper; toast the spices for 1-2 minutes, just to bring out a little more flavour. The add the salt, onion, green chilies, and bell peppers; cook for 5-8 minutes, or until the bell peppers are softened and the onions are translucent. You don’t need to brown them, but don’t freak out if they take on a little colour or if they’re still slightly firm. Remember, they have more time to cook when you stuff the aubergine.
Add the garlic and tomato paste, and cook for a couple of minutes more, just to take the rough edges off the garlic. Then remove the pan from the heat and set aside until it’s time to stuff the aubergines.

7d973c03-e5db-4565-b288-4929f98bdf50

Fit to be stuffed.

When the aubergines are partially cooked, but still firm(-ish), take them out of the oven and allow them to cool sufficiently that you can stuff them without burning your fingers. Take a knife and “split their bellies” (vertically of course), then spoon in a generous amount of filling. Don’t pack it in too much, though, or the aubergines will split during their second oven sojourn. Pour the chicken stock into the pan (but not over the aubergines), so they don’t burn. You can also use the resulting sauce to spoon over the finished dish, although in my case most of the liquid had evaporated.

Return the stuffed aubergines to the oven for 30-35 minutes, or until a knife can pierce their flesh without resistance. Allow them to cool for about 10 minutes, because they are molten lava hot straight from the furnace. Plate, spoon over some of the drippings, and serve. [Although inauthentic, cheese, sour cream, or crème fraîche could be used as toppings. You could also sprinkle some fresh chopped parsley on top for colour. ]

This is scalable, depending on the number of diners, and is quite mutable while still staying within the parameters of karniyarik. Find the ingredients that exist in your pantry and/or suit your palate, pour yourself a glass of raki for a job well done, and offer a hearty şerefe to your dining companions.


Pull My Pork

0

Occasionally, while I am between steps in cooking, I will jot down a note or two, sometimes in free verse. So it was this past evening:

Pull My Pork

From an oven low and slow,
Barely more than candle flames,
Pork perfume pervades.
Garbed in Marco Polo’s to-do list
Basting like a Russian on the Barcelona coast,
One large butt.
Actually a shoulder, an innocent misnomer
From people who deceived you
Into thinking thymus glands
were sweetbreads.

Necessity being the mother of invention, I stumbled upon an article that gave me a workaround for cooking my soon-to-reach-its-sell-by-date port butt in the oven, rather than trying to smoke it in my electric pellet smoker during a rainstorm.

It couldn’t be more simple; rub the pork “butt” (actually the shoulder, but hey, this isn’t a physiology blog) with a spice blend of your choice. Then pop it in a Dutch oven overnight at a very low temp, maybe mop it (that is, squirt or daub a little liquid on it) a time or two if you feel like it, and pull it out the next day. I set mine on the insert from my Instant Pot®, just to keep the meat from sitting in its own rendered juice and also to develop some crust (or bark) on the bottom.

My rub was as simple as 1-2-3: one part sea salt (or Kosher salt) to two parts Penzeys Singapore seasoning to three parts brown sugar.

The “mop” followed a similar formula: one part Dijon mustard to two parts apple cider vinegar to three parts dark molasses. I put it in a squirt bottle and splashed some on once during the night when I woke up and again early in the AM before it was ready to come out.

The boneless pork shoulder weighed about 7.5 lbs / 3.5 kg, and it took about 12 hours at 225°F / 107°C to reach an internal temperature of 205 °F / 96°C , at which point I pulled it out of the oven, let it stand for 30 minutes or so, and pulled it apart with forks and (clean) fingers.

The “bark” was as good as its bite.

INGREDIENTS
1 large pork butt, preferably boneless, about 7.5 lbs / 3.5 kg
For The 1-2-3 Rub
sea salt or kosher salt
Penzeys Singapore Seasoning
brown sugar
For The 1-2-3 Mop
Dijon mustard
apple cider vinegar
dark molasses

DIRECTIONS
Preheat oven to 225°F / 107°C.
If you have time, remove meat from refrigerator for about an hour.
Rub spice blend thoroughly onto meat, coating all sides.
Put pork in roasting pan or Dutch oven, preferably on a small wire rack/riser.
Cook for about 12 hours, mopping occasionally (or not), until its internal temperature reaches approximately 205 °F / 96°C. [Anything over 202 °F / 94.5°C should be fine, you just want it to be falling apart without much stress.]
Allow to cool for 1/2 hour to 45 minutes, them pull apart with forks.
Refrigerate or freeze the unused portion(s).

Ensalada de Pulpo con tomates ahumados (Octopus Salad with smoked tomatoes)

0

70261144_10217767910602202_8963468529093312512_n

The variety of textures is pleasing on the tongue, and the variety of ingredients ensures that each bite will be slightly different from the one on either side. I think of this as a summer salad, but even though I’m making it in mid-September, summer is still in full swing in Los Angeles (save for the ever-shortening daylight hours).

INGREDIENTS

1.33 lbs / 600 g octopus, cooked and chopped
1 medium bunch fresh parsley, chopped (leaves only — well, mostly)
2 stalks celery, minced
1 orange, zested (zest only)
1 bottle (12 oz. / 340 g) marinated red peppers, diced
1/2 red onion, quartered, sliced thin, and macerated
2 tbsp / 20 g bottled capers, drained
2 dozen smoked and roasted cherry tomatoes, optional
vinaigrette dressing to taste
coarse or flaked sea salt to taste for finishing

DIRECTIONS

I bought my octopus already cooked, but if you don’t have a store that carries such, cooking octopus is pretty easy (cooking it well, however, is perhaps a little more difficult).

[I will be posting a technique for cleaning and cooking octopus in the Instant Pot® in the next week or 10 days. ]

Most of the work here is cleaning, chopping, and mixing. If you have a Microplane zester, it will make short work of the orange. You can substitute lime, lemon, or grapefruit zest if an orange isn’t handy, but I think orange suits it best.

Macerating the onion entails soaking it in red wine vinegar (or plain old white vinegar if you must) and a pinch of salt for about an hour. During that time, the purple/red of the onion will lighten considerably, and the onion itself will lose some (but not all) of its bite. After the hour is up, you can drain and rinse the onion before adding it to the salad. [You can dress the salad while the onion is macerating; it’s better when the dressing has had a little chance to mingle and be absorbed.]

As for the vinaigrette, I went super simple: 1 part red wine vinegar to 3 parts olive oil, and a teaspoon / 2.5 gm of ground black pepper. I didn’t want to get too fancy, because I didn’t want to overwhelm our cephalopod friend. That said, since there are so few ingredients in the dressing, I made sure to use a really good olive oil. If I’d had access to the appropriate Gegenbauer vinegar, I would have used that, but my remaining sour cherry vinegar wasn’t right for this recipe.

I happened to have roasted and smoked cherry tomatoes taking up space in the fridge, and they were a welcome addition, but by no means crucial. You could use regular cherry or grape tomatoes, or none at all.

Pop the whole lot in the chill chest and refrigerate for at least an hour before serving. This will make an opening salad for 6-8, but the bride and I made it our main course, and polished off about 2/3 of it. We’ll finish up the rest tomorrow because, well, seafood.

And as for summer, I’m gonna hang on to it until reality intrudes, and I have to trade my rosé for a single malt, and my light-filled salads for soup.


What’s the matter, pig got your tongue? [Smoked Pork Tongue on the Electric Pellet Smoker]

1

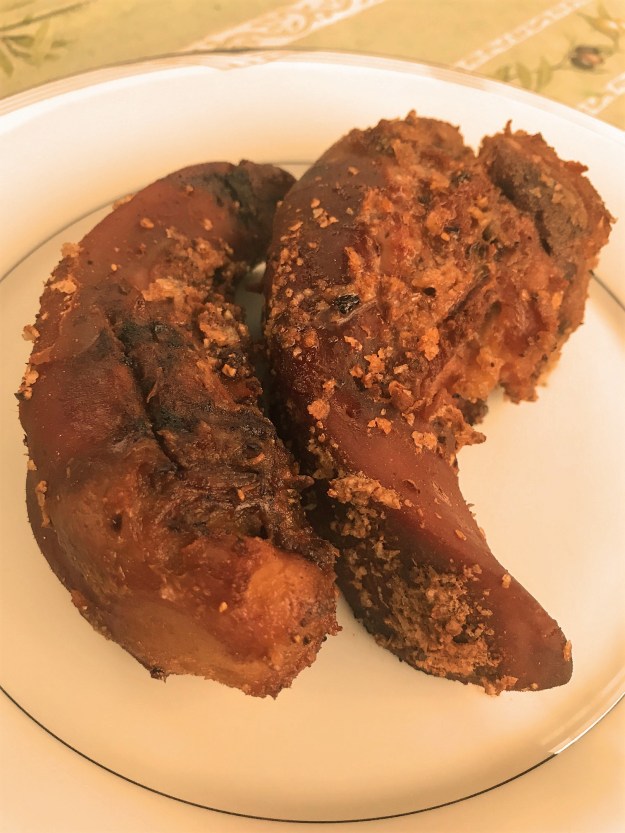
Dos lenguas de puerco.

I’ve mentioned in other places that the idea of eating an animal’s tongue is usually met with some, um, hesitancy by my Anglo friends, with the general exception of Jewish carnivores (though they tend to eat beef tongue rather than pork). Latinx, of course, have a rich history with this cut, and virtually any taco truck worth its sal will have lengua as a meat option. In a perfect world, I’d love to make this barbacoa style, but I’m too lazy to go to all that effort for just the bride and me (not to mention for a mere two pounds of tongue), so I’m going to smoke it instead.

Into the Instant Pot® for a quick bath.

I think one of the reasons that people are reticent to try tongue is that they don’t want to taste what the pig’s already eaten, and I get that. In fact, though, the surface of the tongue (including the rough part studded with lingual papillae) is removed in this particular preparation, though it isn’t in all recipes. One method for removing this stratum is to boil the tongue for about an hour and then use a knife to slice off the surface, but I’ve found that 40 minutes or so in a pressure cooker accomplishes the task even better (I threw in some Rancho Gordo Mexican oregano as an aromatic as well). Most of the surface could easily be peeled off by hand, and the rest I trimmed up with my Global chef’s knife.

Rubbed and ready.

When it came to a rub for the smoker, I wasn’t shooting for anything fancy; just some salt, black pepper, and pimentón de la Vera (Spanish smoked paprika, both to enhance the smokiness and because it reminds me of my beloved Galicia). I set the dial of my electric pellet smoker for “Hi Smoke” (average temp about 210°F / 100°C, though it varied by some 15°F / 8°C over the course of the cook). [For those of you who obsess over such details, the pellets I used were Traeger Grills Signature Blend pellets, made from hickory, maple, and cherry woods.]

Fresh out of the smoker.

After an hour and a half in the smoker, the internal temp registered 177.5°F / 80.8°C, which was just a shade higher than most of the recipes I’d read suggested (though a couple said 150°F / 65.5°C was where they pulled it out). Since I wasn’t planning on making tongue jerky, I removed it and gave it 25-ish minutes to rest before trying a slice.

INGREDIENTS

2 lbs. / 1 kg pork tongue
1 tbsp. / 17 g salt
1/2 tsp. / 1 g pimentón de la Vera
1/2 tsp. / 1 g black pepper
dash Mexican Oregano flakes (optional)

DIRECTIONS

Rinse off meat in cold water, pat dry. Place in Dutch oven or pasta pot. Cover with water and add a pinch of Mexican oregano flakes, bring to a boil on stovetop, then simmer, covered, for one hour OR cook on steaming rack in pressure cooker for 40-45 minutes on high pressure (add 1.5 cups / 350 ml water and pinch of Mexican oregano flakes for aroma). Remove meat and allow to cool, then peel tongue with chef’s knife or by hand.

While meat is cooling, turn on electric smoker to Hi Smoke setting (or 225°F / 107°C) and allow at least 15 minutes to come to temp.

Make spice rub with salt, pimentón de la Vera, and black pepper. Rub liberally into meat, making sure to get rub into any nooks.

Place on smoker for approximately 90 minutes, or until internal temp registers 175°F / 79.5°C, then remove and allow meat to rest at least 20 minutes before slicing.

Just had a slice, and boy, is it tender. Now all I need is a bolillo or a Kaiser roll, some mayo and either mustard or bbq sauce, maybe some of the living butter lettuce we have in the fridge, and I’ll be one happy camper… even if I’m not at Cantina Río Coves in Galicia.

Some pig!

When Grapes Met Cotton Candy – A Goofy Story

0

Back in the day.

Back in the carefree, racist, Hazmat-filled days of 1964, Pillsbury decided to take on a soft-drink behemoth that has since acquired a second, political, meaning (Kool-Aid®) with “Funny Face.”a series of imitation drink mixes of their own.

There were initially six iterations of Funny Face, two of which (Injun Orange and Chinese Cherry) were promptly withdrawn because they were have adjudged to have exceeded even the racist norms of their time, and it was a time when many people actually got embarrassed about creating racist memes. Further scorn was heaped on the product when it was discovered to have been sweetened with cyclamates, which were declared a carcinogen and banned in America in 1970. But Goofy Grape was my fave Funny Face drink, cancer be damned.

At that time, Thompson Seedless green grapes were pretty much the only seedless variety to have penetrated the market, but since then, several horticultural entities have stepped up to attempt to unseat the Thompson. For instance, the University of Alabama (!) has developed several varieties, many of which (Saturn, Venus, Jupiter, etc.) are named after planets. [Not particularly surprised they didn’t name a grape after Uranus.]

On the private side, a producer known as Grapery® was, and is, bringing a little magic to the market in totally unexpected ways. Owners Jack Pandol and Jim Beagle of Grapery® both grew up in commercial ag; in fact, Pandol’s grandfather Stjepe emigrated from his native Croatia at the early 1900’s and farmed his first vineyard in California’s San Joaquin Valley not far from where Grapery®’s vineyards now stand.

The grapes, many of which look surprisingly, um, unusual are all non-GMO. And the shapes and flavours! Oh my.

Best of both worlds.

My favourite is a variety the bride brought home today and is only available for about 6-8 weeks each year. Cotton Candy® grapes look pretty much like your standard Thompson Seedless, but they embody that ephemeral sweetness for which cotton candy is famed. I also found some Moon Drops® at the local super; they seem — to me anyway — to have a more distinctive shape than taste, but they’ll definitely liven up a salad visually.

Moon Drops®.

Like any crop, it has a limited harvest, so git while the gittin’ is good. There’s just no substitute, and they’re worth getting goofy over.

Smoking Sun-Dried Tomatoes and Roasted Tomatoes in an Electric Smoker

1

Sun-dried on the left; roasted and packed in oil on the right.

Over the course of playing with my new electric pellet smoker, I’ve discovered lots of recipes for smoking fresh tomatoes, but none for smoking sun-dried tomatoes. You can certainly buy smoked sun-dried tomatoes, but they’re not cheap. I happened to have both a bag of sun-dried tomato strips and a bottle of roasted tomatoes packed in oil lying around, so I thought I’d give then each a go.

This time, the sun-dried tomatoes are on the right.

I put them in the smoker at 175°F / 80°C for 15 minutes and checked them; no apparent smoky taste. So I turned the smoker to the “Lo Smoke” setting, which (somewhat counterintuitively) produces more smoke. [According to the mfr., Lo Smoke temp runs about 175°F / 80°C, Hi Smoke about 210°F / 100°C, and that on both settings the auger timing is slightly slowed, allowing pellets to smolder more than burn. In case you’re wondering, I used the Traeger Grills Signature Blend pellets, made from hickory, maple, and cherry woods.]

After 15 more minutes, I was sensing a bit of smokiness, but the tomatoes’ concentrated flavour still wasn’t permitting much to come through. By 45 minutes in, the smoke seemed more noticeable, but still not quite where I intended it to be. My concern at this point was not to allow the tomatoes to turn acrid, which over-smoking will do to just about anything if you aren’t careful. So I set the timer for one more 15-minute jaunt.

Roasted on the left, sun-dried on the right, looking pretty much as they did when they started, but tasting noticeably different.

Huzzah! Just the edge I was looking for. I put the roasted tomatoes and their oil back into their original jar, and I popped the sun-dried strips into a Snapware Glasslock storage container with a little Olea Farm rosemary olive oil.

Two takeaways:
1) Next time I will spritz the sun-dried tomatoes with a little olive oil, or even water, because the moisture helps them take the smoke better.
2) If your pellet grill doesn’t have a “Lo Smoke” setting, I’d smoke these at 210°-230°F / 100°-110°C for about 30-45 minutes, tasting at the half-hour mark.

Bacon-Wapped Peaches on the Electric Smoker

2


If this isn’t the easiest summertime recipe ever, I don’t know what is. Summer, of course, is stonefruit season, and peaches go together with smoke and bacon just as magnificently as Peaches goes together with Herb. Simply cut as many peaches as you care to, wrap them each in a slice of bacon, stick them with a toothpick, and splash them with a little balsamic vinegar… or not. Half an hour later, they’re done! [I used a pellet mix of hickory, maple, and cherry; lighter woods (say, other than mesquite) are recommended.]

I served them with a little conserva de pulpo (Galician tinned octopus in olive oil), which I put, in the can, on the smoker for the last 15 minutes of cooking.

UPDATE 24 August 2019: Just got a shipment of fresh peaches from Frog Hollow Farm, and it was a complete game changer. I’m talking the difference between a Toyota RAV4 hybrid and a Lexus RX 450h. Or, if you’re not a car buff, the difference between Mumm DVX and Nicolas Feuillatte Palmes d’Or. In other words, you’ll be starting off at an okay place with the basic recipe, but the upgrade is more than an order of magnitude better.

INGREDIENTS

2-3 firm yellow or white peaches, halved
4-6 strips thick cut bacon (1 per each)
1 tbsp. / 15 ml balsamic vinegar (optional)

INSTRUCTIONS

Preheat smoker to 325°F / 163°C
Cut peaches in half
Wrap 1 bacon slice per peach half around fruit, secure with toothpick
Drizzle balsamic over peaches and bacon
Place peach halves directly on grill, close lid
Turn peach halves over half way through (15 minutes)
Remove at 30 minutes and let cool slightly

Electric Smoker Meats Its Match With Leg Of Lamb Two Ways

0

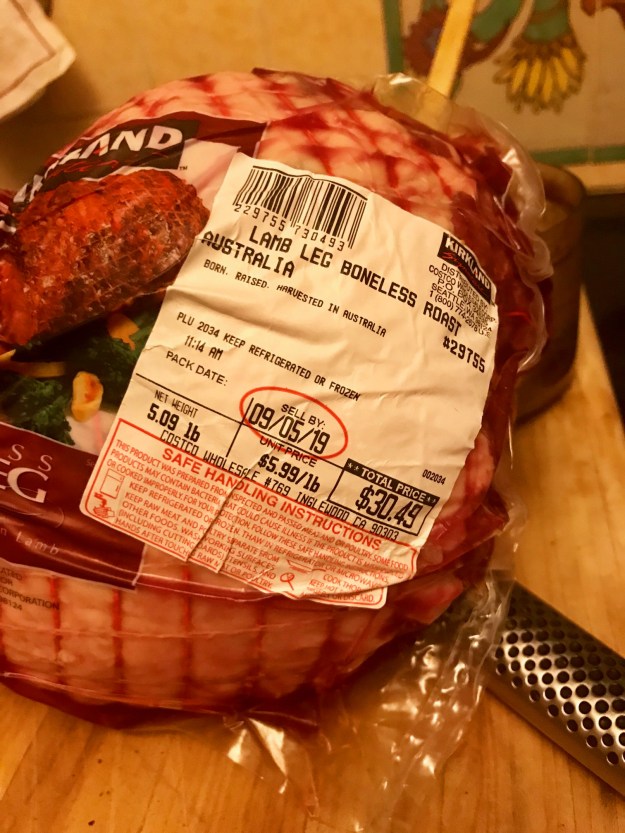
Sell by? It will have been long gone by.

Headline pun intended.

The Internets have no shortage of opinions when it comes to smoking meats, and one is on a fool’s errand to attempt to secure a definitive answer. PRO TIP: This is NOT a definitive answer.

I’ve been grilling leg of lamb for about half my life now (which is to say over 30 years), and I was excited to try our new pellet smoker to find out how it stacked up against the various other methods (Big Green Egg, gas grill, trad charcoal grill) I’ve employed before.

The short version: Very Well.

You don’t need to follow me down the rabbit hole unless you’re slightly — like me — monomaniacal about research prior to grillage. If you are, I suggest these YouTube vids, one from Malcom Reed’s HowToBBQRight, the other from Darnell McGavock Sr.’s D Grill. Both of them used electric pellet smokers, so they were the most relevant to my immediate project, but I also watched a bunch of others. The reason I frequently turn to YouTube first is to see the actual cooks and their process(es) in motion, as well as to hear comments they might not bother to include in a printed recipe. [I also visited Steven Raichlen’s very informative online home, which I recommend highly.]

Originally, my intention was to make pulled lamb, which in theory comes off the smoke at a higher temp than your standard smoked leg. From what I’ve read (at least in terms of pork), there are two sweet spots for removing meat from the grill/smoker: one is about 145-150°F/63-65.5°C, the other is about 195-203°F/90-95°C. Apparently, the in-between is the “tough zone.” I’ve encountered this phenomenon before when cooking octopus, squid, and shrimp (not always on the grill), so it doesn’t surprise me. Perhaps a quick revisit to Harold McGee’s On Food and Cooking: The Science and Lore of the Kitchen will yield an answer as to why, but that’s for another post. I opted not to pursue the higher finished temperature, because I read that the leg was not sufficiently possessed of marbling fat to make it tender at that temp; that recipe recommended bone-in lamb shoulder instead.

Lose some, but not all, the fat.

PREP
No matter how thoroughly your butcher trims the fat off your lamb leg, it’s not enough. You don’t want to take all the fat away, but an excess will give it that “gamy” taste that causes people to think they don’t like lamb. You can see in the lower right of the photo above how much fat I excised. I cut the leg about 60/40%, because I was feeling a bit experimentative, both in terms of marinating and cooking.

Pan-Asian Marinade Ingredients.

Marinade #1 (Asian Style) (for the 60% piece)
INGREDIENTS
2 tbsp. / 30 ml sesame oil
2 tbsp. / 5-6 cloves minced garlic
3 tsp. / 16 g ginger paste
6 star anise pods, ground
3 tsp. / 5 g five-spice powder
1 tsp. / 2.5 g white pepper

It’s Turkish-ish, kinda.

Marinade #2 (Turkish-ish) (for the 40% piece)
INGREDIENTS
¼ cup / 60 ml olive oil (I used Olea Farm, which I love)
¼ cup / 60 ml pomegranate molasses
3 tbsp. / 55 g Darrell & Nil’s Turkish Blend Spice*
5 large slices preserved lemon
2 tbsp. salt (preferably kosher or flaked; I used Læsø Salt from Denmark, because I had some and it’s a good story)

*Yeah, you’re gonna have a tough time finding that. It’s made from paprika, black pepper, cumin, coriander, allspice, cassia, sumac, oregano, Maras chile, clove, cardamom, and nutmeg. Maybe I can get them to cough up the actual recipe, but if not, make sure you include the sumac and Maras chile, which really push the blend toward Istanbul.

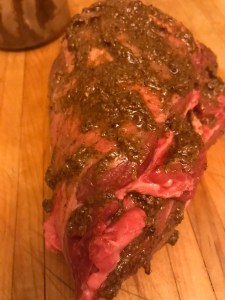
Rub rub rub it in; get your fingers into it; don’t be shy.

MARINATION DIRECTIONS

Rub it in to all the cracks and crevasses, and allow the lamb to chill overnight in the fridge. Due to a scheduling conflict, I left it in for two nights. Not a problem.

A WORD ON PELLET SMOKING

Ask 15 pitmasters what the best type of wood for smoking lamb might be, and you’ll get 67¾ answers. After way too much agita, I succumbed to crowdsourcing and went with Amazon’s Choice, Traeger’s Signature Blend (their hickory pellets were the #1 Best Seller). I am sure that at some point in the future, I will have a hankering to try a specific type of wood with a specific recipe, but this wasn’t it. Think Ford, not Ferrari.

A little over an hour in the smoker. Some colour, but no “bark.”

ON THE SMOKER

I checked the pellet level and fired up the smoker, letting the machine come up to temp (250°F/121°C) while I took the lamb out of the chill chest and tied it up with butcher’s twine to help ensure an even roast. 20 minutes later, I placed the pieces fat side up on the grill and left them alone, apart from one quick peek about halfway through to see if they needed to be swaddled in aluminum foil to keep from drying out (they didn’t). After 3.5 hours on the electric pellet smoker at 250°F/121°C, the one on the left came off at an internal temp of 148°F/64.4°C, the one on the right came off at an internal temp of 166°F/74.4°C (which is regarded as the high end of acceptable for lamb). Obviously, the marinades made some difference in the appearance of the two pieces, and I can say that the 166°F/74.4°C piece was not quite as tender as the other one, though both were highly acceptable, texture-wise, and both were absolutely delicious.

After the meat rested, I popped it back in the fridge for a few hours, but it re-emerged at dinnertime for “lambwiches” (lamb sandwich with rocket and mayo on a Kaiser roll). Still moist and tender, full of flavour. And hands down, the most effortless process for leg of lamb I’ve found yet. Just like I would be happy with my Instant Pot even if I used it for nothing other than beans, I’m thrilled with the Camp Chef SmokePro DLX even if it only ever gets used for lamb… which it surely won’t.

Soupe de la Semaine: Cajun White Bean, Andouille, and Collard Green Soup

0

It turns out, thanks to the bride’s penchant for genealogical spelunking, I have recently discovered Acadian blood in my veins. It’s not an enormous surprise; on Prince Edward Island, the tiny Canadian province from which I hail, the populace is drawn largely from Scots, French, and Irish stock. In practise, PEI Scots didn’t tend to intermarry much back in the day, not just due to the language differences (Scots held onto their Gaelic before yielding to English), but also thanks to Catholic-Protestant interfaith snipery. It is, however, an island, so exceptions were occasionally made. Hence the occasional Arsenault or Paquet or Daigle or Cheverie among the Campbells and MacLeods and MacMillians and MacKays. And conversely.

Acadia, for those of you unfamiliar with the term, was originally a French colony that included the provinces of Canada generally known as the Maritimes, and a little of what is now Maine. [Fun fact: Prince Edward Island was originally known to its European settlers as Île Saint-Jean.] Over the years, wars and treaties with England whittled away at the territorial boundaries, and the people referred to as Acadians tended to be identified more by their language (French) than by their place of birth.

Unfortunately, things really went sideways between the Canadian Anglophones and Francophones in 1755. As a consequence of their participation in the French and Indian War, the Acadians were given the choice of swearing allegiance to the British king, or clearing the premises. You can imagine how that went. What happened next became known as the Great Upheaval, the Great Expulsion, the Great Deportation, or Le Grand Dérangement. Many Francophones, including some of my direct kin, were forcibly repatriated to France (which, incidentally, didn’t really want them). Other Acadians fled south to Louisiana, where they became known as Cajuns.

While there’s a lot of intermingling between Cajun and Creole cultures, the reason this soup is more properly identified as Cajun rather than Creole is largely due to the absence of tomatoes, which is one simple signifier separating the two storied cooking traditions. By some measures, Creole cuisine tends to be “city food,” and Cajun cuisine tends to be “country food,” with simpler ingredients and less reliance on sauces. Please do note that these are generalisations, so please don’t flood my inbox with picayune (or Picayune) commentary to the contrary.

I don’t want to sound like a broken record (or, for our younger readers, digital audio stutter), but it never hurts to splurge on some of the key ingredients. I purchased fresh, uncooked andouille sausage (hotter than the quite tasty Aidells’ pre-cooked commercial version I used in an earlier iteration). The white beans in this recipe were Cassoulet heirlooms from Rancho Gordo. Because I had no homemade stock, I substituted Aneto, which is excellent, if pricey. I deglazed the pot with Croma Vera 2017 Rosé, because it was delicious, handy, and fit the bill. And while I seasoned the soup with fleur de sel from Ibiza, that was merely a pointless extravagance that gladdened me and enhanced the back story. We writers care about that stuff.

Best broth you can buy.

This soup can be made entirely on the stove top. I chose not to, partly due to convenience and partly due to shoddy time management. My Instant Pot® allowed me to bypass the overnight pre-soak for the dried beans, and it also condensed the time necessary to tenderise the celery and the collard greens’ stems. You may, of course, use canned beans and/or canned collard greens… if you must.

How much is enough? Maybe 6 cups or so, chopped. Be as green-dependent as you like.

While I favoured traditional Cajun ingredients for this recipe (although I omitted bell pepper, one-third of the Cajun “holy trinity”), my pal Inmaculada Sánchez Leira (no slouch in the cooking department herself) noted that, save for the comparative lack of root vegetables, it’s not particularly far removed from Caldo Gallego, the classic Galician soup. It’s also fairly close to many recipes involving Black Eyed Peas, traditionally served in the South for good luck on New Year’s Day. In fact, you could easily sub black eyed peas into this recipe… and yes, you can get them from Rancho Gordo (if they’re not sold out).

INGREDIENTS
1 lb. / 1/2 kg dried white beans (or four 15 oz. cans cooked beans, drained and rinsed)
30 ml / 2 tbsp olive oil
2 lbs. / 1 kg Andouille sausage links
1/2 cup / 120 ml white or rosé wine (or water or stock) for deglazing
1 large onion, finely chopped
3-4 garlic cloves, minced
2 large carrots, chopped or sliced into coins
2 large bunches fresh collard greens
4-6 large stalks celery, finely minced
1 medium sprig fresh thyme
3 liters / 12 cups good quality chicken and/or vegetable stock (I used Aneto chicken stock)
1 liter / 4 cups water
5-10g / 1-2 tsp salt
1/3 cup / 80 ml apple cider vinegar
chopped fresh parsley for garnish, optional

DIRECTIONS
Rinse beans thoroughly, then drain (whether you’re using canned or dried beans). [This is where you would add the dried beans and two liters of stock to the Instant Pot®, if you are going that route. Add the 1/2 kilo / 1 lb. of dried beans and about 2 liters / 8 cups liquid (I used all stock). Cook according to instructions. For more recommendations on cooking times, check here and here.] My unsoaked Cassoulet beans took 48 minutes on high pressure in the Instant Pot®, with a natural release (I’m told this helps to keep the bean skins from splitting). Should you choose, you can use the stovetop method to cook beans pre-soaked overnight (or dried beans straight from the packet should you choose). When beans are soft, set cooked beans and stock aside.

Here is where the two paths diverged in the wood. First, I will lay out the stovetop version. Then, I’ll include the Instant Pot® shortcut, for those of you who care to use it.

STOVETOP VERSION
Dice onion; mince garlic and celery. Cut carrots into coin-size slices (if the “coins” get to be larger than a quarter or a 2€ coin, cut them in half). Strip collard green leaves from their tougher stems, slice (or tear) the leaves and dice the stems (skip this last bit if using canned collard greens).

In a large soup pot, heat the olive oil. Then season the Andouille links with a little salt, leaving them whole, and brown them for about 10-12 minutes, or until cooked through and browned on all sides. Remove links from pot and let them cool.

Deglaze the browned bits with a little water, stock, or wine. Make sure to give pot a good scrape.

The liquid and browned bits will add depth to your stock base. Plus, you’ll have pre-cleaned the toughest stain in the pot.

[NOTE: If using Instant Pot® shortcut, skip to shortcut below, then come back here.]

Sauté the onion, celery, carrots, collard greens, thyme sprig, and garlic for about 7 minutes, until soft without colouring (the celery and the collard stems will take longer, so don’t wig out if they’re still a little al dente). While the vegges are in sauté mode, slice or crumble the cooled Andouille sausage. Add the beans and stock you set aside earlier, the extra liter of stock (if you’re not using the Instant Pot® shortcut), Andouille, vinegar, and water, along with a little salt. Bring to a low boil and then reduce heat. Simmer for about an hour or more, or until celery and collard green stems have softened to desired degree. Adjust salt and vinegar, if necessary; discard thyme sprig. Ladle into bowls and add optional shredded parsley leaves for garnish.

The Instant Pot® softens up those tough veggies real quick.

INSTANT POT® SHORTCUT
Instead of adding celery and collard green stems and thyme sprig to the main soup pot on the stove, put them into your Instant Pot® with a liter of the stock, set to high pressure for 7 minutes on the Bean/Chili setting, making sure vent is set to Sealing. When done, you can use either natural or instant release. [If you choose the latter, take care to avoid escaping steam.] Discard thyme sprig and add remaining contents to main soup pot. Continue with recipe as above
When Life Hands You Lemons, Preserve Them

1

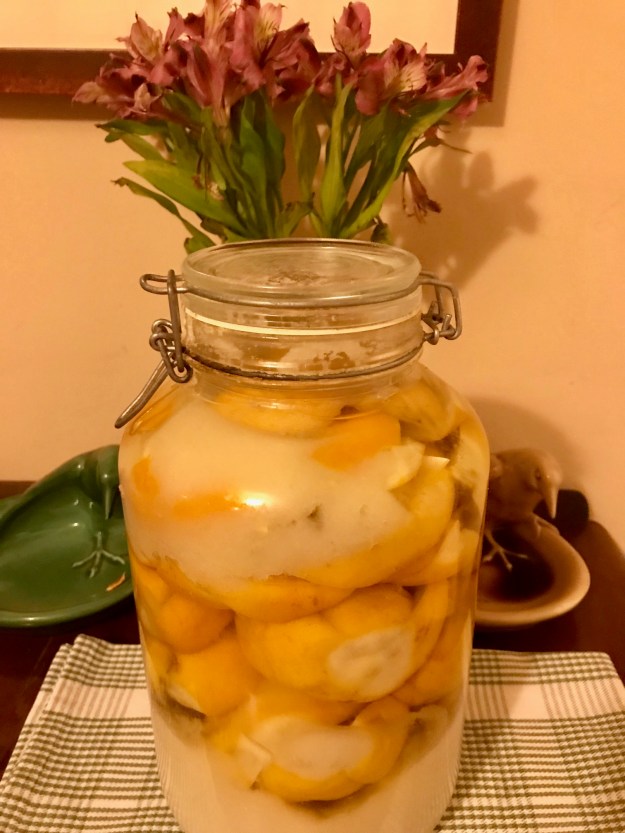
The chopstick jig proves invaluable to the preservation process.

In the words of the late Richard Armour, expanding on a poetic observation by the also late Ogden Nash, “Shake and shake the ketchup bottle / None’ll come, and then a lot’ll.” [Nash’s original, entitled “The Catsup Bottle,” is said to have read “First a little / Then a lottle.”] And while I am writing about a different condiment here, the purpose of the verse is to reiterate what every amateur crop-grower knows: your fruit tree, your tomato plant, your herb garden has a tendency to belch forth its bounty from zero to a degree where you’re practically begging neighbours to take the extra off your hands in about the time it took to write this sentence.

Thanks to a 10th century Egyptian Jew who was chief physician at Saladin‘s court, we have a way of managing the “very pretty” lemon tree‘s excess. And all it takes (apart from the lemons, of course) is a bunch of salt and a little patience.

Abū al-Makārim Hibat Allāh ibn Zayn al-Dīn Ibn Jumay‘ (a/k/a Abu-‘l-Makārim Hibatallāh Ibn-Gumaiʻ, but usually truncated to Ibn Jumay’, sometimes without the trailing apostrophe) apparently was a fairly prolific author, penning no fewer than eight medical tomes. His enduring masterpiece, though, seems to have been the lemon-plus-salt recipe that has gone largely unamended since the 12th century, and which was included in his treatise On Lemon, its Drinking and Use. The “drinking” part yielded the first known recipes for lemonade, and the “use” part gave us the preservation technique employed herein. Sadly, no original manuscript seems to have survived. As Toby Sonneman notes in his excellent book Lemon: A Global History, though, another physician [Ḍiyāʾ Al-Dīn Abū Muḥammad ʿAbdllāh Ibn Aḥmad al-Mālaqī (better known as Ibn al-Bayṭār)], born in Spain the year before Ibn Jumay’ died, lifted pretty much the entire On Lemon… text and incorporated it into his Al-Kitab ‘l-jami’ fi ‘l-aghdiya wa-‘l-adwiyah al-mufradah, also known as The Comprehensive Book of Foods and Simple Remedies. It went through dozens of editions in Latin, and was translated into French by Lucien Leclerc in 1842. To the best of our knowledge, Netflix has not as yet optioned it for a mini-series.

The uses for the umami-laden preserved lemon are legion. Just ask any friend from North Africa. Marinades. Drinks. With fish. With chicken. In salads. In risotto. Once you taste it, don’t be surprised if our imagination kicks into overdrive.

One note of caution: the preserved lemon(s) should be rinsed before using, as they are saltier than a sailor on leave. And, somewhat counterintuitively, the part you use is the rind. Go fig. But if you make these guys once, you’ll be a convert for life.

Lots and lots of lemons.

INGREDIENTS
NOTE: Amounts will vary depending on the number of lemons and size of container

lemons
kosher salt, or other large-crystal NaCl
Lemon juice, if necessary
cookie sheet, to keep the salt from going everywhere
Jar with lid (size depends on number of lemons)
Patience
Nothing else!
Ignore other recipes that call for cinnamon or bay leaves or whatever.
Totally unnecessary.

DIRECTIONS
Wash and dry preserved lemon container. [Some recipes have you go the full boiling-it-sterile route, which seems excessive to me. After all, the salinity and the acid content do a magnificent job of creating a hostile environment for wee beasties. Just make sure your lemons are covered with salt and/or juice during their stay in the jar. ]

Wash lemons.

Cut lemons nearly into quarters, taking care not to sever them entirely (see picture at top of post, in which chopsticks are employed as a device to keep the knife from cutting all the way through the lemons). Rub salt generously over all the interior surfaces, then pack salt inbetween the cuts. Place salted lemon in jar, and cover with salt. Repeat until jar is full, then top off the jar with salt and a little lemon juice, if it’s available and convenient. Basically, the salt will leach out the juice from the lemons, and you’ll have a sort of brine in which the lemons will morph into a really delicious condiment.

Wait about 30 days, turning the jar occasionally to mix it up and get the saline/lemon solution into all the nooks.

Use lemons. Refrigerate after opening.

Cacio e Pepe, Heretic Style (with Feta!)

0

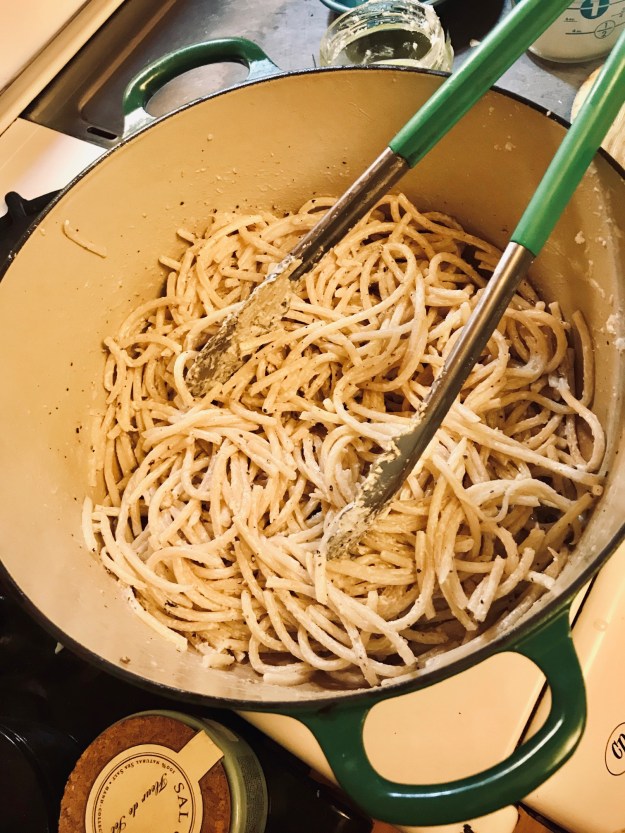
Solo pepe macinato fresco, per favore.

Cacio e pepe* couldn’t be simpler, right? It literally translates to “cheese and pepper.” But this is much like saying fútbol (or football or soccer, depending on your home) is simple; you just kick a ball into a net. People actually come to blows over whether to use Pecorino Romano, or Parmigiano Reggiano, or Grana Padano, or a blend of two or three of them, or one or more of them with a smidgen of Asiago. Not that I want to tar them all with the same brush, but if Italians didn’t invent arguing, they certainly perfected it.

Ultimately, you want a salty cheese that can (with a little of the pasta water) melt into the warm noodles to coat them in a creamy sauce, much the way the Day-Glo orange powder, along with some milk and butter, lovingly hugs Kraft Dinner. And, as it happened, I had such a cheese: Meredith Dairy Sheep and Goat Cheese, a Feta-like concoction from Australia. No idea where I got it; it sells for a positively jaw-dropping price on Amazon, and I won’t even link there because no sensible person would pay $14.99 USD + $12.99 shipping for an 11 oz. / 320 g jar, good though it is. [And you’re hearing this from someone who regularly uses chicken stock that sells for $7 USD per liter.] It’s possible that you might find something similar if you have a Greek market in your area, but it seems to be ridiculously expensive everywhere I’ve looked online. Fortunately, it is also stupidly easy to make, and I expect it will forthwith become a fridge staple, much like preserved lemons. Incidentally, some recipes will tell you to use your marinated cheese within two weeks. No need, especially if it is refrigerated. One blogger claims to have consumed some that was over four years old, and found it delicious. [Full disclosure: I just checked my jar, and the recommended “use by” date was December 2016. I promise to have my survivors update the page, should it kill me.] Not only does the marination process mellow out the Feta, but when you’re done with the cheese, the leftover oil can be used in a salad dressing. [What’s the analogue of “nose-to-tail” here? “Lid-to-base?”]

Bucatini is the ideal pasta for this dish, thanks to its toothiness. As with the other ingredients in this recipe, because there are so few, you ought to use the best you can reasonably afford. I even used filtered water for making the pasta, rather than just taking it directly from the tap.

INGREDIENTS
16 oz. / 454 g pasta (such as bucatini, egg tagliolini, or spaghetti)
11 oz. / 320 g marinated Feta (I used store-bought, but it’s easy to make at home)
1 tbsp. / 7 g freshly cracked black pepper, plus some for finishing (one recipe recommends 30 turns of the pepper mill at the coarsest setting)
1 cup / 250 ml pasta water, reserved
salt, if needed (between the salted pasta water and the saltiness of the Feta, I didn’t add any other salt)

DIRECTIONS
Make marinated Feta at least a day before.

Cook the pasta and drain, reserving 1 cup / 250 ml of the pasta water for later. Return drained pasta to the still-warm pot; crumble in bits of cheese, adding reserved pasta water a bit at a time to aid in the cheese melting. Combine by tossing with tongs. Add 1/3 or so of the pepper. Repeat process until cheese is melted and pepper is distributed. [NOTE: You may not need all the reserved pasta water; the sauce is intended to coat the noodles and cling to them. When you’re done serving, there should be virtually no trace of the sauce left behind, unlike with a marinara sauce.] Transfer pasta to bowl or plate; finish with a bit more ground pepper.

Serves 4 generously.

*[Why it’s not “formaggio e pepe” is a mystery to me. Perhaps someone fluent in Italian can lend a hand here.]

Soupe de la Semaine: Chicken Noodle Soup with Basil and Spinach

1

The Warhol print was probably tastier.

I realize that I tool on Campbell’s soups a lot — probably more than they deserve, especially since I am descended from Campbells on my Mom’s side (not particularly unusual for someone of Scots heritage). And while Clan Campbell were a prolific lot, it’s likely far more Campbell has passed through my alimentary canal than was ever in my bloodline.

In my youth, their ubiquitous cans were a staple in our pantry. I was especially keen on Scotch Broth, Vegetable Beef, and Beef with Vegetables and Barley. I NEVER liked their Chicken Noodle, since it always got served to me when I was sick. The association has stuck for decades. But in a strange twist of fate, I find myself making soups for an ill friend, so I decided to revisit my childhood chicken soup trauma.

There’s nothing wrong with chicken in soup; Tom Kha Gai is an all-time favourite. And Mexican chicken soups aplenty with tomato and chili and cilantro show up happily, and not infrequently, at table. But my challenge was to attempt to concoct something that was at once chicken noodle soup and not chicken noodle soup. A Zen kōan of a soup, so to speak. In order to achieve this aim, I needed to isolate those elements of trad North American chicken noodle soup that failed to delight me, and simply Marie Kondo them away.

ISSUE #1: The Broth
Typical canned chicken noodle soup features a briny broth with no more point of view than a real estate agent trying to sell you a house. I wanted a stock that would echo our more trad notions wthout being shackled to them.

ISSUE #2: Carrots
Love me carrots, I really do. But not here. There’s a reason Billy Connolly developed a routine based around how, when you regurgitate, there’s always “diced bloody carrots in it.”

ISSUE #3: Celery
Celery in commercial canned soups frequently develops a revolting, slightly slimy texture, and it played an outsize role in the sense-memory flavour of my canned nemesis. I could have opted for celery seed, but I really didn’t want the texture or the taste.

ISSUE #4: The Noodle
Nobody wants a limp noodle. Typically, they look like tiny tapeworms, they have zero toothiness, they shame the marriage of water, flour, and egg. My noodle was going to be strong and proud.

ISSUE #5: The Chicken
This will sound like the proverbial deli diner’s complaint that the food wasn’t good and the portions were too small. But the industrially processed 6mm chicken bit cubes were virtually flavourless, and distributed very sparingly. Hey, I get it — chicken is the soup’s most expensive ingredient, and more chicken = less profit. I responded by loading the pot up with about three pounds (1.5 kilos) of hand shredded boneless, skinless chicken thighs.

But enough of what I didn’t want. Here’s what I did want: simple, healthy (after all, I’m feeding a cancer slayer here), and tasty. I don’t know how you go about planning your recipes (other than having the good fortune to land here, for which I am grateful), but I typically overthink. I read books, I go online, I consult my bride, I mentally review every version of the dish I’ve ever ingested, I engage in an internal Socratic dialogue, I ask friends about their preferences, I fuss.

While in the store buying chicken, I came across a special on fresh basil. The die was cast: green stock. I also had some spinach powder in my pantry, which I suspected would complement the basil, as well as providing an excellent source of beta-carotene and iron. Besides, spinach made Popeye strong, and the Big C is more formidable a foe than Brutus (or, if I might betray my age, Bluto), so bring it on. [You can use regular spinach if you want; I just wanted to play with my new toy. This spinach powder is nothing more than dehydrated fresh spinach ground into green dust. No additives.]

One caveat: the fewer the ingredients, the better each one has to be. Because I had no homemade chicken stock, I used the best commercial stock money can buy. Free range chicken. Wine and olive oil I would proudly serve at table, not hide in the kitchen. Durum semolina pasta from Italy (even if I will use a different shape next time). Of course you can economise (if you have the time and the freezer space, you can save plenty on the stock by making your own), but even in my extravagance this is still cheaper per serving than what you’d probably pay for a bowl at a restaurant.

INGREDIENTS
30 ml / 2 tbsp olive oil (I used Olea Farm Garlic Blush)
3 lbs. / 1.5 kg boneless skinless chicken thighs (about 10)
sea salt and pepper for seasoning chicken
2/3 cup / 150 ml dry white or rosé wine for deglazing (water or chicken stock work also)
1 large onion, finely chopped
4 oz. / 115 g fresh basil, shredded or chopped (reserve about 10-15 leaves for garnish)
3 liters / 12 cups good quality chicken stock (I used Aneto Low-Sodium Chicken Stock)
1/4 cup / 60 g spinach powder (or 4 oz. / 115 g fresh spinach, shredded or chopped)
16 oz. / 454 g dried pasta, cooked separately (I used casarecci, but next time it will be gemelli, ciocchetti, or gigli)
2 tbsp. /35 ml / juice of one fresh-squeezed lemon (I plucked a fresh Meyer from our tree)
OPTIONAL: Shaved or grated Parmesan cheese for garnish.

DIRECTIONS
Cook the pasta and set aside. [You can even undercook it a bit, in fact, given that it will swim in the broth later. Dealer’s choice.] One piece of advice that has served me well is that the pasta water should be as salty as the sea. This, and seasoning the chicken well, meant the recipe required no additional salt.

♫ Brown the chicken in the pot, doo-dah, doo-dah. ♫

Season your chicken liberally with salt and pepper on both sides. In your soup pot, drizzle in about 2-3 tablespoons (30-45 ml) of olive oil, and cook the chicken. Depending on the thickness of the thighs, and the heat of your range top, this should take about 15 minutes. You’re looking for a little browning on the outside, but this is not intended to be fried chicken soup. When the chicken is done (I had to do mine in two batches), remove it to a plate.

What’s left after the chicken cooks is called the fond, and not just because I’m fond of it. When you deglaze the pot, the browned bits will transform into a very tasty sauce.

While the chicken is frying, dice the onion and chop the basil (and spinach, if not using powder), reserving a few basil leaves for later garnish. Afer removing chicken from soup pot, deglaze the pot with some wine or other liquid, then sweat the onion until it turns translucent. Add chopped basil, chicken stock, spinach powder (or chopped spinach), and reserved chicken thighs (including the juices that accumulated on the plate they sat on). Bring to a low boil, then reduce heat and simmer for at least half an hour to 45 minutes or so (plenty of room for error here without any harm).

After the first simmer, remove chicken (again! It keeps jumping in and out, doesn’t it?) and set aside. Allow chicken to cool sufficiently so it can be hand shredded (or chopped, if you must).

OPTIONAL STEP: Remove most of the solids (basil and onion) with a slotted spoon and process in a blender or food processor with a little of the cooking liquid. Alternatively, you could use an immersion blender. This will thicken the liquid slightly.

Return shredded chicken to soup and add cooked noodles. Simmer long enough to warm the noodles, at least 15 minutes. Add lemon juice a few minutes before serving, to brighten and balance the flavour. Taste and adjust salt and pepper, if necessary.

Soup. Mmmm-mmmm-good.

Ladle into bowls, and garnish with chiffonaded basil leaves.

Instant Pot® Vegan Risotto with Mushrooms, Preserved Lemons, and Basil

1

Canadian man makes Italian food.

As the news swirls with epic chills in the Midwest due to a polar vortex that has been altered by climate change, and when rain threatens my California home, it seems like the rib-sticking comfort of risotto is a reasonable response. Unlike my previous recipe for Saffron Risotto with Peas and Langoustine, this version was concocted in a cool bit of technology that had barely penetrated the public consciousness back then, and it’s vegan (although for my second helping, I grated a bit of Pecorino-Romano on top, and found it excellent).

Full disclosure: Although the idea for combining mushrooms and preserved lemons in a risotto originated with a yearning created in my tastebuds, several blog posts guided my thinking as I developed the recipe. You can find them at the Simple Vegan Blog, Vegan Heaven, Vegan Richa, Vegan Huggs, Chew Out Loud, and the ubiquitous Epicurious.

As is often the case, the recipe was developed around existing ingredients; I had some fresh basil in the fridge, it seemed like it would fit in with the other ingredients, and KAPOW, in it went. [One of my #squadgoals for 2019 is to undertake fewer unintentional fridge-based science experiments, a/k/a using ingredients before they stink up the joint.] Same deal with the dried mushrooms; they had been intended for a soup I was going to make for a friend who I later found out doesn’t like mushrooms.

The dried mushrooms I used were porcini (Boletus edulis), and an interesting variety known variously as slippery jack, pink boletus, and sticky bun. Although the package referred to them as Boletus luteus, which is their original 1753-era moniker gifted by the legendary botanist, physician, zoologist, and taxonomist Carl Linnaeus, they are now known to be of a different genus and are more properly called Suillus luteus. You are of course welcome to use fresh mushrooms in addition to or instead of the dried.

Two other ingredients might be slightly unfamiliar to those with a limited pantry. Nutritional yeast is sold as flakes, granules, or powder, and is often employed in vegan dishes to add a cheesy or nutty flavour. You’ll find it in my recipe for Vegan Potatoes au Gratin, in fact. If your local supermercado carries it, you’ll likely find it next to the spices or in the health food/gluten-free/dairy-free ghetto. If not, well, your local GNC or Amazon.

The other possibly unfamiliar ingredient is preserved lemons. Common in South Asian and North African cuisine, preserved lemon is basically a brined or pickled lemon, generally salted heavily and marinated/pickled/brined for a month or so in salt and either lemon juice or water, if liquid is employed. Sometimes spices are added to the mix, but not generally. If you have neither the time, patience, or lemons for this process, they can be found in jars at many Indian, Middle Eastern, or North African markets, should you have such in your area. And yeah, Amazon. But seriously, they are super easy to make and they last a long time, so even if you have to buy a jar to get started, you should make your own, too. Surprisingly, the part you mainly want to use is the peel, not the flesh. Weird, huh?

The Instant Pot® doesn’t let you off the hook entirely when it comes to stirring stirring stirring your risotto; it bypasses only about 85-ish percent, which is not insubstantial. And while this method in all honesty may not yield that Michelin-star-worthy risotto of your Tuscan dreams, it gets close enough that I’ll take it on a weekday when I don’t have the Zen-like attitude or schedule that the former requires.

INGREDIENTS
100 g / 3.5 oz dried mushrooms (to be rehydrated) (or 16 oz. / .5 kg fresh mushrooms, preferably crimini)
2 tbsp. / 30 ml extra virgin olive oil (or other preferred oil)
1 medium onion, diced
3 cloves garlic, minced
3 cups / 600 g uncooked Arborio rice
1/3 cup / 75 g preserved lemon, minced
8 cups / 2 liters Aneto vegetable broth, or other low sodium veggie broth
1 loosely packed cup (1.5 oz. / 45 g) fresh basil leaves, finely chopped
1/4 cup / 10 g nutritional yeast
1/2 teaspoon / 1 g white pepper
salt to taste

“Mushrooms and lemons,” ring the bells of St. Clements.

DIRECTIONS
Rinse dried mushrooms thoroughly to cleanse them of grit, then drain. Then cover them in a liter (or quart / 4 cups) of warm veg broth. I used the stupidly expensive and stupidly great Aneto vegetable broth, available at a case discount at Amazon. If you have your own veggie stock, great. Otherwise I would recommend a mix of water and one of Better Than Bouillon‘s stock bases, such as the No Chicken Base. The mushrooms should hydrate in about 1/2 hour. Remove them from the liquid, then strain the liquid to remove any remaining possible grit and reserve the liquid. [The mushrooms soak up about 100-150 ml of the original liquid, which you can replace with more stock, water, or dry white wine.]

Dice onion, mince garlic, mince preserved lemons.

You can chop the mushrooms if you want; I didn’t.

Set Instant Pot® to “Sauté” and add olive oil to the stainless steel inner container. Add onion and sauté for about 5 minutes, until soft without colouring. Add the garlic (and fresh mushrooms, if you are using them) and sauté for another two minutes or so, stirring regularly. Don’t worry if there’s some browning on the bottom of the stainless steel container. Add minced preserved lemons and sauté for another minute or so. Add rice, and stir, to coat all the rice with a little oil. [Add another few ml or a tbsp. of oil if you feel like you need to.] Deglaze the bottom of the container with a little of the reserved mushroom soaking liquid. Add the rest of the liquid and the mushrooms, close the lid, then set Instant Pot® to high pressure (I used the “Bean/Chili” setting) for six minutes, making sure to set the vent on the lid to “Sealing.”

Chop the basil and set aside.

How much basil? This much basil.

When the timer goes off, carefully turn the vent from “Sealing” to “Venting.” [You may want to do this wearing oven mittens; be mindful to avoid the rapid jet of steam that will be emitted.] Turn power to “Off.” When the steam has vented, carefully open lid and set aside. The risotto will look a little soupy at this point, but it will thicken as you stir in the remaining ingredients. Stir in the chopped basil, nutritional yeast, and white pepper a bit at a time, making sure they are well distributed, until remaining liquid is absorbed. Add salt (if necessary), ladle into bowls, and serve.

Just like mamma mia didn’t used to make.

Soupe de la Semaine: Bean and Ham Hock Soup

0

♪♫ Do you or I or anybody know / Where the peas, beans, oats, and the barley grow? ♫♪

I used to sing this song as a kid, believing it to be a post-agrarian commentary on the disconnect between the urban bourgeoisie and proletariat farmers, the latter of whom were mocked by the former for their lack of culture and inexplicable fetishism of an idealized past. [The city-dwellers were, in turn, mocked by rurals for having no clue where to procure said foodstuffs outside of Selfridges, Harrods, or Fortnum & Mason. Or later, Tesco.]

How wrong I was!

It turns out to be a bit of that, of course, but it seems also to have been intended as a subtle indoctrination into the social bondage of cisgen heteronormative relationships designed to propagate the patriarchy while giving a transparently dismissive nod to egalitarian alliances based upon actual economic, sexual, intellectual, and political agency for both partners (or more, if a poly or communal unit were established).

Whew. That’s a lot of philosophical weight for a poor little legume to withstand. Let’s retreat from the library into the kitchen, thence to make soup.

This particular little bowl full of goodness lives right across the hall from its more famous neighbour,

…with serving suggestions!

There’s even a similar version that appears to be the only constant on the menu for the US Senate, dating back to the early 20th century.

Long story short, wherever tasty salty pig parts find themselves near a kettle and some legumes and veggies, sooner or later some form of this will emerge. It’s super simple to make, nearly impossible to bollix up, and tastes even better then next day.

The reason I made this mostly on the stovetop is that I intended to cook up a double batch, which exceeded my Instant Pot’s capacity. Also, I find the aroma of a soup bubbling lazily away on a winter afternoon to be one of life’s simple pleasures.

Best broth you can buy.

A couple of quick notes: You are welcome to use water as the main liquid for this soup, and it will turn out just fine. I used Aneto stock, about which I have ranted before. Expensive. Worth it. You are welcome to use any beans as the main legume for this soup, and they will be fine. I used Rancho Gordo Heirloom Beans (Snowcap and Cranberry, specifically), about which I have ranted before. Expensive. Worth it. Seriously, at an extra $4 per pound for the beans and an extra $4 per liter for the stock, I spent an extra $16 on the soup. That’s like four lattes at Charbucks. I don’t mean to sound cavalier here; $16 is serious folding dough. But the payoff is seriously huge. And while I pressure-cooked the unsoaked dry beans in an Instant Pot (which is frequently on sale, so look around before you buy), this totally works with pre-soaked beans and/or over the stove, the old fashioned way.

Two great beans that taste great together.

INGREDIENTS
30 ml / 2 tbsp olive oil
2-3 bay leaves
1-2g / 1-2 tsp dried thyme
pinch white pepper
4-6 garlic cloves, minced
2.5 – 3 lbs. / 1 – 1.5 kg smoked ham hocks
1 lb. / .5 kg diced ham (optional)
2 medium-large onions, finely chopped
4-6 large stalks celery, finely minced
2-3 large carrots, chopped or sliced into coins
2 liter / 8 cups good quality chicken and/or vegetable stock (I used some of each)
500ml / 2 cups water
2 lbs. / 1 kg dried beans (or eight 15 oz. cans cooked beans, drained and rinsed)
5-10g / 1-2 tsp salt
lemon zest (optional)

DIRECTIONS
Rinse beans thoroughly, then drain (whether you’re using canned or dried beans). [This is where you would add the dried beans and stock to the Instant Pot, if you are going that route. Add the kilo / 2 lbs. of dried beans and about 2.5 liters / 10 cups liquid (I used the stock and water). Cook according to instructions. For more recommendations on cooking times, check here and here.]

Dice onion; mince garlic and celery. Cut carrots into coin-size slices (if the “coins” get to be larger than a quarter or a 2€ coin, cut them in half.) Dice the additional ham, if using, and set aside.

Sweat the veg.

In a large pan, heat the oil, thyme, bay leaves, and white pepper, and then sauté the onion, celery, carrots, and garlic for about 5 minutes, until soft without colouring. Add the water, stock, beans, ham hocks, and diced ham (if using). Bring to a low boil and then reduce heat. Simmer for about an hour, or until meat begins to fall off hocks. Remove hocks, strip and dice or shred meat, and discard bones. Check and adjust the seasoning (be careful with the salt, as the ham will provide more than you imagine, as will store-bought stock, if it’s not Aneto). Remove bay leaves. Serve hot with crusty bread or rolls.

Sticks to your ribs on a winter’s night.

Soupe de la Semaine: Nässelsoppa, the Stinging Nettle Soup from Sweden

0

In a perfect world, I’d have a beautiful serving shot for you, but I froze the soup for a friend, so here’s one I nicked from the Queen of Kammebornia.

I’m continually surprised by the lengths to which our species will go to get food. Olives give us stomach aches straight from the tree? Maybe soak them in lye, then, because a little lye makes everything tasty. Rhubarb leaves are potentially deadly? Okay, let’s just harvest the stalks, and see if they won’t kill us. Nettles sting us when we touch them? Then we’ll boil them, and then perhaps they won’t sting.

I completely apprehend the ancient sensibility of finding local greens, boiling them, and consuming the broth. In every culture, you can find some version of this basic idea. Maritimers all over the globe even harvested seaweed, which makes for a magnificent, if humble, soup.

So far, a credible origin story for the Swedish version of this soup has not emerged, but since there are similar versions of it in Ireland, Scotland, and Native American culture, I’m presuming that the arc of its development was probably not that of something being spread from a single source, but a soup with a parallel evolution wherever Urtica dioica flourished (originally Europe, Asia, and western North Africa, but now pretty much everywhere). The bottom line is that it is ancient, dating back to the Bronze Age, and if something has persisted that long, there’s a reason.

I dug through dozens of recipes to arrive at this one, many of them Google Translated from Swedish. If you go out hunting on your own, don’t be put off by instructions for chopping nostrils, or be dissuaded by “raspberry soup” mistranslations. So long as you handle the raw nettles with care, your nostrils are safe. You will want to use gloves or tongs for the initial cleansing, though. Gotta respect a plant that employs not only miniscule thorns, but also formic acid, to try to keep itself safe from the likes of soup-making us.

This can easily be adapted to a vegan recipe by omitting the eggs, crème fraîche/sour cream, and chicken stock. Be sure to use a really good vegetable stock to get the depth of flavour the soup deserves. Roasting the vegetables before putting them in the stock is a must for this recipe.

Have a care with these before they’re given the hot broth bath.

INGREDIENTS
30 ml / 2 tbsp olive oil
2 small onions, finely chopped
500g / 1 lb stinging nettle shoots and leaves
1 liter / 4 cups good quality chicken or vegetable stock
500ml / 2 cups water
5-10g / 1-2 tsp salt
1-2g / 1-2 tsp dried thyme
pinch white pepper
20g / 2 tablespoons potato starch (or corn starch)
4 hard boiled eggs
10-20 chives, chopped
250 ml / 1 cup crème fraîche, optional (sour cream may be substituted)

Ready for the purée.

DIRECTIONS
Rinse nettles thoroughly, picking out grass and any foreign objects, then drain. In a large pan, heat the oil, thyme, salt, and white pepper, and then sauté the onion for about 5 minutes, until soft without colouring. Add the water and stock. Bring to a boil and then add nettles. Cover and simmer for about 20 minutes. Using immersion blender, purée soup until smooth (or use food processor/VitaMix). Dissolve the potato starch in a little water and stir it into the soup. Bring back to a gentle boil, stirring regularly until it thickens slightly. Check and adjust the seasoning. Serve hot with quartered or halved hard-boiled eggs, chopped chives, and a dollop of sour cream or crème fraîche.

Despite what Kermit said, it actually is easy being green.

Turned On by Turon

0

Miss World 2013 Megan Young pops by Chaaste Family Market. She looks better in a leather skirt than I do.

In many ways, Angelenos are quintessentially American by being quintessentially provincial. To be sure, Los Angeles is segregated by politics and wealth distribution and ethnicity, but it is also segregated by zones where people Just Won’t Go. Part of this is a logical response to the most mercurial traffic density in the Continental 48: a journey of five miles can range from anywhere between eight and eighty minutes to complete. So people settle into their zone. Some won’t venture east of the 405, some won’t travel south of the 10, or cross the “Orange Curtain” that divides California’s first and third most populous counties. Santa Clarita? Long Beach? You may as well be on Deimos or Phobos, my friends.

It’s only about 19 miles (or 30 kilometers) as the crow flies between the Westwood campus of UCLA and the Rose Bowl in Pasadena (where their team plays its home games in men’s football). And — it’s a bit of an exaggeration, but not much — that’s about the only time (except for New Year’s, obvs) you’ll find a dedicated mass of people from Westwood struggling across town to visit said city.

But thanks to a friend’s medical appointment, I found myself in Pasadena, which is gorgeous even when it’s not hauling rose-festooned floats down its streets. It was also, until 10 days ago, the home of the late Jonathan Gold, the only food critic in American history to have won the prestigious Pulitzer Prize. We never met, much to my dismay, even though he was friends with a number of our friends, and I’m sure we could have arranged an intro. And there was the time at the now-shuttered Corazón y Miel — a restaurant his column introduced to us — when the bride and I saw him sit down to a solitary Sunday meal and decided to let him dine in peace. That was also the day that I learned (thanks to his recommendation) deep-fried avocado is spectacular.

But I digress.

With a couple of unscheduled hours before me as I awaited my pal Valerie’s eyes to dilate like a Disney Princess‘ and then return to something like normal, I headed out for some east side exotica. And I wound up at Chaaste Family Market.

Still life with Honda. Those are spare recyclable grocery bags in the back seat, not the World’s Saddest Balloons.

Initially, I was just poking around for ingredients. It’s a hobby of mine to find the most unusual/exotic/counterintuitive ingredient I can, take it home, then read about it and figure out how to use it. That’s how I once wound up with a bag full of this, for instance:

Actually perhaps the least effective marketing campaign on behalf of mushrooms this millennium.

The bride said, “You’re not going to bring home a bunch of stuff that you’re gonna leave on the counter for months, are you?” I swore I wouldn’t, but I wouldn’t have placed a two-bit bet on whether I was lying or not. I very nearly returned with a box of “Puto,” which as near as I can tell makes a bao-like dough for steaming and stuffing. Those of you from SoCal or for whom Spanglish is a second language already know that puto has a second, and very different, meaning.

This might be the only photo of puto in a box that my website provider would allow me to host.

But judging from the signage, it seemed that la délicatesse du jour was something called turon. [You can find examples of people making them here, here, and here.] Apparently, the day’s turon output was due to start rolling out to the public at 13:30, about half an hour away. I considered making my exit — “Be back at 1:30!” — with about a 10% chance of actually being back at 1:30. But things were slow, and the very friendly proprietor (whom I would later find out is the owner’s son Chris, pictured at the right of the photo at top), said, “It could be a little earlier than that. Why not hang out for a few minutes, if you’ve got time?”

Funky and functional.

Time I had. And attached to their market is a little restaurant, with room for 20 in a pinch. Maybe. If they were friends. It’s decorated in the way that lots of the best eateries in the world are, which is to say minimally. A mural depicts the founders riding in their horse-drawn wedding coach across a bridge from the Philippines to America. It also features the second generation, in various guises. And Manny Pacquiao, because, well, the Philippines. [I’m not being snotty or superior about this in any way, because the Maritimes from which I come has restaurants that boast of Anne Murray and/or Sidney Crosby; gotta support the locals.]

Not 100% sure of tall he iconography here, but it’a a cool mural.

What little knowledge I had of Pinoy food was mostly hastily acquired when I was recruited by a chef pal to participate in a relief effort for the victims of Typhoon Haiyan; I was part of the crew he organized to throw a benefit fund-raising dinner. My contribution was calamansi chewies. So, ignorant but open, I placed myself in the hands of my host, something I often do; after all, who better to know what’s good?

Rice is nice.

We moved onto some steam table items, and settled on bistek, beef giniling guisado (which Chris told me his Latino friends refer to as “hamburger helper”), pancit bihon (a dish very like a vegetable-laden vermicelli mix, though it can also feature a variety of proteins), and, of course, the rice.

From left, clockwise: bistek, giniling guisado, pancit bihon, rice. Yum.

It was a right tasty meal, especially the bistek, whose broth had the depth of a Borges short story collection. Came to a grand total of $8.10, which has to be one of the best under-$10 meals I’ve had in America. Is it worth hacking one’s way through the ugly maw that is Los Angeles traffic to partake of it on a daily basis? Probably not. Will it be at the top of my list the next time I find myself in the neighbourhood? You bet.

The best of both worlds: Christian halfway between the market and the restaurant.

Ah, but then.

Part of me wants to believe that the omitted apostrophe is entirely intentional, and a nod to the French; after all, Mama’s turon is so good it just flies out the door, so it’s no surprise she would find herself without any. Mama Sans Turon, indeed. It’s like an egg roll and a banana and a churro and some jackfruit went up to heaven and asked if they could borrow some manna and have a baby together.

Magic and happiness, fried in tandem.

Like clockwork, at 13:30, the shop began to fill with turon fans. The first few were warned not to try them right away, as the turons were just slightly cooler than a meteorite hitting the lower atmosphere. And after I watched several happy clusters of customers drift off, I joined them, turon package in tow, in sweet (and fried) bliss. So by all means do make your way over some day, plan it around lunch, and surprise your couch- (or house-) bound friends with a little manna that found its path from heaven via Manila and Pasadena.

Summer Vegan Bean Salad I

0

Bless you, Steve Sando.

Summertime, and the livin’ is… damn sticky, for the nonce, in Southern California. And there’s another heat wave coming. The last thing I want to do is to, say, sit over a pot of saffron risotto for an hour. I’d like something cool, and refreshing, and clean, and if I were able to subsist on gin and tonic or Croma Vera Albariño, well, I’d probably do that. My doctor might suggest some other course; I bet she’d be just fine with this one.

The first trick to any bean salad is — duh — great beans. I’ve long extolled the virtues of Rancho Gordo’s heirloom beans, and that’s where I started. The bride and I are particularly fond of their Royal Corona beans, which are kin to the Gigandes plaki, often spelled as yigandes, used in the great Greek meze served under an expansive canopy of tomato sauce and often accompanied by Feta cheese and bread. Rancho Gordo founder Sando is something of a bean whisperer, and cultivates heirloom beans all over the world, working with local farmers at fair prices. He is a hero, full stop.

The second trick to a good bean salad is a balance of flavours and textures. No one wants a limp bean any more than they want a wet noodle — and I mean that literally and figuratively. When I knew I would be building off a base of Royal Corona beans, I compiled a culinary dance card of prospective partners, seen below. Since this is a really adaptable bean, I knew I could go off in several directions, but not all at once. So: I decided to make it Vegan. I knew sun-dried tomatoes and marinated red bell peppers would be part of it for colour and taste and texture. Then it was a matter of filling in gaps. Celery for crunch. Capers for salt and tang. Slivered almonds for more crunch. Macerated red onion for a little assertiveness, but not too much, hence the maceration. Scallions and parsley for herbaceousness and colour. Fresh thyme for extra aromatics. There were some herbs and oil in the sun-dried tomatoes, and I decided to use them rather than rinse them off, and finish off the salad dressing as needed.

NOT “5 Livered Almonds.” The pen was malfunctioning.

This is truly a salad that can be assembled by an elementary schooler, as soon as she can be trusted with a knife (and has the upper body strength to open vacuum-packed bottles, or can inveigle someone to do it for her).

Macerating the onion in this case consists of dicing it and dropping it in a bowl with enough water to cover it, dumping in a glug — that’s a technical term — of some sort of vinegar, and about .5 cup / 170 g of sugar, then stirring it up and setting it into the fridge for an hour or so, to blunt the onion’s sharpness. It’s not quite a quick pickle, but it does temper its aggressiveness.

As for the beans, I made them in my Instant Pot®. Rinsed them, covered them with water, and set the pressure on high for 25 minutes with a natural release. You can soak them overnight if you wish, and cook them in a trad soup pot (I do this in winter, just for the atmosphere), but I was shooting for fast results. I drained the cooked beans and rinsed them with cold tap water, then dumped them in with the already macerating onion to cool them down some more. Kilotonnes of options here, feel free to follow your path.

Give it a bit to mingle flavours, and you may or may not want to top it with a vinaigrette. As it turned out for me, just a few drops of great old Balsamic vinegar and a sprinkling of black sea salt flakes (the flakes were black due to charcoal; they weren’t from the Black Sea) finished it off nicely, even on the second day.

Summer Vegan Bean Salad I
Serves 6-8 as a main course, with extras

INGREDIENTS
1 lb. / 454 g dried Rancho Gordo Royal Corona Beans, hydrated and cooked
24 oz. / 680 g (2 bottles, 12 oz./340 g each) marinated red peppers, drained
25-30 capers
3 large stalks celery, diced
1 red onion, diced and macerated (see note above)
1 bunch scallions (10-12), sliced
1 cup / 60 g chopped fresh parsley
1 tbsp / 2.4 g fresh thyme, finely minced
16 oz. / 454 g julienned sun-dried tomatoes in oil (using the oil)
.75 cup / 85 g slivered almonds

Next go, we may find room for some of those other ingredients on the dance card, plus cucumber, jicama, nopalito, or something else!

Incidentally, if you’re not wedded to the Vegan thing, bacon & bleu cheese, prosciutto & Parmesan, or even chicken & chevre could be welcome additions.

One final and sad note: As I was writing this, I learned that the Pulitzer Prize-winning food writer Jonathan Gold died. He was as much a part of this city’s cultural life as Jim Murray or Jack Smith; he was the culinary literary equivalent for this city of the likes of Mike Royko or Studs Terkel or Herb Caen. He is simply irreplaceable, and his passing at 57 is too soon by decades. I cannot begin to imagine how much our lives will be impoverished by his absence.

http://www.latimes.com/food/jonathan-gold/

At $9 A Liter, Aneto Chicken Broth Is A Steal.

5

Worth its weight in chicken.

I know, I know. For that amount of money you could buy THREE liters of chicken broth. You’d probably be better off mixing this with two liters of water, actually, if price is your sole criterion.

Full disclosure: Due to an upcoming medical procedure during which they insert a video camera up into the shadiest area of my body (i.e., “where the sun don’t shine”), I am currently on a liquid diet. Chicken broth is permitted. I decided to use this opportunity to test drive a suggestion I came across while writing the article on fideuà inauténtico. My research for that piece led me to an excellent food blog called The Daring Gourmet, which features not only recipes, but also product reviews, travel and health tips, restaurant reviews, and more. [You should visit it after you’re done reading this.]

They wrote an article about their visit to the Aneto factory in Artes, Spain, that I found completely captivating. Enough so that I was willing to plunk down $27 to pick up three liters of the broth as part of my hydration regime, knowing I would be renting it for not much longer than it will take you to finish watching the final episode of The Americans this evening.

I had considered myself a fairly savvy shopper, and the chicken broth in the pantry was Kroeger’s Simple Truth Organic Free Range Chicken Broth Fat Free, which I bought at the local Ralphs for about $1.99 or so. But compare the ingredient list between Aneto (at left) and Kroeger (at right).

The boxes are the same size, but that’s where the similarities end.

As Kimberly of The Daring Gourmet pointed out in her article,

    To be called “broth” the USDA only requires a Moisture-Protein Ratio (MPR) of 1:135. That’s 1 part chicken to 135 parts water. That translates as 1 ounce of chicken per gallon of water. As unbelievable as that sounds, we’re understandably left asking, “So where’s the chicken in the chicken broth?”

Indeed.

On the left, the Aneto broth. On the right, the Kroeger. Which one do you suppose has more chicken (and, for that matter, flavour)?

I don’t want to come across as picking on Kroeger; it’s one of the best of the conventional chicken broths. The problem is that we in the United States just don’t set the bar very high (another issue addressed at The Daring Gourmet). And most of us aren’t drinking our chicken broth straight. But I gotta say, from the bottom of my taste buds, that Aneto is to conventional chicken broth what a Maybach or a McLaren is to a Vauxhall Viva.

Of course, you could make your own stock. That gives you the option to tweak the taste, and it’s possible to make a stock that’s even better than what Aneto sells. But it takes time to buy and prepare the ingredients, and if you want to get some economy of scale, it also requires a significant amount of freezer space, so those costs deserve to be considered. I come from a family where it was considered to be something of a crime to let potential soup bones go to waste, so I do make my own stock from time to time, but it’s usually with veggies that are a mere few days away from becoming a science project, plus a fresh onion (I always have those). I rarely — read “never” — set out to make a big batch of stock from scratch with purpose-bought vegetables. Plus, Aneto makes really good stock, and it’s always handy to have some room-temp broth in the pantry even if your freezer is (ahem) well-stocked.

Appended to their 2016 article, The Daring Gourmet thoughtfully provided a list of stores across the USA where Aneto is sold (the company also make a ton of broths that are not sold in the US, such as their Caldo Natural de Jamón). I got mine at the local Sur La Table; I could have saved a couple bucks a unit had I bought a six-pack through Amazon, but I failed to plan ahead that far. Idiot me. Over the next few hours, I’m sure I will have ample time to sit and contemplate the error of my ways.

Meanwhile, go read the Aneto story!

Fidella? Paedeuà? Maybe We Should Just Call It Fideuà Inauténtico.

3

A little bit of Valencia, a little bit of Catalunya, a little bit of Inglewood.

If you’ve ever been to Spain — and even if you haven’t — there’s a fair likelihood that you have at some point encountered paella, that rice-based Valencian marvel redolent of saffron and pimentón de la Vera. Believe it or not, the paella you treasure in your taste buds’ memory is likely, in a word, inauténtico. Paella, like pizza and pretzels, rallies a passionate coterie of prescriptivists to its bosom, each claiming that a single path alone leads to the culinary ecstasy prized by gourmands. Yeah, bunk.

The earliest precursor to paella I could find dates to about 1520, when the notes of the master chef to Ferdinand I, Rupert de Nola (who, despite his name, was not from New Orleans), were codified into Libre del Coch (later Libro de Guisados), said to be the first printed cookbook in Catalan (and, some further allege, in Spain). It seems to have been compiled originally in 1477, which indicates that book publishers back then maintained the same sort of leisurely release schedule they do today.

What? A book without pictures? Depends on your edition.

But I digress. According to Saveur magazine, the original Valencian paella was likely cobbled together from local ingredients. Rice was a Moorish legacy dating back to the overthrow of the Visigoths in 711, and Arab traders brought saffron to the region a couple hundred years later. Then, all they had to do was add some veggies and protein, and presto! It’s said that snails (which sound much tastier in Spanish, as caracoles) and rabbits were often featured, as were local beans. [Beans and rice? How is it that there’s no paella burrito food truck in Los Angeles? Maybe this.] In any event, the natives are passionate about what is and is not authentic (even when they disagree on specifics), but what else would you expect from citizens of a town that sports its own rice museum?

In the early 20th century, one Valencian had gone completely heretical, not only adding seafood to paella, but substituting noodles for rice! There are competing legends surrounding the origin of fideuá, one of which portrays it as an accident by a chef who had run out of rice, another concerning a chef who attempted to dissuade a gluttonous sea captain by ostensibly making his paella less palatable with noodles. Whatever the truth, the dish became a hit, though it migrated up the coast into Catalunya for its most elegant expression.

While I have a great deal of respect for the tradition of Spanish cuisine, I’m not above a cultural mashup (I am going to pull together a paella burrito one of these days!), so I assembled a dish I proudly call Fideuà Inauténtico. [I once worked with a multiple Grammy-nominated art director who occasionally said, “Go ugly early.” I’m not sure exactly what she meant by that, but it seems to apply here.] I will note that, as with many of the recipes found on this blog, this is more of a suggestion than an absolutist set of instructions.

Developing the socarrat.

Fideuà Inauténtico
Serves approximately 4 to 6, with a little left over

NOTE: This was made in a 16″ Staub pan designed for cooking paella. Technically, the pan is also called a paella, so saying “paella pan” is as redundant as saying “La Brea Tar Pits.” Mine is rather heavy and thick, while the traditional Spanish version of the pan is thin. The size and weight of your pan will affect cooking time, so have a care. The ultimate goal is for the pasta to absorb the liquid, and to develop a bit of a crust (or socarrat). While the dish as pictured was made on top of my ancient O’Keefe and Merritt stovetop, I often use my outdoor gas grill for this dish, because it produces a superior socarrat, thanks to the larger burners and higher BTU output.
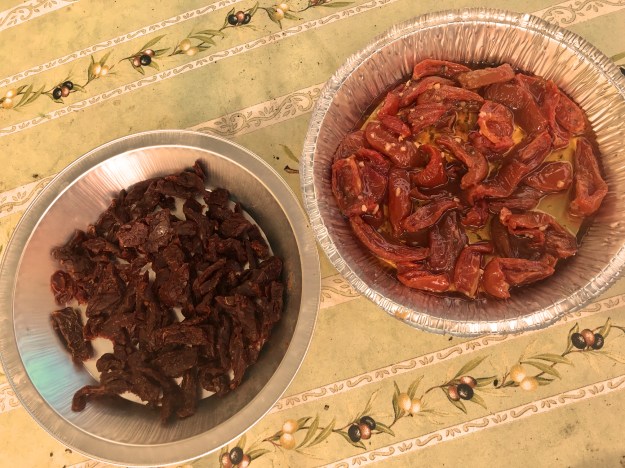
INGREDIENTS
2 packages fideo pasta* (7 oz. / 400 g each)
½ cup / 120 ml extra-virgin Spanish olive oil
1 pound / ½ kg boneless chicken thighs, cooked and chopped
1 – 2 teaspoons / 2½ – 5 g pimentón de la Vera (sweet/dulce if you have it, but bittersweet/agridulce or hot/picante work fine)
1 medium onion, chopped
4 garlic cloves, chopped
2 pounds / 1 kg tomatoes, peeled, seeded, and chopped or two 14-oz / 400 g cans of fire-roasted diced tomatoes
20-24 large shrimp, tail on, uncooked
8 oz. / 225 g link of Spanish chorizo** cut into 20 or so slices
3½ – 4 cups / 820 – 940 ml of stock (I used chicken stock, but fish or veggie or beef would work fine also), heated
⅛ – ¼ teaspoon / .09 – .17 g saffron (not really very much, because it’s super expensive, but you can add more if you want)
¼ cup / 60 ml dry Spanish white wine such as Albariño (optional)
Salt to taste

*Angel hair pasta and vermicelli also work well, so long as they are in broken into short pieces and you adjust the cooking time and amount of liquid so they don’t get overcooked. Spaghetti, on the other hand, is too thick.
**Spanish chorizo, unlike Mexican chorizo, is cured and has the texture of a hard sausage.

DIRECTIONS

Cook chicken thighs in advance, using whatever method you prefer. I braised mine in wine, intending to finish them off with a little browning on the gas grill, but I skipped that step for time’s sake, and it worked out fine. In fact, I made the thighs the previous night, and just chopped them up the following evening. I saved the cooking juices to combine with the stock.

Heat the stock in a saucepan to simmer; you will be adding it in a bit at a time later in the recipe.

In large paella pan (sic), combine olive oil and fideo over high heat; brown fideo to golden colour, stirring frequently (don’t worry if some gets a little too dark, just don’t burn it). Add pimentón de la Vera and onion and cook until softened, about 3-4 minutes. Add garlic and continue cooking about one minute. If it looks like the fideo is getting too dark, splash in a little stock or wine and allow it to evaporate.

Add tomatoes, cooked chicken, chorizo, shrimp, and saffron, arranging them in the pan evenly. Begin pouring stock in a bit at a time (about 40% the first time, then 20% or so with each subsequent pour), allowing it to reduce a bit before adding more. DO NOT STIR, because this will mess with the formation of the socarrat. [You can sample the pasta along the way, checking to see if it has gone from crunchy to al dente. Typically, fideo requires only 4-5 minutes in boiling water.] A couple of minutes after the first stock addition, flip over the shrimp. When they are cooked, they’ll turn from grey to pink and white. You may need to turn them over a couple of times to get them there. Should you run out of stock, you can add a bit of dry wine, such as Albariño, or even a dry rosé. It’s also possible that you may not need to use all your stock. Let your tastebuds be your guide. If the pasta’s done and the shrimp are pink, you’re good to go. Allow the liquid to evaporate, take the pan off flame, and let it sit for a 3-5 minutes to help build the socarrat.

Lift portions out of pan with spatula, making sure to scrape off the socarrat in the process. It is traditionally served with allioli, a kind of garlic mayo that can be made in a food processor or with a mortar and pestle. Possibly due to the number of margaritas I had consumed, I skipped this step. It tasted fine without the condiment.

Just about fork-ready.