My Favourite Summer Salad (adaptable for winter, too!)

0

Leave it to me to post my favourite summer salad on the 20th of September, right?

But it’s still warm here in São João do Estoril, Portugal, and more importantly, couve (cabbage) is in season, while couves de bruxelas (Brussels sprouts) are not.

This salad originated at the wonderful food blog Love & Lemons, where it was featured as an only-seven-ingredient Shaved Brussels Sprout Salad. [Although it really really originated on our pal Karen’s Facebook page, which was what tipped the bride to the recipe.] Needless to say, when my betrothed first prepared it, I was sceptical. Maybe even dubious. But it was terrific, and light, and whenever she made it, we dove into our bowls like a pair of Tasmanian Devils on a meth bender. Brussels sprouts are a seasonal thing round these parts, though, and the frozen sprouts are not a good substitute — much like Christopher Lloyd, they are fairly unshavable.

Fortunately, cabbage — Savoy, or green, or red, or some combination of the three — is a highly acceptable stand-in during those months when sprouts are on the outs. And the absolutely brilliant bit about this salad (in either form) is that it will keep overnight in the fridge without going all wilty. Plus, even I can make it, which means that even you can make it. If you can operate a knife, a spoon, a whisk, and a bowl, you’re good to go.

Okay, I lied. You’re going to have to toast some slivered almonds. Trust me, it’s worth it. You can do it in the oven, or like I did, on the stovetop in a dry frying pan. Here’s a good article about the different ways of achieving this miracle of aromatic nuttiness. And yes, you’re probably — no, if my experience is any guide, definitely — going to overtoast on occasion. The good news is that, unless they’re blackened, the almonds can almost always go in the salad and work just fine.

Don’t burn your nuts.

My other favourite thing is that the salad hits every taste note: the cranberries bring sweetness, the feta is salty, the lemon has acid, the chives contribute a bit of herbaceousness to the mix, the cabbage and toasted almonds have a slightly bitter edge, and the olive oil adds umami. I’m going to sound like a bit of a broken record to longtime readers here, but I implore you to use the best olive oil you can get your hands on, and it’s worth squeezing fresh lemons for the dressing — if you can get hold of Meyer lemons, even better!

Feel free to adjust the amounts — and even ingredients — to suit your palate. Some folks prefer Parmesan or another salty cheese to Feta, and that’s just fine. No chives? Maybe you have some green onions. Walnuts rather than almonds? Go right ahead. Pomegranate seeds rather than dried cranberries? Okay. But please do give this version a go before you start your own mods, because the bride and I feel like we hit on a really good balance of elements.

INGREDIENTS

1 small (or 1/2 large) head of cabbage
240g / 1.5 cups dried sweetened cranberries (often marketed in the US as Craisins)
1 small bunch / 20g chives, finely chopped (scallions will work in a pinch)
400g / 14 oz. feta cheese, cubed or crumbled (if there’s not too much water in the pkg, you can add it to the salad)
150g / 1 cup toasted slivered almonds
FOR THE DRESSING
150ml / 5 oz. fresh-squeezed lemon juice (or about 2 lemons)
150ml / 5 oz. extra virgin olive oil (equal to lemon juice)

DIRECTIONS
Toast the almonds [see above for method(s)], and set aside to cool. Using a cleaver or large knife, shred the leafy part of the cabbage (food processors shred too finely for this salad). The solid center stalk can be discarded or julienned for use in the salad (I did the latter). Place in a large bowl. Add the dried cranberries. Chop the chives, and add them to the bowl. Crumble or dice the feta, and add it to the bowl (you can give this all a stir if you wish). Add the cooled toasted almonds.

Simple dressing — EVOO and lemon juice.

Squeeze juice of two lemons into a 500 ml / 2 cup or larger measuring cup, then add an equal amount of extra virgin olive oil. Whisk the two together for about 20-30 seconds to emulsify. Pour dressing over salad, taking care not to overdress. Toss salad so it is completely coated. For best results, return salad to refrigerator for 1-2 hours to cool. Re-toss salad immediately before serving.

Chilled Avocado Soup (Vegan)

1

It’s a little warm and muggy today in São João do Estoril, Portugal, though I am not complaining. It appears from the news that much of the northern hemisphere is experiencing a heat wave right now, which makes it an ideal time for a super-easy-to-prepare chilled soup, especially one that requires exactly zero time on the stove. [Well, unless your bride asks you to make homemade croutons for it.]

A note about stock and salt: I use a Spanish commercial vegetable stock by Aneto that already has a little salt in it, so I let diners add some finishing salt if they wish. American cooks using commercial vegetable stocks will likely find them to be sodium bombs, so I would advise y’all to take it easy on the salt. Better Than Bouillon makes an excellent vegetarian stock base, but it’s not readily available here in Europe. Making your own vegetable stock so you can control the salt content is an option, but you certainly don’t want to do it on a hot day. At least I don’t.

INGREDIENTS

1 liter / 4 cups vegetable stock
125ml / ½ cup fresh lemon juice (lime juice can be substituted)
30g / ½ cup chopped fresh cilantro
3 ripe avocados (minus skin and seeds)
3 green onions (scallions), chopped
4 cloves garlic (but I’m a garlic fiend, so you may want less)
1.25g / ½ teaspoon pimentón de la Vera
Optional toppings: croutons, parsley, diced tomato or bell pepper, toasted almonds, piri-piri sauce or Tabasco, cilantro

DIRECTIONS
Put all the ingredients into a blender. Blend on medium until desired texture is reached. Transfer to pitcher and chill (both you and the soup) for at least 1 hour to allow flavours to meld. Garnish as the spirit moves. Serve.


Polvo Guisado a/k/a Portuguese Octopus Stew

1
Portuguese Octopus Stew Completed

Seems like almost exactly a year ago I was writing about pulpo/polvo/octopus, then I got caught up in the business of actually moving to Portugal (not there yet), and then the plague hit. Although I have been in the kitchen a fair bit, I’ve been away from the blog. I am intending to change that, but it is subject to intervention from a couple of governments, a shipping company, a real estate agent, and life during COVID-19.

Since I can’t be in Portugal (as is the case for most of us living in America at present), the next best thing is to bring a bit of Portugal to California.

This particular stew is by no means uniquely Portuguese; in Catalunya, there’s a version known as Estofat de pop i patata; in Greece, you can find the very similar Octapodi Kokkinisto, though it’s usually served over rice or orzo rather than with potatoes; in Italy, it’s Polpi in Umido and Polpo alla Luciana, often including clams or other seafood and served with pasta or just bread. And in Galicia, Pulpo a la Gallega omits the tomatoes, but is frequently served over boiled potatoes. I’m sure if I dug a bit deeper, I could find Croatian and Turkish versions of the dish; heck, even the French might have one, although their version would probably be more elegant, since that’s what they do. From what I can gather, this one originated in the Azores, some say specifically on Pico Island.

In most Mediterranean (and Mediterranean-adjacent) countries, polvo guisado is peasant food; the cephalopod was pulled out of the sea, and the tomatoes and potatoes came out of your garden. No real fancy ingredients are necessary (although I did use a South African Pinotage Rosé, because the South African wine industry is currently in desperate straits due to COVID-19).

One quick note before we get to the actual recipe: a number of friends and acquaintances on social media find the eating of octopuses distasteful. They (the cephalopods) seem to be intelligent creatures, and many people, myself included, find them endearing. I understand and respect those whose ethics have led them away from creature consumption, and am happy to engage in conversation on that topic over the telephone or in person, but social media lack the capacity for nuance, so comments will be moderated. If this recipe is not to your taste, please feel free to avail yourself of one of the many vegetarian and vegan options on the blog.

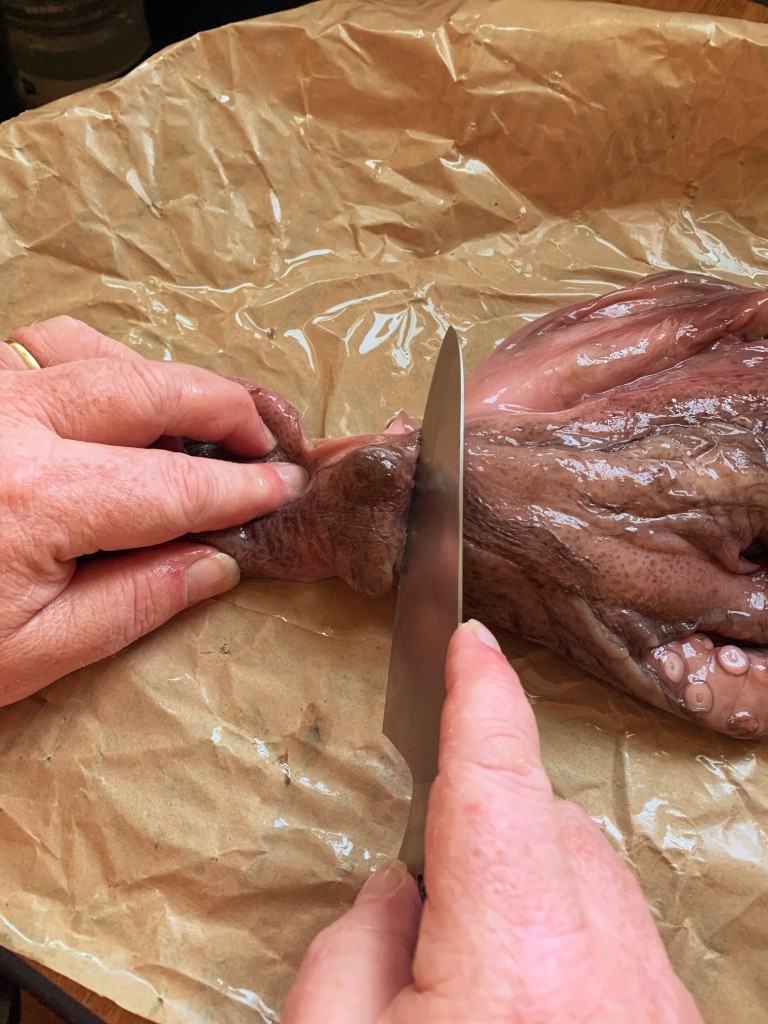
You may be able to get the octopus pre-cleaned from your fishmonger, but if not, you have a little cutting to do.
You may be able to get the octopus pre-cleaned from your fishmonger, but if not, you have a little cutting to do. Removing the eyes, the ink sacs, and the beak are not difficult, and there are many YouTube vids to guide you.

INGREDIENTS
2 lbs. / 1kg octopus, blanched and cleaned
2-3 tbsp. / 30-45ml olive oil
2 large onions, chopped
4 large cloves minced garlic
3 bay leaves
4.25 cups / 1000ml chicken or fish stock (I used Aneto)
2 cups / 500ml wine (rosé, white, and red all work fine)
2 lbs. / 1kg fresh (or canned) tomatoes, chopped (peeling optional)
2 lbs. / 1kg new potatoes (or fingerlings, or whatever you have)
1 thsp. / 5g crushed red pepper flakes
1 bunch fresh cilantro (coriander), chopped
1 bunch fresh parsley, chopped
1-2 small lemons, juiced (or 2-3 tbsp. / 30-45ml lemon juice)
Salt and pepper (to taste)

Our octopus turns a pinky-purple during its five-minute bath.

DIRECTIONS
Set a large pot of salted water on the stovetop to boil.
Remove the octopus’ eyes, ink sacs, beak, and interior of the head (if not pre-cleaned by your fishmonger) then rinse under cold water and set aside.
If you’re using medium or large potatoes, wash and quarter them (peeling is optional), and set aside.
Chop onions and mince garlic and set aside.
Chop cilantro and parsley fairly fine and set aside.
Dip the octopus three times into the salted boiling water to curl the tentacles, then submerge it for 5 minutes.


Drain and let it cool, then cut the tentacles and body into 2-inch lengths or chunks and reserve.
In that same pot, add the olive oil; add the onions, garlic, pepper flakes, and bay leaves, stirring occasionally. Fry in the oil for 6 to 7 minutes, until slightly wilted and beginning to brown.
Deglaze the pan with the wine, bring the liquid up to a boil and reduce it by half.
Stir in the tomatoes, season with salt and pepper, add the potatoes, the octopus, and stock. (Note: I used chicken stock, but fish or vegetable stock will also work, and if necessary, you could just use water with perhaps a bouillon cube or paste.)
Bring the liquid up to a boil and reduce to a simmer.


Cover the pot and simmer for about 90 minutes on low heat.
Add the lemon juice, fresh chopped cilantro (a/k/a coriander), and parsley. Simmer for another 5 minutes or so (it’s okay to go longer).
Adjust the salt and pepper (if necessary), fish out the bay leaves (if you can), allow the stew to cool slightly and serve.
Serve with crusty bread or rolls (optional) for mopping up the sauce.
Incidentally, a nice vinho verde goes nicely with the stew, but don’t be fussy about red or white; both are fine.

Electric Smoker Meats Its Match With Leg Of Lamb Two Ways

0

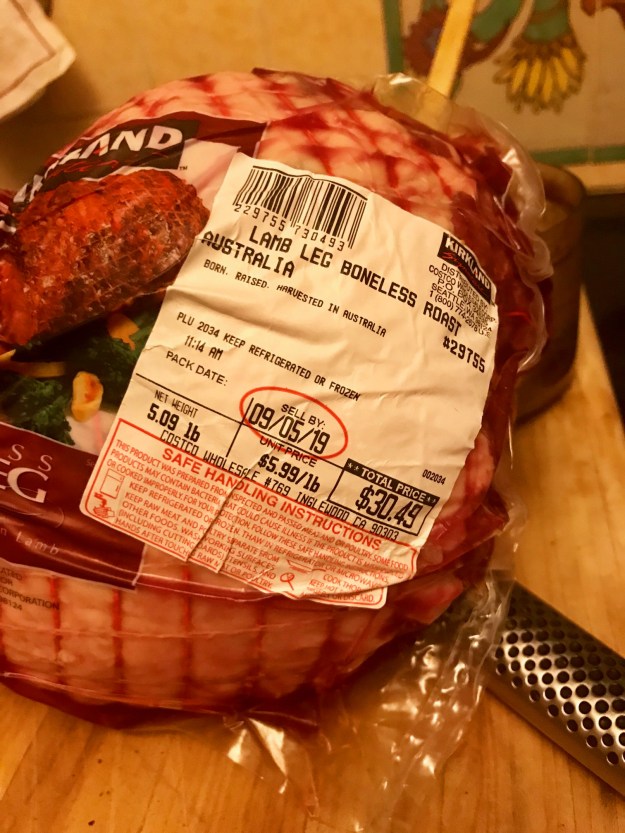
Sell by? It will have been long gone by.

Headline pun intended.

The Internets have no shortage of opinions when it comes to smoking meats, and one is on a fool’s errand to attempt to secure a definitive answer. PRO TIP: This is NOT a definitive answer.

I’ve been grilling leg of lamb for about half my life now (which is to say over 30 years), and I was excited to try our new pellet smoker to find out how it stacked up against the various other methods (Big Green Egg, gas grill, trad charcoal grill) I’ve employed before.

The short version: Very Well.

You don’t need to follow me down the rabbit hole unless you’re slightly — like me — monomaniacal about research prior to grillage. If you are, I suggest these YouTube vids, one from Malcom Reed’s HowToBBQRight, the other from Darnell McGavock Sr.’s D Grill. Both of them used electric pellet smokers, so they were the most relevant to my immediate project, but I also watched a bunch of others. The reason I frequently turn to YouTube first is to see the actual cooks and their process(es) in motion, as well as to hear comments they might not bother to include in a printed recipe. [I also visited Steven Raichlen’s very informative online home, which I recommend highly.]

Originally, my intention was to make pulled lamb, which in theory comes off the smoke at a higher temp than your standard smoked leg. From what I’ve read (at least in terms of pork), there are two sweet spots for removing meat from the grill/smoker: one is about 145-150°F/63-65.5°C, the other is about 195-203°F/90-95°C. Apparently, the in-between is the “tough zone.” I’ve encountered this phenomenon before when cooking octopus, squid, and shrimp (not always on the grill), so it doesn’t surprise me. Perhaps a quick revisit to Harold McGee’s On Food and Cooking: The Science and Lore of the Kitchen will yield an answer as to why, but that’s for another post. I opted not to pursue the higher finished temperature, because I read that the leg was not sufficiently possessed of marbling fat to make it tender at that temp; that recipe recommended bone-in lamb shoulder instead.

Lose some, but not all, the fat.

PREP
No matter how thoroughly your butcher trims the fat off your lamb leg, it’s not enough. You don’t want to take all the fat away, but an excess will give it that “gamy” taste that causes people to think they don’t like lamb. You can see in the lower right of the photo above how much fat I excised. I cut the leg about 60/40%, because I was feeling a bit experimentative, both in terms of marinating and cooking.

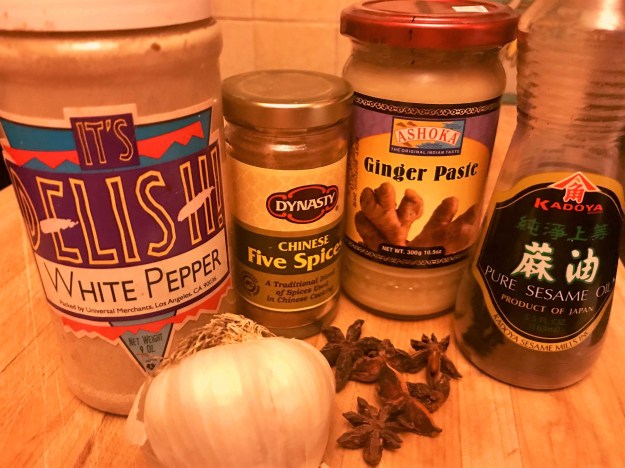
Pan-Asian Marinade Ingredients.

Marinade #1 (Asian Style) (for the 60% piece)
INGREDIENTS
2 tbsp. / 30 ml sesame oil
2 tbsp. / 5-6 cloves minced garlic
3 tsp. / 16 g ginger paste
6 star anise pods, ground
3 tsp. / 5 g five-spice powder
1 tsp. / 2.5 g white pepper

It’s Turkish-ish, kinda.

Marinade #2 (Turkish-ish) (for the 40% piece)
INGREDIENTS
¼ cup / 60 ml olive oil (I used Olea Farm, which I love)
¼ cup / 60 ml pomegranate molasses
3 tbsp. / 55 g Darrell & Nil’s Turkish Blend Spice*
5 large slices preserved lemon
2 tbsp. salt (preferably kosher or flaked; I used Læsø Salt from Denmark, because I had some and it’s a good story)

*Yeah, you’re gonna have a tough time finding that. It’s made from paprika, black pepper, cumin, coriander, allspice, cassia, sumac, oregano, Maras chile, clove, cardamom, and nutmeg. Maybe I can get them to cough up the actual recipe, but if not, make sure you include the sumac and Maras chile, which really push the blend toward Istanbul.

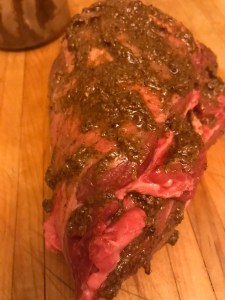
Rub rub rub it in; get your fingers into it; don’t be shy.

MARINATION DIRECTIONS

Rub it in to all the cracks and crevasses, and allow the lamb to chill overnight in the fridge. Due to a scheduling conflict, I left it in for two nights. Not a problem.

A WORD ON PELLET SMOKING

Ask 15 pitmasters what the best type of wood for smoking lamb might be, and you’ll get 67¾ answers. After way too much agita, I succumbed to crowdsourcing and went with Amazon’s Choice, Traeger’s Signature Blend (their hickory pellets were the #1 Best Seller). I am sure that at some point in the future, I will have a hankering to try a specific type of wood with a specific recipe, but this wasn’t it. Think Ford, not Ferrari.

A little over an hour in the smoker. Some colour, but no “bark.”

ON THE SMOKER

I checked the pellet level and fired up the smoker, letting the machine come up to temp (250°F/121°C) while I took the lamb out of the chill chest and tied it up with butcher’s twine to help ensure an even roast. 20 minutes later, I placed the pieces fat side up on the grill and left them alone, apart from one quick peek about halfway through to see if they needed to be swaddled in aluminum foil to keep from drying out (they didn’t). After 3.5 hours on the electric pellet smoker at 250°F/121°C, the one on the left came off at an internal temp of 148°F/64.4°C, the one on the right came off at an internal temp of 166°F/74.4°C (which is regarded as the high end of acceptable for lamb). Obviously, the marinades made some difference in the appearance of the two pieces, and I can say that the 166°F/74.4°C piece was not quite as tender as the other one, though both were highly acceptable, texture-wise, and both were absolutely delicious.

After the meat rested, I popped it back in the fridge for a few hours, but it re-emerged at dinnertime for “lambwiches” (lamb sandwich with rocket and mayo on a Kaiser roll). Still moist and tender, full of flavour. And hands down, the most effortless process for leg of lamb I’ve found yet. Just like I would be happy with my Instant Pot even if I used it for nothing other than beans, I’m thrilled with the Camp Chef SmokePro DLX even if it only ever gets used for lamb… which it surely won’t.

When Life Hands You Lemons, Preserve Them

1

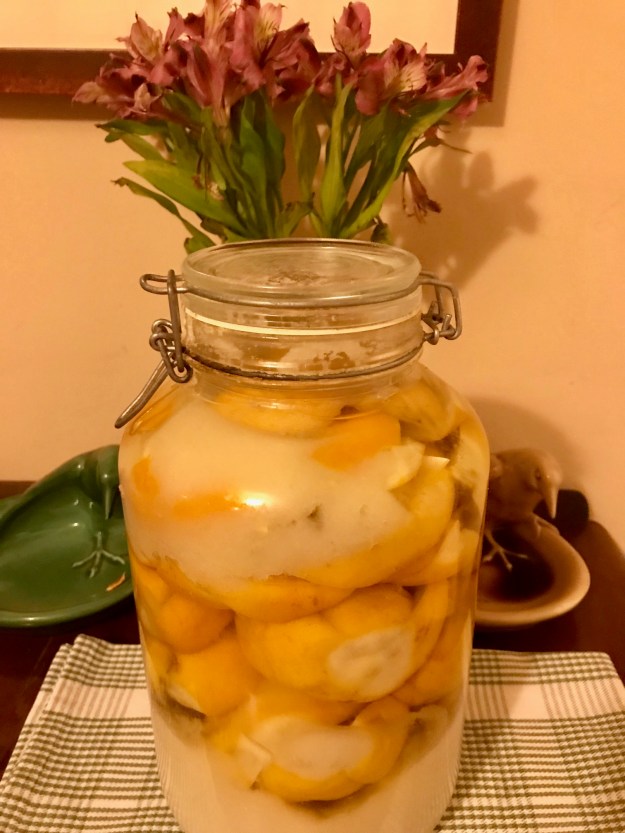
The chopstick jig proves invaluable to the preservation process.

In the words of the late Richard Armour, expanding on a poetic observation by the also late Ogden Nash, “Shake and shake the ketchup bottle / None’ll come, and then a lot’ll.” [Nash’s original, entitled “The Catsup Bottle,” is said to have read “First a little / Then a lottle.”] And while I am writing about a different condiment here, the purpose of the verse is to reiterate what every amateur crop-grower knows: your fruit tree, your tomato plant, your herb garden has a tendency to belch forth its bounty from zero to a degree where you’re practically begging neighbours to take the extra off your hands in about the time it took to write this sentence.

Thanks to a 10th century Egyptian Jew who was chief physician at Saladin‘s court, we have a way of managing the “very pretty” lemon tree‘s excess. And all it takes (apart from the lemons, of course) is a bunch of salt and a little patience.

Abū al-Makārim Hibat Allāh ibn Zayn al-Dīn Ibn Jumay‘ (a/k/a Abu-‘l-Makārim Hibatallāh Ibn-Gumaiʻ, but usually truncated to Ibn Jumay’, sometimes without the trailing apostrophe) apparently was a fairly prolific author, penning no fewer than eight medical tomes. His enduring masterpiece, though, seems to have been the lemon-plus-salt recipe that has gone largely unamended since the 12th century, and which was included in his treatise On Lemon, its Drinking and Use. The “drinking” part yielded the first known recipes for lemonade, and the “use” part gave us the preservation technique employed herein. Sadly, no original manuscript seems to have survived. As Toby Sonneman notes in his excellent book Lemon: A Global History, though, another physician [Ḍiyāʾ Al-Dīn Abū Muḥammad ʿAbdllāh Ibn Aḥmad al-Mālaqī (better known as Ibn al-Bayṭār)], born in Spain the year before Ibn Jumay’ died, lifted pretty much the entire On Lemon… text and incorporated it into his Al-Kitab ‘l-jami’ fi ‘l-aghdiya wa-‘l-adwiyah al-mufradah, also known as The Comprehensive Book of Foods and Simple Remedies. It went through dozens of editions in Latin, and was translated into French by Lucien Leclerc in 1842. To the best of our knowledge, Netflix has not as yet optioned it for a mini-series.

The uses for the umami-laden preserved lemon are legion. Just ask any friend from North Africa. Marinades. Drinks. With fish. With chicken. In salads. In risotto. Once you taste it, don’t be surprised if our imagination kicks into overdrive.

One note of caution: the preserved lemon(s) should be rinsed before using, as they are saltier than a sailor on leave. And, somewhat counterintuitively, the part you use is the rind. Go fig. But if you make these guys once, you’ll be a convert for life.

Lots and lots of lemons.

INGREDIENTS
NOTE: Amounts will vary depending on the number of lemons and size of container

lemons
kosher salt, or other large-crystal NaCl
Lemon juice, if necessary
cookie sheet, to keep the salt from going everywhere
Jar with lid (size depends on number of lemons)
Patience
Nothing else!
Ignore other recipes that call for cinnamon or bay leaves or whatever.
Totally unnecessary.

DIRECTIONS
Wash and dry preserved lemon container. [Some recipes have you go the full boiling-it-sterile route, which seems excessive to me. After all, the salinity and the acid content do a magnificent job of creating a hostile environment for wee beasties. Just make sure your lemons are covered with salt and/or juice during their stay in the jar. ]

Wash lemons.

Cut lemons nearly into quarters, taking care not to sever them entirely (see picture at top of post, in which chopsticks are employed as a device to keep the knife from cutting all the way through the lemons). Rub salt generously over all the interior surfaces, then pack salt inbetween the cuts. Place salted lemon in jar, and cover with salt. Repeat until jar is full, then top off the jar with salt and a little lemon juice, if it’s available and convenient. Basically, the salt will leach out the juice from the lemons, and you’ll have a sort of brine in which the lemons will morph into a really delicious condiment.

Wait about 30 days, turning the jar occasionally to mix it up and get the saline/lemon solution into all the nooks.

Use lemons. Refrigerate after opening.

Instant Pot® Vegan Risotto with Mushrooms, Preserved Lemons, and Basil

1

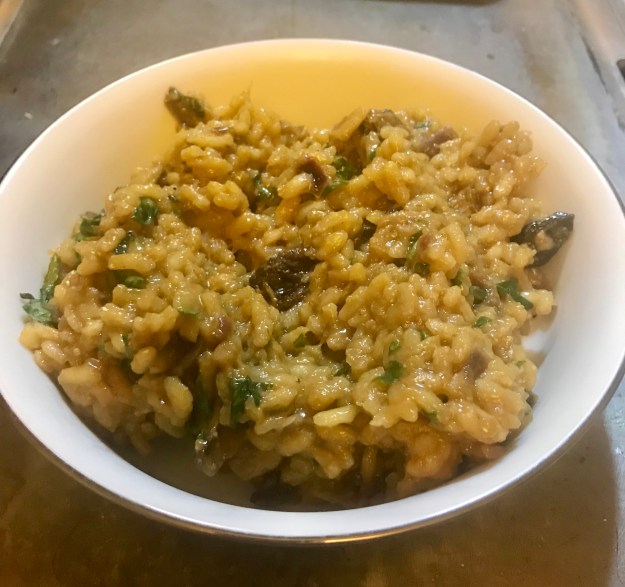
Canadian man makes Italian food.

As the news swirls with epic chills in the Midwest due to a polar vortex that has been altered by climate change, and when rain threatens my California home, it seems like the rib-sticking comfort of risotto is a reasonable response. Unlike my previous recipe for Saffron Risotto with Peas and Langoustine, this version was concocted in a cool bit of technology that had barely penetrated the public consciousness back then, and it’s vegan (although for my second helping, I grated a bit of Pecorino-Romano on top, and found it excellent).

Full disclosure: Although the idea for combining mushrooms and preserved lemons in a risotto originated with a yearning created in my tastebuds, several blog posts guided my thinking as I developed the recipe. You can find them at the Simple Vegan Blog, Vegan Heaven, Vegan Richa, Vegan Huggs, Chew Out Loud, and the ubiquitous Epicurious.

As is often the case, the recipe was developed around existing ingredients; I had some fresh basil in the fridge, it seemed like it would fit in with the other ingredients, and KAPOW, in it went. [One of my #squadgoals for 2019 is to undertake fewer unintentional fridge-based science experiments, a/k/a using ingredients before they stink up the joint.] Same deal with the dried mushrooms; they had been intended for a soup I was going to make for a friend who I later found out doesn’t like mushrooms.

The dried mushrooms I used were porcini (Boletus edulis), and an interesting variety known variously as slippery jack, pink boletus, and sticky bun. Although the package referred to them as Boletus luteus, which is their original 1753-era moniker gifted by the legendary botanist, physician, zoologist, and taxonomist Carl Linnaeus, they are now known to be of a different genus and are more properly called Suillus luteus. You are of course welcome to use fresh mushrooms in addition to or instead of the dried.

Two other ingredients might be slightly unfamiliar to those with a limited pantry. Nutritional yeast is sold as flakes, granules, or powder, and is often employed in vegan dishes to add a cheesy or nutty flavour. You’ll find it in my recipe for Vegan Potatoes au Gratin, in fact. If your local supermercado carries it, you’ll likely find it next to the spices or in the health food/gluten-free/dairy-free ghetto. If not, well, your local GNC or Amazon.

The other possibly unfamiliar ingredient is preserved lemons. Common in South Asian and North African cuisine, preserved lemon is basically a brined or pickled lemon, generally salted heavily and marinated/pickled/brined for a month or so in salt and either lemon juice or water, if liquid is employed. Sometimes spices are added to the mix, but not generally. If you have neither the time, patience, or lemons for this process, they can be found in jars at many Indian, Middle Eastern, or North African markets, should you have such in your area. And yeah, Amazon. But seriously, they are super easy to make and they last a long time, so even if you have to buy a jar to get started, you should make your own, too. Surprisingly, the part you mainly want to use is the peel, not the flesh. Weird, huh?

The Instant Pot® doesn’t let you off the hook entirely when it comes to stirring stirring stirring your risotto; it bypasses only about 85-ish percent, which is not insubstantial. And while this method in all honesty may not yield that Michelin-star-worthy risotto of your Tuscan dreams, it gets close enough that I’ll take it on a weekday when I don’t have the Zen-like attitude or schedule that the former requires.

INGREDIENTS
100 g / 3.5 oz dried mushrooms (to be rehydrated) (or 16 oz. / .5 kg fresh mushrooms, preferably crimini)
2 tbsp. / 30 ml extra virgin olive oil (or other preferred oil)
1 medium onion, diced
3 cloves garlic, minced
3 cups / 600 g uncooked Arborio rice
1/3 cup / 75 g preserved lemon, minced
8 cups / 2 liters Aneto vegetable broth, or other low sodium veggie broth
1 loosely packed cup (1.5 oz. / 45 g) fresh basil leaves, finely chopped
1/4 cup / 10 g nutritional yeast
1/2 teaspoon / 1 g white pepper
salt to taste

“Mushrooms and lemons,” ring the bells of St. Clements.

DIRECTIONS
Rinse dried mushrooms thoroughly to cleanse them of grit, then drain. Then cover them in a liter (or quart / 4 cups) of warm veg broth. I used the stupidly expensive and stupidly great Aneto vegetable broth, available at a case discount at Amazon. If you have your own veggie stock, great. Otherwise I would recommend a mix of water and one of Better Than Bouillon‘s stock bases, such as the No Chicken Base. The mushrooms should hydrate in about 1/2 hour. Remove them from the liquid, then strain the liquid to remove any remaining possible grit and reserve the liquid. [The mushrooms soak up about 100-150 ml of the original liquid, which you can replace with more stock, water, or dry white wine.]

Dice onion, mince garlic, mince preserved lemons.

You can chop the mushrooms if you want; I didn’t.

Set Instant Pot® to “Sauté” and add olive oil to the stainless steel inner container. Add onion and sauté for about 5 minutes, until soft without colouring. Add the garlic (and fresh mushrooms, if you are using them) and sauté for another two minutes or so, stirring regularly. Don’t worry if there’s some browning on the bottom of the stainless steel container. Add minced preserved lemons and sauté for another minute or so. Add rice, and stir, to coat all the rice with a little oil. [Add another few ml or a tbsp. of oil if you feel like you need to.] Deglaze the bottom of the container with a little of the reserved mushroom soaking liquid. Add the rest of the liquid and the mushrooms, close the lid, then set Instant Pot® to high pressure (I used the “Bean/Chili” setting) for six minutes, making sure to set the vent on the lid to “Sealing.”

Chop the basil and set aside.

How much basil? This much basil.

When the timer goes off, carefully turn the vent from “Sealing” to “Venting.” [You may want to do this wearing oven mittens; be mindful to avoid the rapid jet of steam that will be emitted.] Turn power to “Off.” When the steam has vented, carefully open lid and set aside. The risotto will look a little soupy at this point, but it will thicken as you stir in the remaining ingredients. Stir in the chopped basil, nutritional yeast, and white pepper a bit at a time, making sure they are well distributed, until remaining liquid is absorbed. Add salt (if necessary), ladle into bowls, and serve.

Just like mamma mia didn’t used to make.

Praying for Grain: Vegan Fried Rice, Mushroom, and Super Greens Bowl

0

Asked the bride last night if she had any ideas for tonight’s dinner, and she responded with, “I pinned some grain bowls on my Pinterest page.” Some people find Pinterest really useful and convenient. I am not one of those. So after I looked through all 266 pins in the “No Animals Were Harmed” folder, I wound up (as I often do) perusing Food & Wine’s website. On it, I found this recipe, for Kale-and-Shiitake Fried Rice. It was pretty close to where I wanted to go, but it had eggs, and I was in a vegan mood, so I made a few simple mods for tonight’s meal.

This is super easy to whip together if you already have some cooked rice lying around, so I made a bunch in the Instant Pot last night before going to bed. Obvs, you can use any type of rice, but I find that brown Basmati rice is a good middle path between an insipid white and a cloying brown. The author of the Food & Wine recipe (David Lebovitz) recommended day-old rice, which he says works better to absorb the flavourings. Makes sense, since it will dry out a bit in the fridge overnight. As far as the greens go, I used a mix from the local market, but you could easily add or substitute arugula, collard greens, turnip greens, watercress, or even the leafy part (not the stem) of bok choy. Mustard greens, on the other hand, might overpower the dish, so have a care if you are thinking of adding them.

[NOTE: I love my Instant Pot; I made a whole slew of rice all at once with nary a care. Typically, the recipe for rice in the Instant Pot calls for a 1-to-1 ratio between liquid and dried rice; for brown rice, however, I’ve found that a 1.25-to-1 ratio of liquid to rice works better. Also, the “Rice” button on the front of the cooker is calibrated for white rice. If you are making brown rice, you’ll want to cook it at high pressure for 22-24 minutes, then let the cooker depressurize naturally, which takes about 10 minutes.]

INGREDIENTS

1/4 cup / 60ml olive oil
One 1-inch / 2.5cm chunk of fresh ginger, peeled and grated
2 oz. / 57g sliced or slivered almonds
6 scallions, thinly sliced
12 oz. / 350g mushrooms, thinly sliced
5 oz. / 141g coarsely chopped “super greens” (kale, chard, mizuna, and baby spinach or whatever greens you prefer)
4 cups day-old cooked brown Basmati (or other) rice
3 tablespoons / 45ml lemon juice (juice of one medium lemon) or equivalent rice wine vinegar
Sea salt

DIRECTIONS

In a wok or large skillet, heat the oil. Add the ginger, almonds, scallions, and a pinch of salt. Cook over moderately high heat, stirring constantly, until the ginger and scallions are tender, about 2 minutes. Add the sliced mushrooms and a generous pinch of salt and cook, stirring occasionally until tender, about 5 minutes. Add the greens, season with salt and stir-fry until wilted, 2 to 3 minutes. Add the cooked rice and stir-fry until heated through, about 3-5 minutes. Serve immediately.
 Serves 2 as a main course (see bowl in picture), or 4-6 as a starter or side.

Enter The Octagon. Salad, that is.

0

This is going to be a little frustrating for those of you who need precise measurements or who aren’t comfortable grilling a steak. I’m just warning you up front, so you won’t be disappointed and won’t waste your time. That said, if you are agreeable to a bit of improv, you’ll be rewarded with a tasty, carnivore-pleasing meal. It’s called the Octagon Salad, not in homage to the ridiculous 1980 film starring the ridiculous Chuck Norris, but because it has eight elements, to wit:

    INGREDIENTS
    Mixed Greens
    Grilled Steak, cut in strips [Chicken or Pork may be substituted if desired]
    Corn (fresh, canned, or frozen)
    Tomatoes (cherry or grape; chopped sun-dried tomatoes can be substituted)
    Marinated Bell Peppers (1 jar usually does it for me)
    Cashews (preferably roasted and salted)
    Tortilla Strips*
    Cilantro-Pepita Caesar Dressing
    Finishing salt

The beauty part of this salad is that, apart from the steak and the tortilla strips, it can all be assembled from pre-packaged ingredients; cherry or grape tomatoes work particularly well in that regard (you can slice them in half if you feel the need). It’s also a terrific way to use up leftover grilled meats, should you have some. While I’ve tried making this with store-bought rotisserie chicken, the texture just doesn’t work, so I advise against it. I haven’t yet tried it with grilled sausage, but I’m sceptical as to whether it would work… maybe an herbed chicken sausage could be acceptable. Or maybe not. [If you find one that fits, please let me know!]

As for the cilantro-pepita dressing, if you happen to live in California (as I do), it’s a pretty good bet that one of your local supermercados carries the El Torito brand, which is right tasty, if somewhat expensive. If you are feeling more adventurous, or are just plain thriftier, copycat recipes for a DIY version can be found here and here.

The steak, corn, tomatoes, and marinated bell peppers can be combined with the dressing ahead of time, and if you have more than one evening’s worth of those ingredients, they may be kept in an airtight container in the fridge for a few days. Don’t add the cashews or the tortilla strips until the very end, or they’ll lose their crunch (part of this salad’s attraction is its variety of textures). It is best served al fresco with a white wine (Sancerre, Albariño, and Moschofilero all work well) or a rosé (even sparkling!), but if you are watching calories, some lemon and cucumber spa water is an excellent substitute.

Be sure to sprinkle a tiny bit of coarse finishing salt over each individual plate immediately before serving. This is a place where a little Pink Himalayan salt or black “lava” salt (which is just salt mixed with charcoal, incidentally) can add some visual interest. I have a bunch of different salts from all over the world for just this purpose. Trust me, your guests will feel special when you tell them that you had your grey sea salt shipped in from the Guerande Salt Ponds on the Breton coast. Or they may just consider you a dimwitted gasbag easily fished in by the latest culinary fad. But either way, it will be entertaining for them, and that’s the point.

And yes, I realize that the finishing salt brings the ingredient total up to nine. But who would want to eat a nonagon salad?

*The way to get the tortilla strips done as in the photo is to purchase a package of taco-sized corn or flour tortillas (spinach- or tomato-enhanced tortillas add an extra colourful dimension), cut them into quarters, stack the quarter-rounds and slice off 1/4″ (6mm) strips. Heat up about 1/2″ (13mm) of canola or other high-smoke-point oil in a frying pan, and dump in the strips, stirring until browned. Remove strips from frying pan with slotted spatula and cool on paper towels. If you have extra, pop them in a Ziploc bag and save for later; they should be fine for at least a week, but they never seem to last that long.

Soupe de la Semaine: Vegetarian (but not Vegan) Avgolemono

0

Yakko digs Greek soup.

Yakko digs Greek soup.

One of the very first Greek dishes I can remember tasting (long before I ever visited Greece) was a deli-style version of this soup. This version recreates it fairly well (except for the chicken pieces), presuming my taste memory is accurate. The big plus here is that it can be made in a little more than half an hour, and requires practically no prep.

Avgolemono is the Greek compound word for “egg” and “lemon,” and doesn’t necessarily refer to the soup (an egg-lemon sauce that shares the name is used widely with pork, chicken, and grape leaf dishes). That said, avgolemono is often called the “national soup of Greece,” even though research seems to indicate that it likely originated in Portugal or Spain, quite probably among the Sephardic Jewish popuation. [It’s probable that they were also responsible for the original Tarta de Santiago, whose picture adorns the top of this blog.]

A couple of notes. I happen to like the version thickened with potato starch in the winter, when I’m serving it hot. In the summer, I tend to serve it chilled, and without the extra thickener. No need to be too fussy about any of the amounts here; the recipe is easily halved, and you can use less or more orzo or lemon depending on your taste. I recently added the lemon zest and white pepper to the mix, and I find they both give the soup a subtle boost. The beauty part about the orzo (as opposed to rice, which is used in some recipes) is not only that it’s a great way to use up excess cooked pasta if you have it, but since dry orzo only takes 7-9 minutes to rehydrate, you don’t have to cook it separately. If you have leftover cooked rice, you can easily substitute it for the orzo. [Dry rice will take 40 minutes or so to reconstitute.]

Cook’s Illustrated and America’s Test Kitchen named Orrington Farms’ Chicken Flavored Vegan Broth Base & Seasoning as the best commercial starter for vegetable broth, and the latter published a recipe for making your own base. The downside of most store-bought vegetable stocks is that they’re sodium bombs, and many of them just don’t taste very good. The lemon in this recipe does a decent job of masking their weaknesses, but the better a veggie broth you use for a starter, the better the finished product will turn out.

Former White House Communications Director and current ABC News commentator George Stephanopoulos makes a similar, if slightly more complicated, version if you want to watch an ordinary home cook in action.

Ingredients

8 cups / 1.8 litres vegetable stock
4 cups / 800g cooked orzo (or 2 cups / 400g dry)
6 eggs, whisked
2/3 cup / 160ml lemon juice
zest of 1 lemon
1 tbsp. / 12g potato starch (optional)
2 sprigs of fresh dill, chopped (optional)
white pepper to taste (optional)

Tempering the eggs and lemon juice.

Tempering the eggs and lemon juice.

Preparation

1. Heat vegetable stock and chopped dill (if you’re using it) in large pot or Dutch oven, to just below boiling. Add dried or cooked orzo when stock is warmed. DO NOT allow this to come to a boil, or it will curdle when you add the egg and lemon mixture, below.

2. While stock is heating, whisk eggs and lemon juice in a separate bowl.

3. Temper egg-lemon mixture by drizzling in 2 cups / 500ml warm stock while whisking continuously. Transfer tempered egg-lemon mixture back to soup pot.

4. if thickening with potato starch, place 1 tbsp. / 12 g in the bowl in which you tempered the eggs. Gradually whisk in a ladle of liquid from soup pot until you have a slurry free of lumps. Transfer slurry to soup pot and simmer for 15-20 minutes, stirring occasionally to keep orzo from sticking to the pot. Soup will thicken noticeably, enough to coat spoon.

5. Zest lemon over soup pot just before serving, and stir to incorporate. Whisk in white pepper to taste (if desired), and ladle soup into mugs or small bowls, making sure to get plenty of orzo. Garnish with dill if desired.