Split Belly (Karniyarik) — or — The Imam Fainted a Second Time When He Had a Mouthful of Meat

0
10237637-391f-406e-865f-da239fe55a04.jpeg

No, it’s NOT just stuffed eggplant! Well, maybe.

First and foremost, this is a recipe — well, actually a roadmap — for stuffed aubergine (a/k/a eggplant), loosely adapted from a Turkish recipe for karniyarik, which I have read translates literally to “split bellies.” I don’t speak Turkish, and I’m guessing you don’t either, so we’ll just have to rely on the experts.

Karniyarik is a meat-enhanced dish, apparently loosely based on a vegetarian version of stuffed aubergine known as Imam Bayildi (literally, “the imam fainted”). Some stories would have it that he fainted because it was so delicious, and I will take that at face value, because stuffed aubergine is indeed swoonworthy.

Those of you who follow the blog will know it’s not uncommon for me to plunge headlong down the rabbit hole of a recipe’s provenance and expression; this one was no different. I viewed no fewer than a dozen recipes, and found no definitive formula, nor did I discover its origin. I don’t consider the investigatory time wasted, though, because I discovered several variants on the recipe that may find their way into my oven sometime in the future. I have to hand big props to Chef John at foodwishes.blogspot.com, whose video popped up in my YouTube feed and started me down this road to begin with.

Typically, the meat in this recipe is ground, generally beef or lamb. As it happened, I had excess smoked pork shoulder hanging about in the fridge, so that was my meat of choice. The balance of my ingredients hew fairly closely to the harmonized medium of the canon: tomato paste, onion, garlic, cumin, peppers, etc. Some versions include cheese in the filling, but I wasn’t feeling it (although I might in future). Many would have you serve this over (or with) rice or orzo. Fine, but not strictly necessary.
f45b12ec-33a4-4ef3-933b-817b836e0729

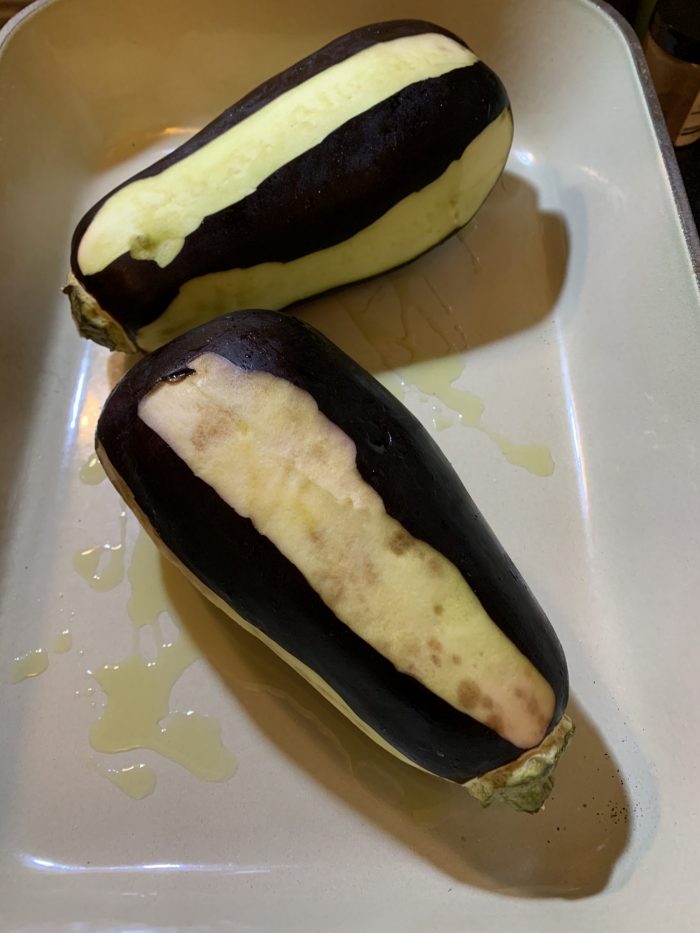
The semi-peeling keeps them from bursting, and gives you a flat surface they can sit on.

INGREDIENTS
2 similarly-sized aubergines (a/k/a eggplant)
.75 lb / .33 kg roasted pork shoulder, shredded
6 mini red bell peppers, diced
1/2 large or 1 small onion, diced
2 cloves garlic, minced
1 can (7 oz. / 198 g) diced roasted green chilies (with juice)
1 tbsp / 7 g cumin powder
1 tsp / 2.5 g ground cinnamon
2 tbsp / 15 g tomato paste
2 tbsp / 15 g Darrell & Nil’s Turkish Spice Blend*
salt and black pepper to taste
2 tbsp / 30 ml olive oil
1 cup / 250 ml chicken stock

*This is a custom spice blend made by some friends. It’s made from paprika, black pepper, cumin, coriander, allspice, cassia, sumac, oregano, Maras chile, clove, cardamom, and nutmeg. Maybe I can get them to cough up the actual recipe, but if not, make sure you include the sumac and Maras chile, which really push the blend toward Istanbul


8dd089f7-8330-4b8c-b4f7-ad9595e31b01

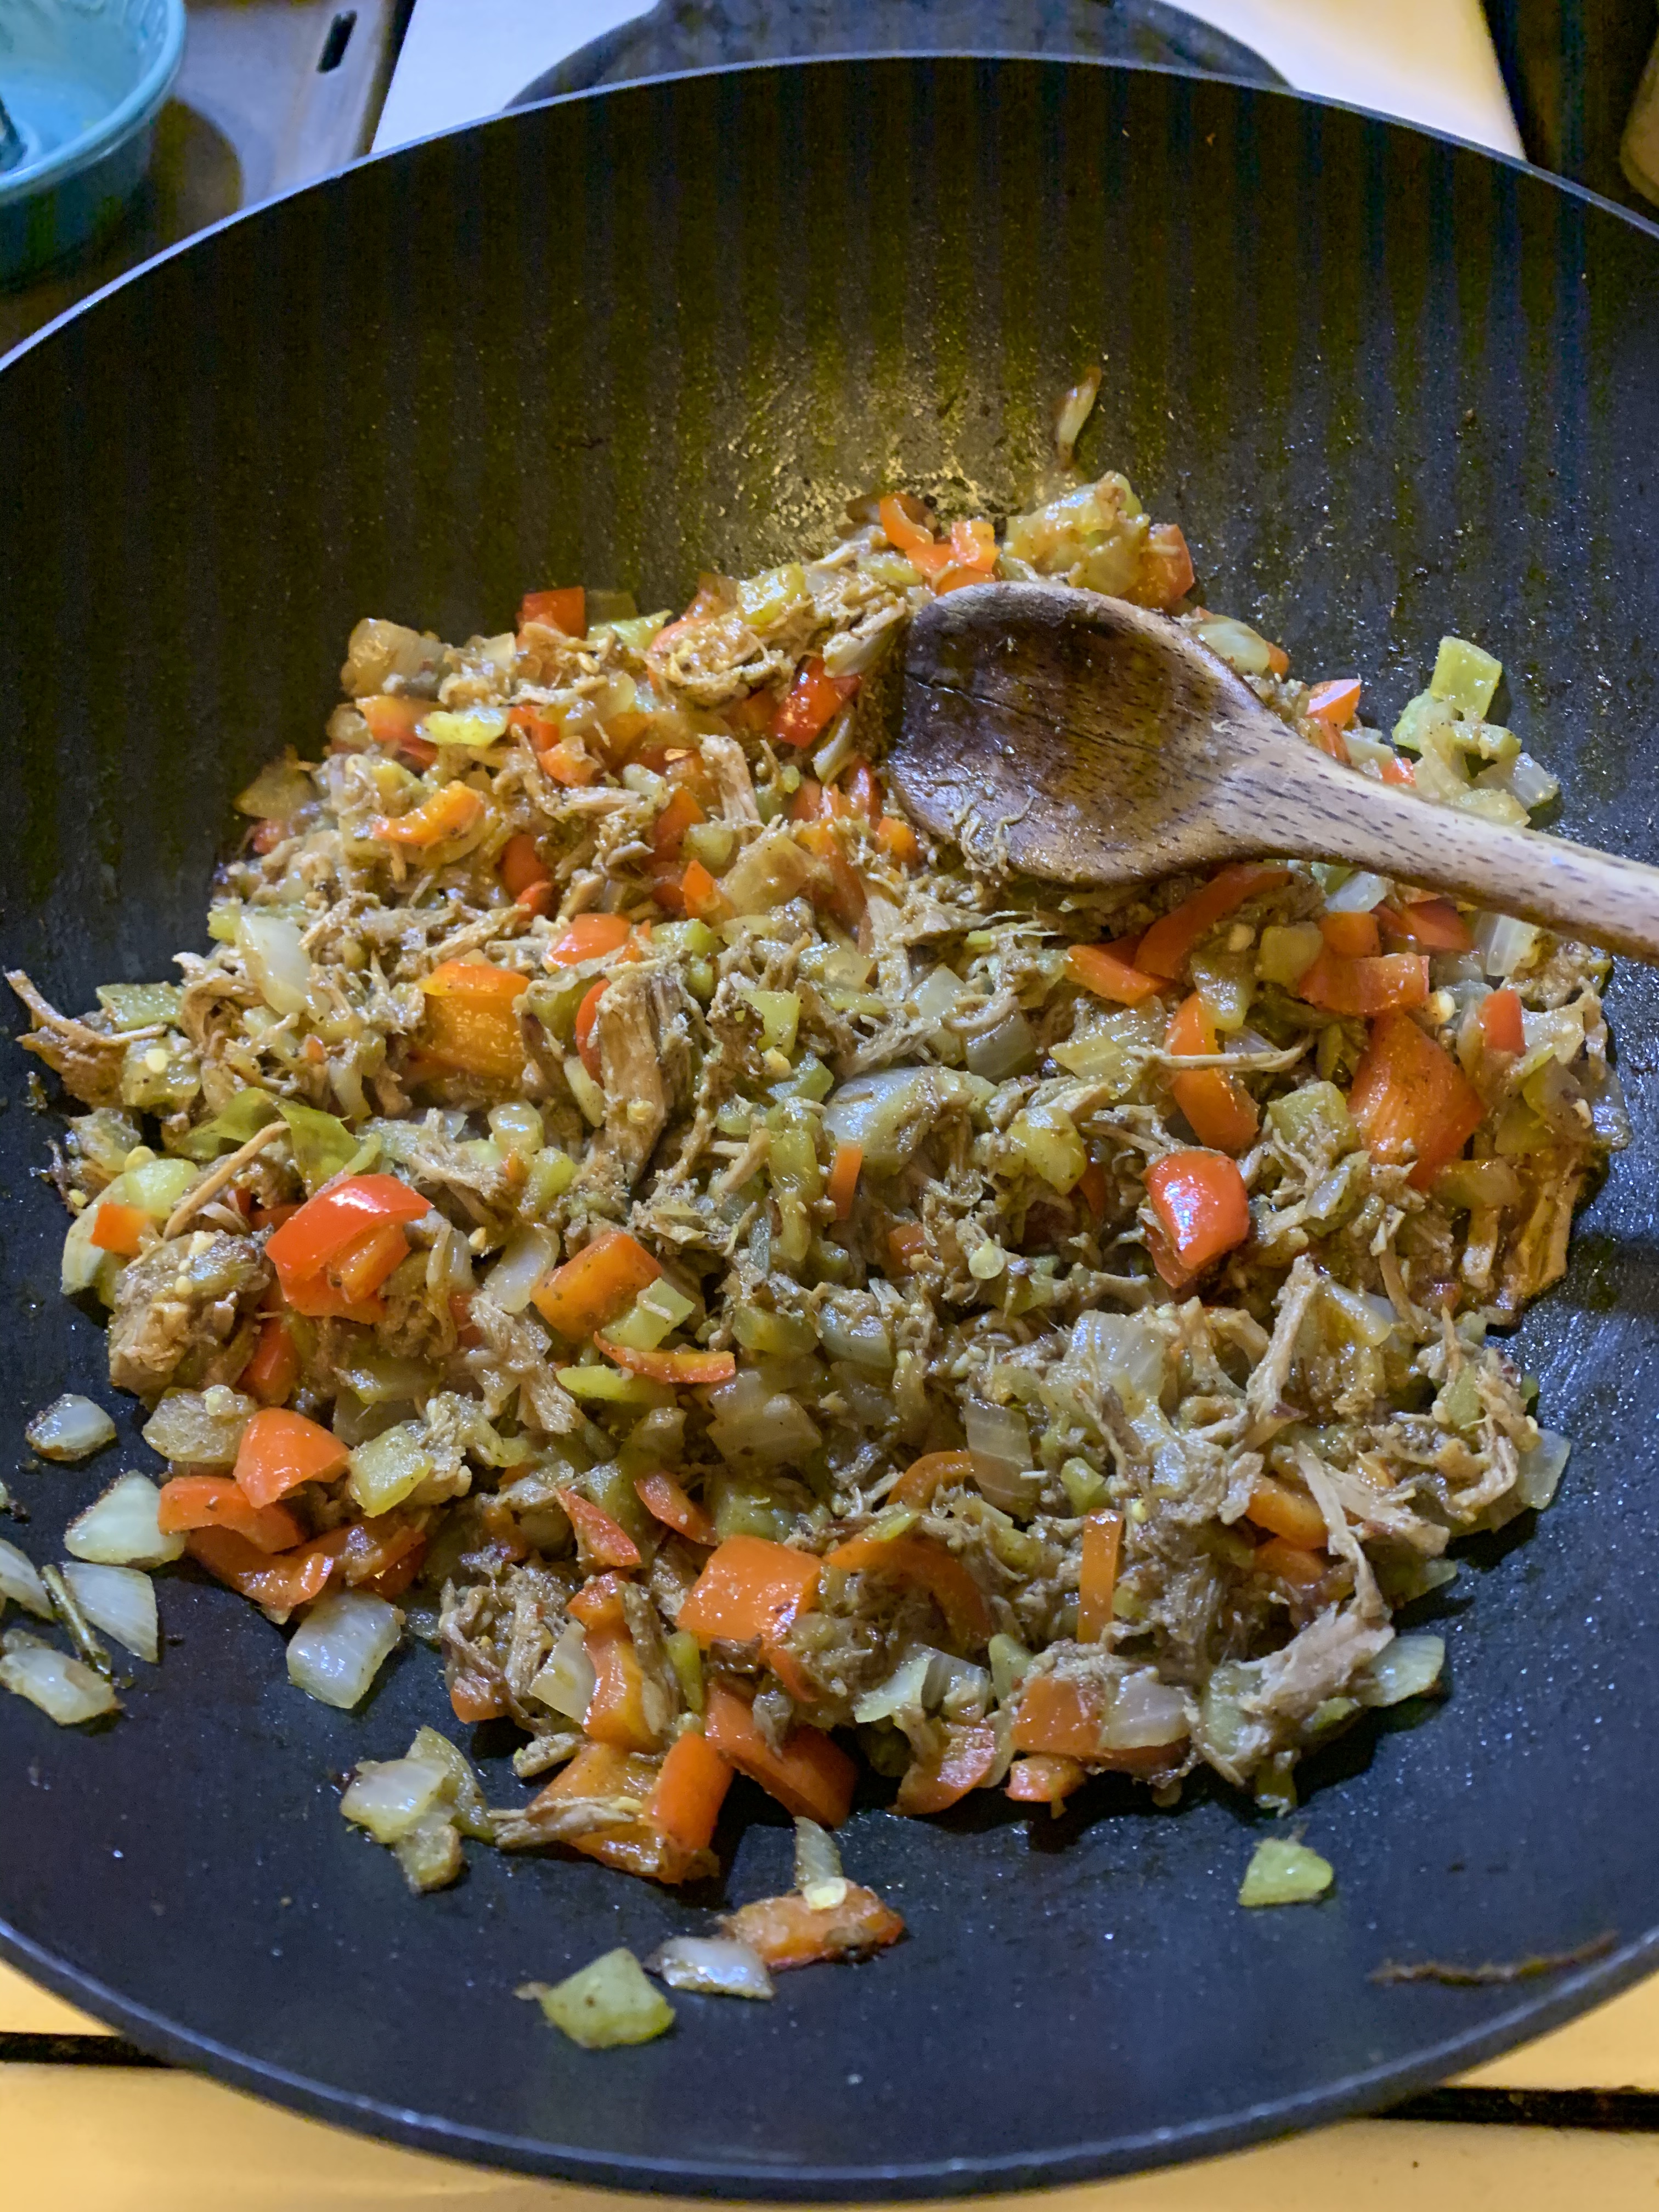
Stuff for the stuffing.


DIRECTIONS
Wash the aubergines, peel four equally spaced strips and set aside. The peel allows them to sit flat in the casserole dish or roasting tin.
Preheat oven to 400°F / 205°C.
Drizzle a little olive oil into a casserole dish or small roasting pan sufficient to hold the two aubergines, then pop the veggies into the dish and pop the dish into the oven.
You’ll want to roast the aubergines for 45 minutes to an hour, depending on their size. You don’t want them cooked all the way, because you will be stuffing them. When you take them out of the oven, they should still be fairly firm and holding their shape.

During that time, you can prepare your filling.
Warm a frying pan over a medium heat, and put in the cumin, cinnamon, spice blend, and black pepper; toast the spices for 1-2 minutes, just to bring out a little more flavour. The add the salt, onion, green chilies, and bell peppers; cook for 5-8 minutes, or until the bell peppers are softened and the onions are translucent. You don’t need to brown them, but don’t freak out if they take on a little colour or if they’re still slightly firm. Remember, they have more time to cook when you stuff the aubergine.
Add the garlic and tomato paste, and cook for a couple of minutes more, just to take the rough edges off the garlic. Then remove the pan from the heat and set aside until it’s time to stuff the aubergines.

7d973c03-e5db-4565-b288-4929f98bdf50

Fit to be stuffed.

When the aubergines are partially cooked, but still firm(-ish), take them out of the oven and allow them to cool sufficiently that you can stuff them without burning your fingers. Take a knife and “split their bellies” (vertically of course), then spoon in a generous amount of filling. Don’t pack it in too much, though, or the aubergines will split during their second oven sojourn. Pour the chicken stock into the pan (but not over the aubergines), so they don’t burn. You can also use the resulting sauce to spoon over the finished dish, although in my case most of the liquid had evaporated.

Return the stuffed aubergines to the oven for 30-35 minutes, or until a knife can pierce their flesh without resistance. Allow them to cool for about 10 minutes, because they are molten lava hot straight from the furnace. Plate, spoon over some of the drippings, and serve. [Although inauthentic, cheese, sour cream, or crème fraîche could be used as toppings. You could also sprinkle some fresh chopped parsley on top for colour. ]

This is scalable, depending on the number of diners, and is quite mutable while still staying within the parameters of karniyarik. Find the ingredients that exist in your pantry and/or suit your palate, pour yourself a glass of raki for a job well done, and offer a hearty şerefe to your dining companions.



Soupe de la Semaine: Nässelsoppa, the Stinging Nettle Soup from Sweden

0

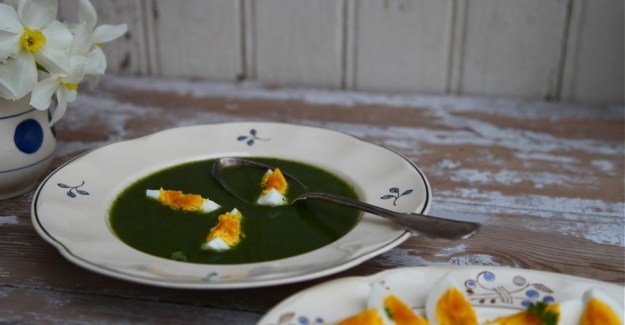
In a perfect world, I’d have a beautiful serving shot for you, but I froze the soup for a friend, so here’s one I nicked from the Queen of Kammebornia.

I’m continually surprised by the lengths to which our species will go to get food. Olives give us stomach aches straight from the tree? Maybe soak them in lye, then, because a little lye makes everything tasty. Rhubarb leaves are potentially deadly? Okay, let’s just harvest the stalks, and see if they won’t kill us. Nettles sting us when we touch them? Then we’ll boil them, and then perhaps they won’t sting.

I completely apprehend the ancient sensibility of finding local greens, boiling them, and consuming the broth. In every culture, you can find some version of this basic idea. Maritimers all over the globe even harvested seaweed, which makes for a magnificent, if humble, soup.

So far, a credible origin story for the Swedish version of this soup has not emerged, but since there are similar versions of it in Ireland, Scotland, and Native American culture, I’m presuming that the arc of its development was probably not that of something being spread from a single source, but a soup with a parallel evolution wherever Urtica dioica flourished (originally Europe, Asia, and western North Africa, but now pretty much everywhere). The bottom line is that it is ancient, dating back to the Bronze Age, and if something has persisted that long, there’s a reason.

I dug through dozens of recipes to arrive at this one, many of them Google Translated from Swedish. If you go out hunting on your own, don’t be put off by instructions for chopping nostrils, or be dissuaded by “raspberry soup” mistranslations. So long as you handle the raw nettles with care, your nostrils are safe. You will want to use gloves or tongs for the initial cleansing, though. Gotta respect a plant that employs not only miniscule thorns, but also formic acid, to try to keep itself safe from the likes of soup-making us.

This can easily be adapted to a vegan recipe by omitting the eggs, crème fraîche/sour cream, and chicken stock. Be sure to use a really good vegetable stock to get the depth of flavour the soup deserves. Roasting the vegetables before putting them in the stock is a must for this recipe.

Have a care with these before they’re given the hot broth bath.

INGREDIENTS
30 ml / 2 tbsp olive oil
2 small onions, finely chopped
500g / 1 lb stinging nettle shoots and leaves
1 liter / 4 cups good quality chicken or vegetable stock
500ml / 2 cups water
5-10g / 1-2 tsp salt
1-2g / 1-2 tsp dried thyme
pinch white pepper
20g / 2 tablespoons potato starch (or corn starch)
4 hard boiled eggs
10-20 chives, chopped
250 ml / 1 cup crème fraîche, optional (sour cream may be substituted)

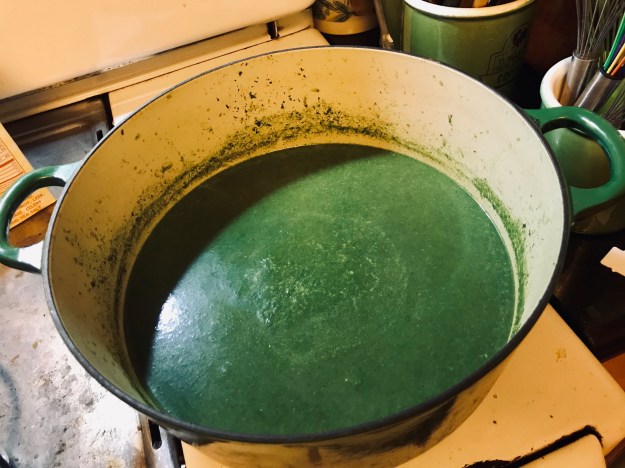
Ready for the purée.

DIRECTIONS
Rinse nettles thoroughly, picking out grass and any foreign objects, then drain. In a large pan, heat the oil, thyme, salt, and white pepper, and then sauté the onion for about 5 minutes, until soft without colouring. Add the water and stock. Bring to a boil and then add nettles. Cover and simmer for about 20 minutes. Using immersion blender, purée soup until smooth (or use food processor/VitaMix). Dissolve the potato starch in a little water and stir it into the soup. Bring back to a gentle boil, stirring regularly until it thickens slightly. Check and adjust the seasoning. Serve hot with quartered or halved hard-boiled eggs, chopped chives, and a dollop of sour cream or crème fraîche.

Despite what Kermit said, it actually is easy being green.

Pear and Bourbon Croustade

0

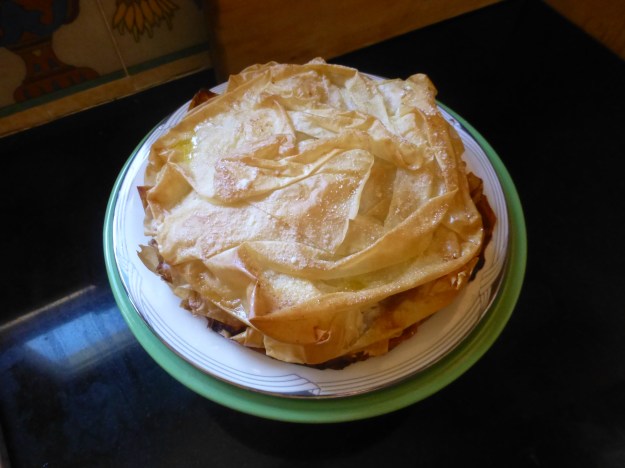
That plate will mean something to readers of a certain age…

Working with phyllo dough is like working with horses, musicians, or people of whichever gender(s) you find sexually attractive; it’s kind of a pain in the ass, but if you are patient and let them (mostly) have their way, you can achieve magnificent results.

Full disclosure: This recipe is derived from “Apple and Calvados Croustade” by Leslie Brenner, originally published in the Los Angeles Times on 12 December 2007. Fuller disclosure: it, in turn, was inspired by a recipe for Apple and Armagnac Croustade in the Cafe Boulud Cookbook by Daniel Boulud and Dorie Greenspan. “Okay, enough with the disclosures already” even fuller disclosure: I have interviewed Boulud and Greenspan on multiple occasions, and their recipes and aesthetic are beyond reproach. So why didn’t I just make their croustade? I’m glad I asked me that. Basically, I wasn’t feeling like apples the night I decided to make it, and pears were in season (and cheaper). It seems that the basic croustade shell could be a happy edifice for all sorts of fruit compotes (peaches, mangoes, and papayas would all likely perform well, so long as they weren’t overripe). I might even have a go at carambolastar fruit — some day, so feel free to play.

Feelin’ hot hot hot.

A note on alcohol, fire safety, and children. When I was a kid, helping out one or another of my grandmothers in the kitchen, I would have just adored being part of a flambé. Well, perhaps not the flambé itself, but part of the process. You are the best judge as to whether your children should be permitted in the kitchen — or the county — when you do this. So long as they stand back at least three feet, everything should be hunky dory, and perhaps even better if you say “Don’t tell [other parent or siblings] I let you help me, okay?” That’s the kind of secret kids love to keep, although they may not be successful in so doing. When it comes to fire safety, I had a sheet pan sitting out that I could employ to cover the flambé pan post-haste, breaking the “oxygen” side of the “oxygen-heat-fuel” fire triangle. Lastly, if alcohol is an issue for you, feel free to leave it out. After all, we’re basically putting a fruit compote into a phyllo dough crust, and there are no fewer than 17,583 ways to do that.

Save some for the baker.

Making your own phyllo dough: Don’t. Life is too short.

The apple version of this croustade seems to have originated in the southwest of France (the name derives from the Occitan crostada, literally “crusted”), and this style of dessert is mainly found in Midi-Pyrénées, now part of Occitanie. It may be known also by pastis (which it is called in the Quercy and the Perigord) or tourtière (in the Tarn and the Landes). In the Gers, the croustade is called Pastis Gascon (not to be confused with the aperitif!).

A bowl of Bartletts.

GEAR

Small fine mesh strainer or sifter for applying powdered sugar
Pastry brush
Silicone mat or parchment paper
Baking sheet
9″ / 225mm tart ring (size may vary some; see below)
Canola oil spray for lubricating tart ring and parchment paper (optional)
Thin, lint-free towel (approx. 18″ x 24″ / 455mm x 600mm)

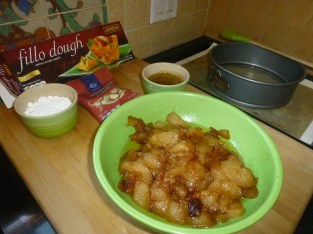
Mise en place after pears are cooked.

INGREDIENTS

1 stick plus 2 tablespoons (113g + 30g) butter, divided
6-8 Bartlett (or other, except Asian) pears, peeled, cored, and cut into 1/3″ / 8.5mm slices
1 moist, plump vanilla bean
1/4 cup / 50g light brown sugar (you can substitute white sugar; i preferred the brown for an extra “bass note”)
1/3 cup / 75ml vanilla-infused bourbon or pear brandy or pear eau de vie or rum (should be 70 proof / 35% alcohol or higher)
1/2 package of frozen phyllo dough (.5 lb. / 225g, containing about 20 sheets or so), thawed
[NOTE: The phyllo take 2 hours to thaw at room temp or overnight in the fridge]
1/2 cup / 60g powdered sugar (or more, as needed)
1/3 cup / 35g sliced almonds, divided

DIRECTIONS

Peel and cut pears into 1/3″ / 8.5mm slices. Set in bowl and set aside. [Normally, I would have the bowl filled with acidulated water to prevent the pears from going brown, but since you’re going to caramelize them, that’s not an issue.] Cut the vanilla bean lengthwise in half and, using the tip of a small knife, scrape the seeds over the pears and drop the pod on top. Add the 1/4 cup / 50g brown sugar to the pears in the bowl and stir gently.

Melt 4 tablespoons / 55g / one-half stick of butter in a large skillet over medium heat. When the butter is foamy, add the pears with the vanilla and the sugar and cook, stirring occasionally and gently, until the pears are lightly caramelized and soft, about 20 to 25 minutes. Add your alcohol of choice and, standing well back while using a long match or grill-style lighter, set it aflame. When the flames subside, turn the pears over in the sauce; when the the alcohol has reduced to a glaze, transfer the pears to a bowl and allow them to cool to room temperature. Remove vanilla bean. [If you started late at night and want to finish up the next morning, as I did, or need to take a break, you can do so here. Just cover the lot with cling film, pop it all in the fridge, and come back when you’re ready to pick up again.]

Center a rack in the oven and heat it to 350°F / 175°C. Grease a 9″ / 225mm tart ring (I used the side of a springform pan) and place it on a baking sheet lined with a silicone mat or parchment. Melt the remaining butter and set it aside. Unfold the phyllo dough on your work surface and cover it with a damp towel.

Working quickly, remove the top sheet of phyllo (re-covering the remaining sheets), brush it lightly with butter, and dust it with powdered sugar. Gently and loosely crumple the dough into a circle and lay it into the pastry ring. Sprinkle it with a few of the almonds. Repeat this procedure five more times, until you have six buttered, sugared, and almond-sprinkled sheets of phyllo layered in the ring. Do not press them together — let them keep some height.

Spoon the pears into the center of the croustade, leaving a 1-inch / 25mm border bare. Working as you did before, butter, sugar, and crumple two sheets of phyllo, fitting them loosely over the pears. Sprinkle this layer with the remaining almonds, and cover this with another pair of crumpled, buttered, and sugared sheets of phyllo. Drape the phyllo artfully, so it looks good. Don’t feel bad if a phyllo sheet tears; just pick up the remaining part and arrange it adjacent to its sibling. And if it goes completely sideways, as, say, cling film sometimes will, you can make a command decision to ditch the dough or just tuck its shards someplace toward the middle for “texture.”

Slide the croustade into the oven and bake for about 10 to 12 minutes, watching the top of the tart carefully to make certain it doesn’t brown too much (depending on your oven, you may want to rotate it at the halfway mark). When the top is just lightly browned, remove the croustade from the oven.

Increase the oven temperature to 400°F / 200°C. Butter and sugar another pair of phyllo sheets, loosely crumple them and place them side by side on the previous layer to make a light, airy crown. Bake for 5 to 10 minutes, or until lightly browned, then remove it from the oven again.

Butter the last sheets of phyllo and, once again, crumple them to make a crown. Place them on top of the croustade and dust it heavily with some of the remaining powdered sugar. Return it to the oven and bake until the top layer caramelizes evenly, about 5 to 10 minutes. Check the progress of the sugar frequently, because — like toast — it can go from brown to burned in a flash. Pull the croustade from the oven as soon as the top is a golden caramel color and allow it to cool for 5 to 10 minutes. Dust it one last time with a little powdered sugar.

To serve, lift off the tart ring and, using two wide spatulas, transfer the croustade to a serving plate. Serve warm or at room temperature the day it is made, with crème fraîche, very lightly sweetened whipped cream, or vanilla ice cream.

[CODA: I used a silicone basting brush for the butter, and while it was okay, it wasn’t brilliant. A paintbrush-style brush would have worked better. It is apparently customary in France to cut these with a pair of long, sharp scissors. However you decide to do it, the croustade is going to shed some of its golden phyllo. If you’re cutting it up in the kitchen, you can gather the crumbs and arrange them as artfully as possible, or just hide them under the whipped cream. Finally, this is plenty sweet without any help, so feel free to serve it plain.]