My Favourite Summer Salad (adaptable for winter, too!)

0

Leave it to me to post my favourite summer salad on the 20th of September, right?

But it’s still warm here in São João do Estoril, Portugal, and more importantly, couve (cabbage) is in season, while couves de bruxelas (Brussels sprouts) are not.

This salad originated at the wonderful food blog Love & Lemons, where it was featured as an only-seven-ingredient Shaved Brussels Sprout Salad. [Although it really really originated on our pal Karen’s Facebook page, which was what tipped the bride to the recipe.] Needless to say, when my betrothed first prepared it, I was sceptical. Maybe even dubious. But it was terrific, and light, and whenever she made it, we dove into our bowls like a pair of Tasmanian Devils on a meth bender. Brussels sprouts are a seasonal thing round these parts, though, and the frozen sprouts are not a good substitute — much like Christopher Lloyd, they are fairly unshavable.

Fortunately, cabbage — Savoy, or green, or red, or some combination of the three — is a highly acceptable stand-in during those months when sprouts are on the outs. And the absolutely brilliant bit about this salad (in either form) is that it will keep overnight in the fridge without going all wilty. Plus, even I can make it, which means that even you can make it. If you can operate a knife, a spoon, a whisk, and a bowl, you’re good to go.

Okay, I lied. You’re going to have to toast some slivered almonds. Trust me, it’s worth it. You can do it in the oven, or like I did, on the stovetop in a dry frying pan. Here’s a good article about the different ways of achieving this miracle of aromatic nuttiness. And yes, you’re probably — no, if my experience is any guide, definitely — going to overtoast on occasion. The good news is that, unless they’re blackened, the almonds can almost always go in the salad and work just fine.

Don’t burn your nuts.

My other favourite thing is that the salad hits every taste note: the cranberries bring sweetness, the feta is salty, the lemon has acid, the chives contribute a bit of herbaceousness to the mix, the cabbage and toasted almonds have a slightly bitter edge, and the olive oil adds umami. I’m going to sound like a bit of a broken record to longtime readers here, but I implore you to use the best olive oil you can get your hands on, and it’s worth squeezing fresh lemons for the dressing — if you can get hold of Meyer lemons, even better!

Feel free to adjust the amounts — and even ingredients — to suit your palate. Some folks prefer Parmesan or another salty cheese to Feta, and that’s just fine. No chives? Maybe you have some green onions. Walnuts rather than almonds? Go right ahead. Pomegranate seeds rather than dried cranberries? Okay. But please do give this version a go before you start your own mods, because the bride and I feel like we hit on a really good balance of elements.

INGREDIENTS

1 small (or 1/2 large) head of cabbage
240g / 1.5 cups dried sweetened cranberries (often marketed in the US as Craisins)
1 small bunch / 20g chives, finely chopped (scallions will work in a pinch)
400g / 14 oz. feta cheese, cubed or crumbled (if there’s not too much water in the pkg, you can add it to the salad)
150g / 1 cup toasted slivered almonds
FOR THE DRESSING
150ml / 5 oz. fresh-squeezed lemon juice (or about 2 lemons)
150ml / 5 oz. extra virgin olive oil (equal to lemon juice)

DIRECTIONS
Toast the almonds [see above for method(s)], and set aside to cool. Using a cleaver or large knife, shred the leafy part of the cabbage (food processors shred too finely for this salad). The solid center stalk can be discarded or julienned for use in the salad (I did the latter). Place in a large bowl. Add the dried cranberries. Chop the chives, and add them to the bowl. Crumble or dice the feta, and add it to the bowl (you can give this all a stir if you wish). Add the cooled toasted almonds.

Simple dressing — EVOO and lemon juice.

Squeeze juice of two lemons into a 500 ml / 2 cup or larger measuring cup, then add an equal amount of extra virgin olive oil. Whisk the two together for about 20-30 seconds to emulsify. Pour dressing over salad, taking care not to overdress. Toss salad so it is completely coated. For best results, return salad to refrigerator for 1-2 hours to cool. Re-toss salad immediately before serving.

Gazpacho, pacho man! I want to be a gazpacho man!

0
With croutons, parsley, and cilantro.

Still summer, still hot. Time again for a simple cold soup (many call it “liquid salad”), perfect for that moment your garden is in its annual throes of tomatorrhea, when your plants imitate the ketchup bottle in Richard Armour‘s famous poem: “none will come / and then a lot’ll.” Even if you don’t grow your own tomatoes, local supermercados, feiras, and grocery stores will be happy to provide you with a cornucopia of ingredients.

This particular verion of gazpacho was built from a foundation laid by the Spanish chef and international hero, José Andrés, and published in the Washington Post. I guarantee that if you follow his instructions to the letter, you will have an excellent bowl of soup, if slightly different from the one offered here.

Some people claim that the word gazpacho originated in Arabic, others say it came from Greek; the Real Academia de la Lengua Española, which is the final word on Spanish words, has come down firmly in the camp of “we aren’t sure.” One thing that IS clear is that the modern version of red gazpacho dates back no further than the 16th century, because the Old World (although they didn’t know it) was waiting for Columbus to bring back tomatoes and peppers. [Rock fans know this from the Neon Park illustration on the cover of Little Feat‘s album Waiting for Columbus. But I digress.]

[One further digression: other scholars assert that Hernán Cortés, not Columbus, introduced the Peruvian tomato to Spain in 1521. Regardless of who performed the introduction, it was widely embraced.]

Most culinary historians date gazpacho’s birth sometime between the 8th and 15th centuries, when the Ottoman Empire’s reach extended to Spain; others credit the Moors with a roughly contemporaneous version. Still others say an early precursor dates to the Roman Empire, and there are even some who push the date back as far as the Biblical book of Ruth. One thing that virtually all of them agree on, though, is that the first person to publish a recipe for it was the chief confectioner at the court of the Spanish kings Felipe V and Fernando VI, Juan de la Mata.

Looks good for being nearly 300 years old.

His treatise, Arte de Repostería (Art of Confectionery), was published in 1747 and is still studied. Even at that late date, tomato had not gained the preeminence it has today, and de la Mata’s recipe called for bread, water, anchovy bones, garlic cloves, vinegar, sugar, salt, and oil. [For more on the history of gazpacho, I commend the James Beard Award-winning author Clifford A. Wright, who not only has his observations on the origins of this delightful soup, but recipes as well.]

Throughout its ancestral home of Andalucia, and indeed throughout the entire Iberian peninsula, gazpacho evinces itself in a wide variety of textures and flavour profiles. Some are chunky, others puréed; some feature tomato and some don’t; certain cooks absolutely insist that bread crumbs have to be in the mix, while others are happy to incorporate such exotic flavours as watermelon or avocado. So my advice to you would be to keep an open mind, paw through a bunch of recipes, and find the one that zings the strings of your papillae.

Please don’t feel any sense of shame if you use canned tomatoes rather than fresh; some days, the local crop may be woody or just plain bland, and the canned option (particularly if fire-roasted) may yield a better finished product. But please do use the best olive oil and vinegar that your budget will allow. My last batch contained some artisanal olive oil we purchased directly from the producer in Marvão, just barely on the Portuguese side of the Spanish border. The vinegar was hand-carried home from Brauerai Gegenbauer in Vienna, and their products are just crazy great. You can use a good Sherry vinegar, but I like to add some Gegenbauer tomato vinegar to a glug of Lustau Sherry, both for the sweetness and the rounded texture.

As is true with many of my recipes, this is merely one of a gaggle of routes to the destination of yum. To usurp (and slightly corrupt) the title of a famous book/movie, Eat, Play, Love.

INGREDIENTS

1 liter / 4 cups polpa de tomate/tomato sauce (a combination of tomato paste and tomato juice can be substituted)
390g / 14 oz. can chopped tomatoes (check to see if salted or not)
600g / 21 oz. Padrón peppers (shishito peppers can be substituted)
1 cucumber, peeled and chopped (seeding optional)
5-6 cloves garlic (but I’m a garlic fiend, so you may want fewer)
100ml / 3.5 oz Sherry
250ml / 14 oz. extra virgin olive oil
100ml / 3.5 oz vinegar
Optional toppings/add-ins: croutons, parsley, diced tomato or bell pepper, toasted almonds, piri-piri sauce or Tabasco, cilantro

DIRECTIONS
Put all the ingredients into a blender. Blend on medium until desired texture is reached. Transfer to pitcher and chill (both you and the soup) for at least 2-3 hours to allow flavours to meld (the garlic may not completely mellow out until the following day). Garnish as the spirit moves. Serve.

Soupe de la Semaine: Chicken Noodle Soup with Basil and Spinach

1

The Warhol print was probably tastier.

I realize that I tool on Campbell’s soups a lot — probably more than they deserve, especially since I am descended from Campbells on my Mom’s side (not particularly unusual for someone of Scots heritage). And while Clan Campbell were a prolific lot, it’s likely far more Campbell has passed through my alimentary canal than was ever in my bloodline.

In my youth, their ubiquitous cans were a staple in our pantry. I was especially keen on Scotch Broth, Vegetable Beef, and Beef with Vegetables and Barley. I NEVER liked their Chicken Noodle, since it always got served to me when I was sick. The association has stuck for decades. But in a strange twist of fate, I find myself making soups for an ill friend, so I decided to revisit my childhood chicken soup trauma.

There’s nothing wrong with chicken in soup; Tom Kha Gai is an all-time favourite. And Mexican chicken soups aplenty with tomato and chili and cilantro show up happily, and not infrequently, at table. But my challenge was to attempt to concoct something that was at once chicken noodle soup and not chicken noodle soup. A Zen kōan of a soup, so to speak. In order to achieve this aim, I needed to isolate those elements of trad North American chicken noodle soup that failed to delight me, and simply Marie Kondo them away.

ISSUE #1: The Broth
Typical canned chicken noodle soup features a briny broth with no more point of view than a real estate agent trying to sell you a house. I wanted a stock that would echo our more trad notions wthout being shackled to them.

ISSUE #2: Carrots
Love me carrots, I really do. But not here. There’s a reason Billy Connolly developed a routine based around how, when you regurgitate, there’s always “diced bloody carrots in it.”

ISSUE #3: Celery
Celery in commercial canned soups frequently develops a revolting, slightly slimy texture, and it played an outsize role in the sense-memory flavour of my canned nemesis. I could have opted for celery seed, but I really didn’t want the texture or the taste.

ISSUE #4: The Noodle
Nobody wants a limp noodle. Typically, they look like tiny tapeworms, they have zero toothiness, they shame the marriage of water, flour, and egg. My noodle was going to be strong and proud.

ISSUE #5: The Chicken
This will sound like the proverbial deli diner’s complaint that the food wasn’t good and the portions were too small. But the industrially processed 6mm chicken bit cubes were virtually flavourless, and distributed very sparingly. Hey, I get it — chicken is the soup’s most expensive ingredient, and more chicken = less profit. I responded by loading the pot up with about three pounds (1.5 kilos) of hand shredded boneless, skinless chicken thighs.

But enough of what I didn’t want. Here’s what I did want: simple, healthy (after all, I’m feeding a cancer slayer here), and tasty. I don’t know how you go about planning your recipes (other than having the good fortune to land here, for which I am grateful), but I typically overthink. I read books, I go online, I consult my bride, I mentally review every version of the dish I’ve ever ingested, I engage in an internal Socratic dialogue, I ask friends about their preferences, I fuss.

While in the store buying chicken, I came across a special on fresh basil. The die was cast: green stock. I also had some spinach powder in my pantry, which I suspected would complement the basil, as well as providing an excellent source of beta-carotene and iron. Besides, spinach made Popeye strong, and the Big C is more formidable a foe than Brutus (or, if I might betray my age, Bluto), so bring it on. [You can use regular spinach if you want; I just wanted to play with my new toy. This spinach powder is nothing more than dehydrated fresh spinach ground into green dust. No additives.]

One caveat: the fewer the ingredients, the better each one has to be. Because I had no homemade chicken stock, I used the best commercial stock money can buy. Free range chicken. Wine and olive oil I would proudly serve at table, not hide in the kitchen. Durum semolina pasta from Italy (even if I will use a different shape next time). Of course you can economise (if you have the time and the freezer space, you can save plenty on the stock by making your own), but even in my extravagance this is still cheaper per serving than what you’d probably pay for a bowl at a restaurant.

INGREDIENTS
30 ml / 2 tbsp olive oil (I used Olea Farm Garlic Blush)
3 lbs. / 1.5 kg boneless skinless chicken thighs (about 10)
sea salt and pepper for seasoning chicken
2/3 cup / 150 ml dry white or rosé wine for deglazing (water or chicken stock work also)
1 large onion, finely chopped
4 oz. / 115 g fresh basil, shredded or chopped (reserve about 10-15 leaves for garnish)
3 liters / 12 cups good quality chicken stock (I used Aneto Low-Sodium Chicken Stock)
1/4 cup / 60 g spinach powder (or 4 oz. / 115 g fresh spinach, shredded or chopped)
16 oz. / 454 g dried pasta, cooked separately (I used casarecci, but next time it will be gemelli, ciocchetti, or gigli)
2 tbsp. /35 ml / juice of one fresh-squeezed lemon (I plucked a fresh Meyer from our tree)
OPTIONAL: Shaved or grated Parmesan cheese for garnish.

DIRECTIONS
Cook the pasta and set aside. [You can even undercook it a bit, in fact, given that it will swim in the broth later. Dealer’s choice.] One piece of advice that has served me well is that the pasta water should be as salty as the sea. This, and seasoning the chicken well, meant the recipe required no additional salt.

♫ Brown the chicken in the pot, doo-dah, doo-dah. ♫

Season your chicken liberally with salt and pepper on both sides. In your soup pot, drizzle in about 2-3 tablespoons (30-45 ml) of olive oil, and cook the chicken. Depending on the thickness of the thighs, and the heat of your range top, this should take about 15 minutes. You’re looking for a little browning on the outside, but this is not intended to be fried chicken soup. When the chicken is done (I had to do mine in two batches), remove it to a plate.

What’s left after the chicken cooks is called the fond, and not just because I’m fond of it. When you deglaze the pot, the browned bits will transform into a very tasty sauce.

While the chicken is frying, dice the onion and chop the basil (and spinach, if not using powder), reserving a few basil leaves for later garnish. Afer removing chicken from soup pot, deglaze the pot with some wine or other liquid, then sweat the onion until it turns translucent. Add chopped basil, chicken stock, spinach powder (or chopped spinach), and reserved chicken thighs (including the juices that accumulated on the plate they sat on). Bring to a low boil, then reduce heat and simmer for at least half an hour to 45 minutes or so (plenty of room for error here without any harm).

After the first simmer, remove chicken (again! It keeps jumping in and out, doesn’t it?) and set aside. Allow chicken to cool sufficiently so it can be hand shredded (or chopped, if you must).

OPTIONAL STEP: Remove most of the solids (basil and onion) with a slotted spoon and process in a blender or food processor with a little of the cooking liquid. Alternatively, you could use an immersion blender. This will thicken the liquid slightly.

Return shredded chicken to soup and add cooked noodles. Simmer long enough to warm the noodles, at least 15 minutes. Add lemon juice a few minutes before serving, to brighten and balance the flavour. Taste and adjust salt and pepper, if necessary.

Soup. Mmmm-mmmm-good.

Ladle into bowls, and garnish with chiffonaded basil leaves.

Soupe de la Semaine: Green Posole Soup [Vegan] [Instant Pot® recipe]

0

This could actually be seriously vintage posole.

It is possible that I made soup the other evening with posole that’s older than Ariana Grande. As you can tell from the packaging, marks from the inner lining’s adhesive have bled through the external paper bag, and the very top (which had not been exposed to light) is a great deal lighter than the rest of the bag. To the best of my recollection, I’ve been to Santa Fe only a couple of times in the last 30 years: once in 1990, on my honeymoon; and once in 2015, to see the Santa Fe Opera’s excellent production of Donizetti’s La fille du régiment. I’m sure I didn’t buy this bag of posole on the latter trip. When the bride said that it was probably from 1990, I was gobsmacked. That would have meant it survived two cross-country moves, both of which took place in the previous millennium. Oy.

That said, it was really tasty soup. Full marks to The Chile Shop in Santa Fe (which is still in business) for the quality and durability of their products.

The word “posole” (or “pozole”) originates in the Nahuatl language, and is possibly derived either from “posolli” (or “pozolli”) which is alleged to mean “frothy” or “foamy.” Or it could come from the Nahuatl word “potzonti,” meaning “to boil or bubble.” It apparently used to be called “tlacatlaolli,” which is said to mean “threshed men corn.” But hey, I don’t speak Nahuatl, so I’m sort of agnostic on the issue. It is further alleged that human flesh was a key ingredient in the original recipe (although some have been less eager to embrace the description in Fray Bernardino de Sahagún’s twelve-volume 16th century masterpiece, Historia general de las cosas de nueva España, also known as The Florentine Codex). I expect that very few modern butcher shops cater to the cannibal crowd, so as long as we’re going inauthentic, why not jump to a vegan version?

The central ingredient, of course, is cacahuazintle, or hominy corn. [Q:”Hominy corn?” A:”About a pound’s worth.” FX:rimshot.] Much like the Mexican flag, the soup comes in three colours: red, white, and green. I chose green, basically a riff off the version found on the 10th Kitchen website, based upon ingredients at hand and my culinary aesthetic (which included trying to make it fairly quickly).

Green Posole Soup
Makes approximately 14 cups / 3½ liters

INGREDIENTS
1 pound / 500 g dried white hominy (or two large cans pre-soaked) [25 oz. / 708 g per can]
1 large white onion, sliced thin lengthwise into strips
6-8 cloves garlic, peeled and chopped
1 tsp. / 1 g dried Mexican oregano
1 bottle (23 oz. / 652 g) crushed tomatillos OR 1½ pounds / 700 g tomatillos, husks removed, rinsed
1 can (7 oz. / 198 g) diced green chiles (or 1-3 diced serrano chiles)
1 big bunch fresh cilantro/coriander, finely minced
2 tablespoons / 30 ml olive oil (or other vegetable oil)
½ cup / 65 g pepitas (optional)
8 cups / 64 oz. / 2 liters water or vegetable stock (Better Than Bouillon enhanced my stock)
Salt to taste

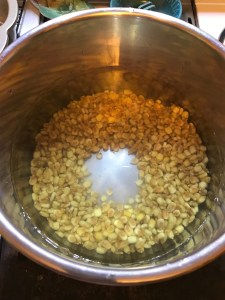
Soaking the dried hominy. When you pour the water into the center of the pot after you’ve added the corn, it looks like this. Cool.

DIRECTIONS

If you are using dried hominy, it’s best to rinse it off and soak it overnight. [That in itself makes a good case for buying canned hominy, which must be drained and rinsed before being added to the mix.] In either case, drain the soaked hominy and leave it in the strainer.

In the Instant Pot® interior container, add onion, olive oil, Mexican oregano, and a generous pinch of salt. Set Instant Pot® to “Sauté” function, and sweat onions, stirring occasionally, until softened; it’s okay if they get a little brown. Add chopped garlic and sauté for another minute or two, then press the “Keep Warm/Cancel” button.

If you are using whole tomatillos and chiles, you should pop them in a food processor with a little bit of water and the cilantro; chop until fairly smooth and add to the Instant Pot® container. Otherwise, just mince the cilantro and dump it in the Instant Pot® container with the crushed tomatillos and diced canned chiles. Add the hominy and stock (and pepitas, if you are using them). Close the Instant Pot®, and set the vent on the lid to “Sealing.” Then press the “Soup” button, making sure that the pressure is set to high.

Here is where paths diverge in the woods. IF you are using the canned hominy, set the time for 12 minutes, and allow pressure to release naturally when done, unless you’re in a huge hurry. IF you are using the dried and soaked hominy, set the time for 35 minutes, and allow pressure to release naturally when done, unless you’re in a huge hurry (in which case you should have used the canned hominy in the first place). [NOTE: Because my hominy apparently dated to the Mesozoic, it was still a little more al dente than I would have liked at the 35 minute mark. I replaced the lid and added another 15 minutes of cooking time. Still not quite there. So I replaced the lid again and added another 15 minutes of cooking time. Perfect. The lesson here is not to use hominy that was dried before the first web browser was invented.]

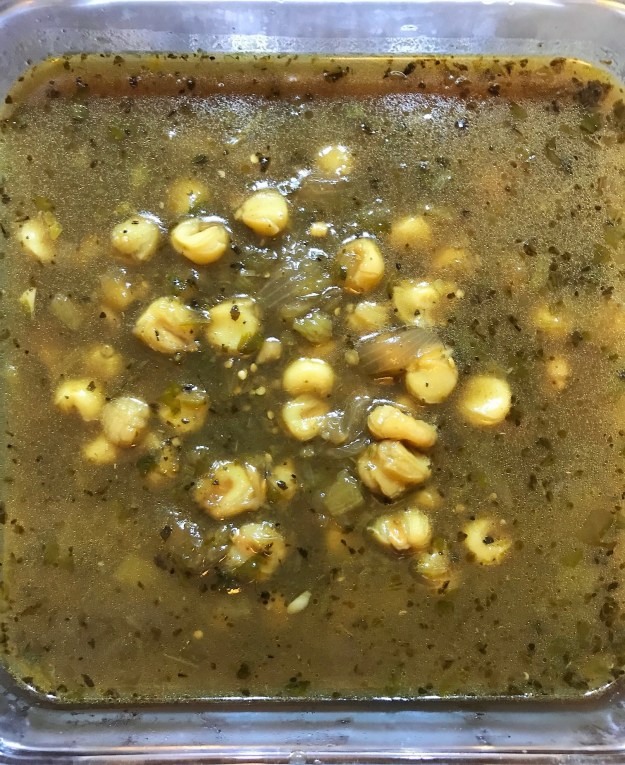
Yummy goodness that tastes better than it looks, I promise. I’m a way better cook than food stylist.

More than Bacon, Egg, & Cheese : Coconut Curry Soba Noodle Egg Bites [Instant Pot® recipe]

2

Doesn’t take much to send me down the rabbit hole.

I’ve been goofing around with the Starbucks®-style egg bites for a bit now (as you can see here and here), and I’ve had some fun exploring sort of vaguely North American/Mediterranean variations on the theme commercially available at everyone’s favourite coffee charrers.

But why not move away from the tried-and-true cheese-and-egg model? How about something vaguely Caribbean? Or Eastern European? Or South Asian? The worst that could happen is the wasteful expenditure of some time, a few eggs, and my interest in “improving” on the already terrific.

Hard to get much more authentic than a coconut curry sauce marked “Product of Canada.”

I’d like to say I made my own coconut curry sauce for this recipe, but I’d be lying. It was totally an impulse thing, given that the local mercado had several bottles on markdown to $1.49 USD. [The total outlay for this recipe came to less than $14.00 USD, since both the sauce and the mushrooms were on special. I paid extra — like 25 cents per egg extra — for humanely-farmed eggs, but I think it’s worth it. For the first seven bites, it costs out at $4.00 per two-egg-bite serving, a fairly modest savings from the commercial version, especially when one adds in one’s time. But I still have sauce, mushrooms, eggs, herbs, and noodles left over for another batch and change, so the cost per serving going forward plummets way further, to $2.00; if I get some more coconut curry sauce, it goes even lower. Not too shabby.]

Soba, awaiting the warm embrace of sauce, eggs, herbs, and fungus.

I’m pretty sure you don’t just happen to have 5 ounces (or 150 g) of cooked soba noodles lying about, so allow me to offer you an option for the rest of the soba noodles you’re likely to cook in order to make this recipe. [This No Spoon Necessary blog’s recipe was the inspiration for last night’s dinner, but since the bride and I are ovo-lacto vegetarians until Lent’s end, I had to mess with it a bit. That’s another post for another day.] Also, this version is dairy-free, unlike most other egg bite recipes.


INGREDIENTS

4 eggs
5 oz. / 150 g cooked soba noodles (I flavoured the noodle cooking water with fresh ginger, lemongrass, makrut lime leaves, and tamari sauce)
10 tbsp. / 150 ml coconut curry sauce
4-5 small mushrooms, chopped
3 tbsp. / 18 g chopped green onions (2 or 3 shallots, just to make it easy)
3 tbsp. / 9 g chopped cilantro
2 scant pinches salt
olive oil or, even better, coconut oil to coat the molds
2 cups / ½ liter tap water for Instant Pot®
aluminum foil

Fungus and greens sweating it out.

DIRECTIONS
If your leftover soba noodles are in the fridge, put the ones you’re using for the recipe in a bowl with 4 tbsp. / 60 ml of the coconut curry sauce and let them sit overnight, or at least for a couple of hours; they’ll soak up the flavour. If you’re making the noodles expressly for this recipe, take the still-warm drained noodles and pop them in the bowl with the curry sauce and let them sit for as long as you can; overnight is best. In fact, I made both the soba noodles and the mushroom/cilantro/scallion combo the night before, because the timing worked out for me.

Oil egg bite tray, distribute soba noodles evenly into each cup and set aside. Chop mushrooms, green onion, and cilantro, place in a small frying pan with 1 tsp. / 5 ml oil (coconut, olive, or neutral), 2 tbsp. / 30 ml of the coconut curry sauce and the first pinch of salt; cook until soft and mushrooms have given up their liquor. Set aside to cool. [You can do this the night before if you want, and allow them to soak up the curry sauce flavour in the fridge.] In a medium size bowl, whisk the eggs, the remaining 4 tbsp. / 60 ml curry sauce, and second pinch of salt together until smooth. Fold in the cilantro, green onions, and mushrooms. Spoon mixture evenly into oiled cups in the egg tray. Add the water to the Instant Pot® container. Cover the egg tray loosely with aluminum foil, place it on the Instant Pot® steaming trivet, and lower it into the Instant Pot®. Set to “Steam” for 8 minutes at high pressure, making sure that the vent is set to “Sealing” rather than “Venting.” When timer goes off, wait four or five minutes (or more, if you desire), and flip vent from “Sealing” to “Venting.” Remove egg bites and allow them to cool for a few minutes before serving, or store in refrigerator up to five days. Reheat one or two at a time in the microwave for 30-40 seconds on “High” and serve.

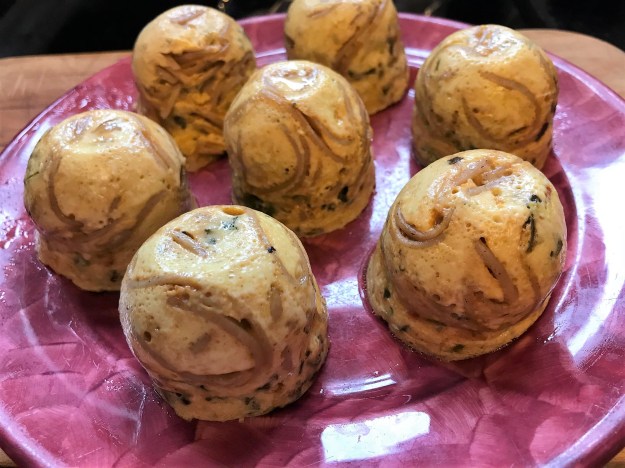
Ribbons of soba in egg bites that bear a disturbing similarity to what are euphemistically known as “bull fries.”

Los cojones del toro. There’s a little something you can’t unsee.

Tourtière Végétalienne [Vegan Vegetable Pie]

0

Chef Marie (l.) and cousin Sheryl (r.) performing the Ritual Admiration of the Tourtière ceremony last December.

My great-great-great-great-great grandfather Pierre would disown me.

The very idea of making a vegetable tourtière would be as alien and outlandish to him as, um, reading Gwyneth Paltrow’s Twitter feed. As every Canadian knows, the only way to make this traditional Québécois holiday dish is with pork. Or a blend of pork and another meat. Or wild game. Or maybe the occasional bird. Spice, too, is highly variable from region to region. In fact, Susan Semenak of the Montreal Gazette suggests that each particular recipe may be a “tell” as to one’s genealogy. As you might have intuited, it’s quite the subject of debate, and if you thought Canadians are unfailingly polite, donnybrooks over the dish’s “authenticity” will disabuse you of that notion for good. [Although, to be fair, the CBC Radio host in the previous link responded individually — and no doubt courteously — to all the hate mail she got over a network story on the subject.]

I had a delicious tourtière in Vancouver this past holiday season (see picture at top), but for Lent this year, we’re all vegetarian all the time, so salty tasty pig parts are right out. In my scent memory, tourtière was always more redolent of warm winter spices (cloves, cinnamon, nutmeg) than pork, though, so I figured if I got the seasoning right and the filling didn’t clash, I could pull a decent vegan version together. Since I’ve always found a grilled portabello cap an acceptable substitute for a burger, I started with mushrooms. Potatoes and onions could make the leap from the trad version to this one without effort, but it still seemed to be missing something. I knew that certain ersatz meat-like products are made with lentils, and I had the dregs of a box of lentilles du Puy in the pantry, so in they went. If nothing else, at least they were French. Plus, I love their peppery bite.

[Sidebar: Le Puy lentils ain’t your standard ranch stash legumes. Known as “the poor man’s caviar” and “the pearls of central France,” the lentilles vertes du Puy are sufficiently distinctive to have been awarded their own AOC, much like Champagne and Roquefort cheese. So please don’t just wander down to your local south Asian market and load up on urad dal, good though it may be. Not for this dish.]

I’m not going to lie to you: this is not the sort of recipe of which you can say, “I just tossed everything in the microvection pot, and twelve-point-four minutes later, my family and I were discussing Corsi stats for the Vegas Golden Knights while shoveling forkfuls of a storied Québécois holiday dish into our cavernous pieholes.” On the other hand, none of the steps require a whole lot of sophistication or attention, so it’s pretty easy to pull this together while you are assembling your personal Death Star, extracting ink from a squid, or knitting handcuffs for children.

Tourtière in situ, avec des feuilles d’érable pour l’authenticité.

Tourtière Végétalienne
(serves 8-12)

INGREDIENTS

Tourtière Spice Blend
2 teaspoons / 12 g salt
2 teaspoons / 1 g Herbes de Provence
1 teaspoon / 1½ g thyme
½ teaspoon / 1 g cinnamon
½ teaspoon / 1 g ground ginger
½ teaspoon / 1/3 g marjoram
½ teaspoon nutmeg / 1 g (fresh ground if possible)
½ teaspoon / 1/3 g sage
½ teaspoon / 1/3 g savory
¼ teaspoon / ½ g allspice
¼ teaspoon / ½ g coriander
¼ teaspoon / 1/5 g dry mustard
⅛ teaspoon / ¼ g ground cloves
dash white pepper

Tourtière Filling
2 lb. / 1 kg potatoes, peeled, cooked, and mashed
1 lb. / 500 g crimini mushrooms
75 g dried porcini and Chilean Bolete mushroom mix (about 2 cups rehydrated, or just add another pound of fresh mushrooms)
1 cup / 200 g Le Puy French lentils, cooked (this is a type, not a brand name)
1 large onion, diced
2 ribs celery, minced
4 cloves garlic, minced
2 tbsp. / 30 ml olive oil

Tourtière Crust
12 oz. / 340 g (about 2¼ – 2½ cups) all purpose flour
½ teaspoon / 3 g salt
1 cup / 2 sticks / 225 g Earth Balance Vegan Buttery Sticks (or some other vegan shortening product)
8-12 tbsp. / 120-175 ml ice water (REALLY COLD!)
1 – 2 teaspoons / 5-10 ml vinegar

DIRECTIONS

For the Tourtière Filling:

You might want to read the directions all the way through once before leaping in; I tried to arrange several discrete steps to minimize waste of time and resources (like hot water). But if you’re doing other things in the meantime, feel free to rearrange the process to suit your schedule.

Assemble the spice blend, stir with a fork to mix, and set aside.

Rehydrate the dried mushrooms in warm water; this will take about half an hour or a bit more, depending on the mushrooms and their thickness. When they are plump, remove them from the water (reserving the water in the process) and rinse the grit off in a colander. Strain the reserved mushroom liquid through a fine sieve and set aside. [It can be used for a sauce or in stock later. It will keep in the fridge for a week, or it can be frozen for future use.] Chop the washed mushrooms and set aside in a bowl. Of course, if you are using all fresh mushrooms, you can skip this step. Wash the fresh mushrooms, chop them roughly, and set aside in a bowl.

Peel potatoes (this can be done while the mushrooms are rehydrating) and cut into quarters. Cover with about 1 – 2 inches (2½ – 5 cm) of water and boil gently in saucepan for between 15-25 minutes, until a knife slides in without resistance. Remove potatoes with slotted spoon and transfer to bowl. Mash potatoes with a pinch of salt and pepper, but no liquid (although if they are too much of a challenge, you could add 1/4 cup or 60 ml of the boiling water and give them a little bit of help).

While potatoes are boiling, rinse lentils and remove debris, if any. After potatoes have been removed from the saucepan, you can cook the lentils in the already-warm potato water, boiling gently for 20 minutes. When they are done, drain them, discarding the potato water, and set aside.

Dice onion, and add it along with the olive oil to a large pan (big enough to hold all the ingredients, which it eventually will). Brown onion, stirring occasionally, about 25 minutes or so.

While onions are browning, mince celery and garlic, setting them aside in separate bowls.

After onions have browned, increase the heat under the pan, add minced celery, and sweat it for a couple of minutes, stirring occasionally. Then stir in lentils, minced garlic and spice mix, and cook for about 2-3 more minutes. Reduce heat and fold in mushrooms; simmer, stirring occasionally, until mushrooms have softened and released their liquor, about 15 minutes. If mixture seems too dry at any point along the way, add between 2 tablespoons and 1/4 cup (30 – 60 ml) of reserved mushroom rehydrating broth. When mushrooms are cooked, fold in mashed potatoes and mix with wooden spoon so that all ingredients are distributed evenly throughout. When it’s all warm (about 5-10 minutes), taste and adjust spices as necessary. [This usually means a bit of salt and pepper, but if your palate is discerning, you may detect that one element or another of your spice blend has disappeared, so you can fix that as well. Be forewarned: cloves, cinnamon, and ginger are very assertive, so add with caution, if at all.]

Remove from heat and allow to cool at least to room temperature before filling pie.

Here’s your shortening.

DIRECTIONS

For the Tourtière Crust:

Freeze shortening overnight. Chop shortening into small chunks. Add, along with salt and flour, to food processor bowl fitted with “S” blade. Pulse until a “gravelly” dough comes together that will adhere to itself if you pinch it in your hand (think wet sand). Notice little clump at left of photo.

Not quite ready, but close.

Begin adding ice water and vinegar solution a tablespoon or two at a time, and pulsing until dough begins to have enough moisture to cohere. There’s not a great way to explain this in print, which is why there are apprentices and grandmothers. Once you feel it, you will understand. In the meantime, check this vid, and you’ll get a sense of the process. [The video version is done with a pastry cutter rather than a food processor, but you’ll see how the chef gets where she needs to go.]

IMPORTANT SIDEBAR: Keep everything as cold as you can! Warm dough is greasy and soggy dough.

Not quite a 50-50 spilt.

Empty dough from processor and mold into a round-ish lump, wrap with cling film, and pop it into the chill chest — you know it as the refrigerator — to rest for AT LEAST an hour, though overnight is even better. When dough has rested, bring it out onto your rolling surface (I used a big cutting board with a floured silicone mat on top) and cut it in half-ish (the bottom crust needs to be bigger than the top).

In the pan, ready to be filled.

Roll out the dough from the center outwards until you have a sufficiently large crust for the bottom, two to three inches (5 – 7.5 cm) bigger than the pan. Don’t worry about overhang; that will be incorporated later. Once bottom crust is set in pan, fill with mushroom/lentil/potato mix, making sure to distribute it evenly.

Man, I’m stuffed.

Roll out top crust and place on top. This video shows not only shows about how to crimp the dough together, it’s a useful instruction tool on how to make pie dough period (even if his version is not vegan). You’ll need to vent your tourtière just like any pie, to allow steam to escape. You may choose to cut your vents in the shape of maple leaves, or you can just poke the crust a few times with a knife or fork. Have a little fun with it; after all, you’re making pie for dinner. How cool is that?

Vented and crimped.

Bake the filled tourtière for approximately 50 minutes at 175°C / 350°F. Serve warm, or allow to cool to room temp and serve then. Mushroom gravy, a wine reduction sauce, or a vegan mustard “cream” sauce are delightful accompaniments, but they’re going to have to wait for another post, I’m afraid.

Soupe de la Semaine: Sopa de Fideo… sin fideo [Gluten-Free & Vegan] [Instant Pot® recipe]

0

¿Dónde está el fideo?

Because I’m not Mexican, I hesitate to call sopa de fideo the ultimate Mexican comfort food soup — probably sopa de tortilla or caldo Mexicano de albóndigas gets the nod there — but it’s certainly in the running for the propreantepenultimate Mexican comfort food soup. For those of you unfamiliar with fideo noodles, they’re like a thin vermicelli (itself the Kate Moss of the spaghetti world), and usually cut in short pieces (generally somewhere between an inch and 4 cm).

Given that the bride is currently on a carb-cutting crusade, I thought spaghetti squash might suitably supplant the original fideo. Nestled in broth, it doesn’t need to bear the weight of being the dish’s focal point, which it does when being substituted, rather unsatisfactorily, for actual spaghetti under a blanket of Bolognese. The Instant Pot® pulls double duty here, both cooking the squash and making the soup. All you need to do between steps is to remove the steamer insert and squash, then dump out the remaining water. No need for cleaning along the way, since the squash that just came out is going right back in.

[This recipe, of course, can be made on the stovetop as well; the spaghetti squash can either be roasted or microwaved beforehand (fire up the Internet Machine and ask the Google for advice on that). Once that’s done, you can pretty much follow the general directions under the “For the soup” section; allow about 30 minutes for simmering after all ingredients are added.]

As with many classic soups, recipes for this vary widely. While mine hews fairly closely to the down-the-middle basic version, I did add one exotic ingredient as a nod to the soup’s probable Spanish heritage: pimentón de la Vera, the Spanish smoked paprika whose mere scent sends me off dreaming Gallego dreams. If you want to keep it more anchored to the New World, you could sub chipotle chile powder, regular chile powder, or even a diced jalapeño or two. Look, some people put cayenne, cinnamon, and allspice(!) in this soup, so feel free to follow your tastebuds.

Sin fideo, incidentally, means “without fideo.”

Sopa de Fideo… sin fideo
(makes about 3.5 liters / 15 cups)

Spring onion, sometimes known as Mexican onion.

INGREDIENTS

1 spaghetti squash (approx. 3 lb. / 1½ kg.)
2 spring onions (or 5-6 scallions), sliced thin
3-4 garlic cloves, minced
2 tbsp. / 30 ml olive oil
½ teaspoon / 1.5 g cumin
1 teaspoon / 1 g oregano (preferably Mexican oregano)
½ tbsp. / 4 g pimentón de la Vera (or smoked paprika)
½ tbsp. / 9 g salt
1 can (28 oz. / 794 g) diced tomatoes
6 cups / 1½ liters vegetable broth
chopped cilantro leaves for garnish
slice of lime for garnish (optional)
thinly sliced radish for garnish (optional)
slice (or chunk) of avocado for garnish (optional)
salt to taste
pepper to taste

The Instant Pot® fits like a glove… if your hand is cylindrical and about seven inches deep. Or a spaghetti squash.

DIRECTIONS

For the spaghetti squash:

Take off store sticker, rinse squash and pat dry. Insert steamer trivet into Instant Pot® inner pot. Add 1 cup / 250 ml water. Place squash in Instant Pot®. Close and lock lid, making sure that release vent is set to “Sealing.” Press button for Bean/Chili (set pressure to “high”) and adjust timer to 18 minutes. When squash is finished, you can allow natural pressure release or use quick release; either works fine. Remove squash from pot, remove steamer insert, and discard steaming water when sufficiently cool. Cut squash in half, remove seeds and stringy debris. Scrape out “spaghetti” with fork, chop strands into short, fideo-like length (between an inch and 4 cm) and set aside in bowl.

All star alliums: garlic and spring onions prepare for what chef José Andrés calls “a dance” with olive oil.

For the soup:

Set Instant Pot® to “Sauté.” Add olive oil to inner pot insert and allow to warm, then add garlic and spring onions. Sweat the onions and garlic until soft, stirring occasionally, for maybe 4-5 minutes. [No big deal if they begin to brown, but don’t let them burn or stick to the pot.] Add spaghetti squash and spices, stir to mix. Add tomatoes (with juice) and vegetable broth (you can use the tomato can for measuring the broth if you wish; add two cans). Secure lid, making sure vent is set to “sealing.” Press the “Keep Warm/Cancel” button once to stop the sauté function. The press the “Soup” button, adjust pressure to “high” (if necessary) and time to 10 minutes. When soup is finished, either natural pressure release or quick release work fine. Adjust seasonings and ladle into bowls. Garnish with cilantro leaves and the optional avocado, radish, and lime.

Soupe de la Semaine: Bowl of Sunshine — Vegan Yellow Squash & Corn Soup [Instant Pot® recipe]

0

Last night, I re-watched most of High Fidelity for millionth time. It’s one of those movies that resonates with my inner record geek and reminds me what, but for the grace of my bride, I might easily have become. In this scene, Jack Black starts his shift at Championship Vinyl by subjecting the rest of the store to the almost oppressively upbeat ’80s hit “Walking on Sunshine” by Katrina & The Waves. It got me to thinking: could I build a bowl of sunshine?

Short answer: yes.

A few days ago, I visited the “we’re selling this produce cheap” bin at the market and picked up half a dozen yellow squash — a kilo and a half — for 99¢. Coulda wound up in lasagna. Coulda wound up in cornbread. But I’ve been on a bit of a soup kick lately.

Yellow squash by themselves are not particularly assertive, taste-wise, so I knew they’d need a little help. A little spice. A little sweetness. And nothing that would detract from the yellow. The spice comes from white pepper and a jalapeño pepper (which is green, but tiny in volume compared to the rest of the soup). Coconut milk and corn provide the sweetness. And because my vegetable stock base is the colour of Vegemite™, the main bulk of liquid in the soup is water. For a moment, I considered making it a curry-based soup (the Flavor the Moments blog has an excellent vegan take on that here), but ultimately this recipe from the Love & Olive Oil blog resonated with me most.

Like many Instant Pot® recipes, this adapts easily to the stovetop; just add enough time to soften the squash. And boy freakin’ howdy, is this easy. The entire soup is made in the Instant Pot®, so no other pots and pans to clean up. [It’s even done in a single pot on the stovetop.] Prep is not at all demanding, because everything’s getting blitzed at the end (even the cook, should you so choose).

Unsquashed squash.

Vegan Bowl of Sunshine
(makes about 3.5 liters / 15 cups)

INGREDIENTS

6 yellow squash, roughly chopped (approx. 3 lb./ 1½ kg.)
1 sweet onion, roughly chopped
10 oz. / 300 g frozen, fresh, or canned corn kernels (drained if using latter)
1 jalapeño pepper, minced (optional, but recommended)
2 teaspoons / 12 g sea salt
2 sprigs fresh thyme
3 cups / 750 ml vegetable broth or water
1 can (13½ oz. / 400 ml) coconut milk (preferably the “fat” kind)
2 tbsp. / 30 ml olive (or neutral) oil for sweating veggies
1 teaspoon / 2½ g white pepper
2 tbsp. / 30 ml olive oil to finish (optional)
zest of one lemon (optional)
salt to taste
pepper to taste

Sweating the small stuff.

DIRECTIONS

Chop onion and jalapeño and add them to the Instant Pot®’s inner cooking pot; set to “Sauté” function. Sweat the onions and pepper until somewhat softened, then add the chopped squash and continue to sauté for another three or four minutes, stirring occasionally to make sure nothing adheres to the pot. Add salt, water (or stock), coconut milk, thyme sprigs, corn, and white pepper; stir together. Hit the red “Keep Warm/Cancel” button on the control panel.

Ready for pressure.

Cover pot and lock lid (making sure the vent is set to “Sealing”), select “Soup,” set pressure to “High,” and time to 15 minutes. When finished, you may allow pressure to release naturally before unlocking lid, or you can do a “quick release” by turning the vent to “Venting.” [Be careful not to steam your hand.]

Make me smooth, chef.

Remove thyme sprigs, add lemon zest if desired, then process soup with immersion blender or in batches with a blender/food processor. [If you’re using either of the latter, drape a towel over the input tube or lid to allow the steam to vent.] Stir and allow soup to sit for a couple of minutes before tasting and adjusting spices. [NOTE: The immersion blender won’t make the soup silky smooth, so if that is your aim, use a Vita-Mixer and strain through a china cap.

Ladle soup into bowls, drizzle in a teaspoon (5 ml) or so of olive oil if desired, then garnish with a few grains of black pepper and bit of chopped parsley, basil, chives, or green onion.

Soupe de la Semaine: Vegan Potato Pickle Pot [Instant Pot® recipe]

0

Not the prettiest soup, but it has a great personality.

One happy consequence of my current sixty-day Facebook cleanse is that I am spending more time researching (and cooking) recipes of all sorts.

If ever there were a happier marriage between a vegetable and an herb than potato with dill, I don’t think I’ve found it. And while I’m sure some of you might respond reflexively with “Yeah, what about tomato and basil, smart guy,” I’ll meet your snark with the pedantic retort that the tomato is technically a fruit and move on. The Potato Pickle Pot moniker is a nod to the Afro-Caribbean soup/stew known as Pepper Pot, although this particular soup’s roots seem to be Polish, where it, like its African cousin, is often made with cheap cuts of meat and is known as Zupa Ogórkowa. [My rebranding it as Polish Peasant Potato Pickle Pot seemed to be dipping an already gilded lily into Belgian chocolate fondue, so I dialed it back.] Both soups historically depended on available ingredients (peasants, y’know, can’t be choosers), so you’re welcome to think of this more as a template than a recipe. I’m sure no gendarmes from the local potagerie will be dispatched if you sneak in a turnip, some carrots, a rutabaga, or even some cabbage.

Many non-vegan iterations contain butter, milk, and even sour cream, but I was committed to a vegan version, and much like Magda at the I Deliciate.com blog, I considered — and then rejected — adding cashew cream. The puréed taters bring a rustic silkiness to the broth on their own. As with yesterday’s “Sofrito” Soup recipe, I opted to employ my Instant Pot® as a time-saving device to soften the potatoes, but the recipe is easily transferable to the stovetop. Just follow the directions for sautéing the onion, garlic, and potato, then add the broth/almond milk combo and simmer it until the potatoes are fork-tender (as if ready to be mashed). I expect that would take about 40-ish minutes, depending on how small your potato chunks were cut.

Of all the versions of this soup I researched, the one to which I owe the greatest debt came from a fellow Canadian, the woman who ran the One Vivacious Vegan blog out of Winnipeg, Manitoba. It’s little wonder she wanted a sturdy soup back in the fall of 2012; winters up there are doggone cold, and surprisingly long.

VEGAN POTATO PICKLE POT
Makes about 10 cups (about 2¼ liters)

INGREDIENTS

2 tbsp / 30ml olive oil
1 large onion, diced
6 cloves garlic, minced
3 pounds / 1.5 kg potatoes, scrubbed and diced, but not peeled
3 cups / 700ml vegetable stock
3 cups / 700ml unflavoured and unsweetened almond milk (soy milk or rice milk should also be fine)
⅔ cup / 7g chopped fresh dill (or 3-4 tbsp. / 9-12g dried), plus a few extra sprigs for a garnish
½ cup / 120ml pickle brine (straight from the jar)
½ cup / 30g nutritional yeast
1 cup / 170g chopped dill pickles
salt and pepper to taste (remember, the brine is salty, so add it AFTER, if necessary)

Halfway through, it’s really not a pretty sight.

DIRECTIONS [Instant Pot®]

Chop onion, garlic, and potatoes and put them in separate bowls. Add oil to inner cooking pot, and set the Instant Pot® to its “Sauté” function. Sweat the onions until somewhat softened, then add the garlic and continue to sauté for another two minutes, stirring occasionally to make sure nothing adheres to the pot. Add chopped potatoes and continue to sauté for 3-5 more minutes, just to warm the potatoes a bit and get them interacting with the onion and garlic. Add stock, almond milk, and chopped dill; stir together. Hit the red “Keep Warm/Cancel” button on the control panel.

Cover pot and lock lid (making sure the vent is set to “Sealing”), select “Soup,” set pressure to “High,” and time to 20 minutes. When finished, you may allow pressure to release naturally before unlocking lid, or you can do a “quick release” by turning the vent to “Venting.”

Process soup with immersion blender or in batches in a blender/food processor. [If you’re using either of the latter, drape a towel over the input tube or lid to allow the steam to vent.] You can pureé all of the soup at this point, but I like to leave a few of the chunks of potato intact. Add nutritional yeast, pickle brine, and chopped pickles. Stir and allow soup to sit for a couple of minutes before tasting and adjusting spices. Depending on your taste, you might want to add a little more pickle brine or dill to the mix, along with salt and pepper.

Ladle soup into bowls and garnish with a sprig of chopped dill. A baguette would be nice with this, although prudence would mitigate; you’ll have had a full day’s worth of carbs in the soup.

Soupe de la Semaine: Vegan “Sofrito” Soup [Instant Pot® recipe]

1

Leaves you “sofrito” experiment.

This is not going to be so much a recipe for a soup (although there will be one) as a roadmap to soup. Please keep all your appendages inside the vehicle while it’s moving.

Like many people, I occasionally find that I have a few vegetables in the fridge that really call for imminent use, lest they turn into science experiments. Today, that happened to be a two-pound package of carrots, some celery, a yellow bell pepper, and the better part of a bunch of cilantro, plus an onion that was in the unrefrigerated veggie basket. Because February is traditionally a vegetarian month for the bride and me, I decided to fold the ingredients into a soup, rather than use them as a sofrito/soffritto, mirepoix, refogado, or Suppengrün for a meat or poultry dish. [The terms in italics are all variants on the same concept, which is that a group of chopped vegetables can serve as a flavour base for stews, gravies, sauces, and the like. Ingredients and proportions vary from country to country (and from kitchen to kitchen), but not so widely that they aren’t all kissin’ culinary cousins.]

Here’s where it gets interesting: with the possible exception of the cilantro, all the vegetables can easily be enhanced to make soups that will fit in a variety of culinary traditions. For example, if I’d added lemongrass, ginger, and soy sauce to the soup (even keeping the cilantro), it would have taken a turn for Southeast Asia. Some garlic, basil, oregano, rosemary, and marjoram would have pushed it toward Italy. Turmeric, ginger, cinnamon, cardamom, coriander, and cumin would lend it an Indian or Sri Lankan vibe. I decided I wanted something else, a kind of mutt — er, hybrid — cuisine with elements of both Spanish and Tex-Mex.

And while this can definitely be made on the stovetop, it would take way longer than it does in a pressure cooker (Instant Pot® to the rescue again!). Basically, you’d follow all the main steps, but I would chop the vegetables into much smaller pieces to soften them more quickly. I’m guessing that 45 minutes to an hour in the stock at a high simmer (just below boiling) would do it. Then purée the vegetables and adjust spices as in the directions below.

WARNING: I like, and am accustomed to, spicy food. I would advise anyone trying out this recipe to cut the pimentón de la Vera and chipotle powder IN HALF to start. You can always make it spicier later in the process, if you wish. [If you cut the spices, you will also need only about half of the carob molasses as a consequence.]

Vegan “Sofrito” Soup
Makes about 10 cups (about 2¼ liters)

Carrots of many colours.

INGREDIENTS
2 lbs. / 1kg carrots, roughly chopped
1 onion, roughly chopped
1 red or yellow bell pepper, roughly chopped
3 stalks celery (need I say roughly chopped?)
1½ cups / 30g chopped fresh cilantro
5 cups / 1.25 liters vegetable stock (I used Better Than Bouillon and water)
1-2 teaspoons / 2-4g hot pimentón de la Vera (or smoked paprika)*
½-1 teaspoon / 1.5-3g chipotle powder (or other chili powder)*
1½-3 tbsp. / 33-66g carob (or regular) molasses*
½ teaspoon / 1g cumin
½ teaspoon / 3g salt
½ tbsp. / 8g apple cider vinegar (or other vinegar, or lemon juice)

Chopped up, mixed up.

DIRECTIONS [Instant Pot®]

Chop vegetables and cilantro and add them all to inner cooking pot. Add vegetable stock, pimentón de la Vera*, and chipotle powder*.

Lock lid (making sure the vent is set to “Sealing”), select “Soup,” set pressure to “High,” and time to 20 minutes. When finished, you may allow pressure to release naturally before unlocking lid, or you can do a “quick release” by turning the vent to “Venting.”

[At this juncture, the soup will look like you left your vegetables in dishwater overnight. Don’t be discouraged!]

Process soup with immersion blender or in batches in a blender/food processor. [If you’re using either of the latter, drape a towel over the input tube or lid to allow the steam to vent.] Add cumin, carob molasses, salt, and cider vinegar. Stir and allow soup to sit for a couple of minutes before tasting and adjusting spices. It’s at this juncture that you would add the remaining half of the pimentón de la Vera, chipotle powder, and carob molasses, should you choose.

Ladle soup into bowls and garnish with a little extra chopped cilantro. I forgot to reserve some and wound up using bread crumbs and chopped parsley for the photo. If you’re not concerned about being vegan, a dollop of sour cream and/or a sprinkle of cotija cheese would go nicely. Cashew cream is a fine vegan alternative.

*Please read the warning in red in the fifth paragraph; it’s there for your own good.

***********************************************************************

P.S. I’m perfectly happy if you want to replicate this recipe step by step, but it would bring me (and you!) greater joy if you use it as a “serving suggestion” instead, playing around with spices and quantities so that you can truly make it your own. Plus, you can clean out your fridge a bit in the process.

Soupe de la Semaine: Turkish Roasted Red Pepper & Tomato Soup -or- Közlenmiş Kırmızı Biberli ve Domatesli Çorba [Gluten-Free and Vegan]

0

I was tempted to call it the “Istanbowl.” Shame on me.

Yeah, the title is a mouthful. Happily, though, so is the soup.

I didn’t sample this when I visited Istanbul back in the ’80s, but I think I have some general sense of the Turkish flavour palate, and since this dish is reputed to be much like chicken soup is in America (which is to say that there are a quadzillion variations), this should be on pretty safe ground. I consulted with my Turkish pal Nil ex post facto (sending her the picture you see above), and she confirmed that I was in the ball park, and that I had nailed the spelling. I’d hate to give y’all a recipe for Turkish Roasted Red Bat Turd Soup thanks to a typo.

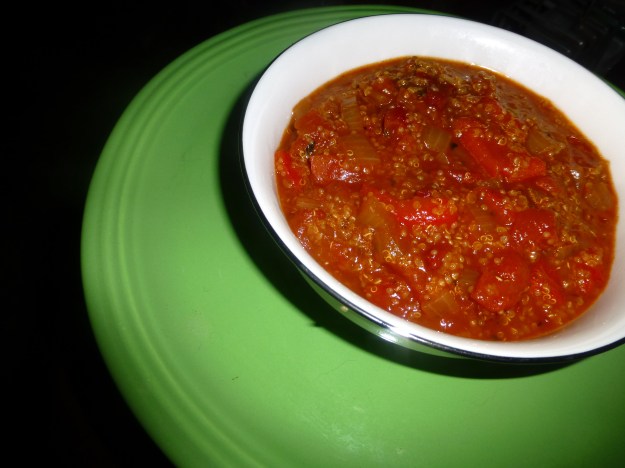
Many recipes call for bulgur wheat as the thickening agent and starchy backbone, but I opted for quinoa, since it’s gluten-free and generally considered safe for celiac patients, depending on whose article you read. If that’s not an issue for you, help yourself to bulgur wheat, rice, or even Israeli couscous (which is actually a pasta) in its stead. The smokiness comes not only from the roasted peppers, but also from the fire-roasted tomatoes and the pimentón de la Vera (or smoked paprika). You may add a pinch of smoked salt to finish before serving if you wish. Lots of bass notes to be had here. You can always add the zest of 1/2 lemon or a teaspoon (5 ml) of vinegar if you feel it needs to be brightened up, but I don’t think you’ll need it, as the acid in the tomatoes should balance it nicely. Some recipes also call for cornstarch as a thickening agent; I would deploy a tablespoon / 10 g of potato starch in a slurry if I thought it needed it. You be the judge.

The biggest downside of this soup is that it requires some time to bring together, unless you happen already to have roasted red peppers (not the marinated kind) and cooked quinoa in your fridge. In that case, it’s a snap. But it will take somewhere between 30-40 minutes-ish to cook the quinoa, and maybe 35 minutes to groom your peppers to soup-readiness. Your patience and dedication will be rewarded!

INGREDIENTS

    3 red bell peppers, halved, de-seeded, and roasted, with skins removed
    3/4 cup / 135 g dry quinoa, cooked (use package instructions) [will yield 2 1/4 cups / 415 g]
    2 tablespoons / 30 ml olive oil
    1 onion, diced
    3-4 garlic cloves, peeled and finely chopped
    2 tablespoons / 5 g sun-dried tomatoes, chopped (or red pepper paste or tomato paste)
    1 teaspoon / 2.5 g smoked paprika (I prefer Spanish pimentón de la Vera, and I used picante/hot rather than dulce/sweet)
    1/2 teaspoon / 1.5 g red pepper flakes, to taste
    1 teaspoon / 2.5 g dried mint (maybe double that if using fresh)
    28 oz. / 793 g can fire-roasted tomatoes (or 10-12 fresh tomatoes, roasted and chopped)
    8 oz. / 227 g tomato sauce
    4 cups / 950 ml vegetable broth
    Salt & coarsely ground black pepper
    OPTIONAL: 1 tablespoon / 10 g potato starch for thickening
    OPTIONAL: Fresh mint for garnish
    OPTIONAL: Sour cream (or vegan alternative) as garnish

Simmerin' away.

Simmerin’ away.

DIRECTIONS

Roast the peppers: Turn on broiler. Spread peppers on an aluminum foil lined cookie sheet, skin side up, in a single layer (you may need to repeat this step to roast all your peppers). Place cookie sheet about 3″ / 8 cm below broiler element. Roast until peppers are blackened across the top, around 10-15 minutes.

Transfer roasted peppers to a medium-sized bowl and cover with plastic wrap, allowing them to steam for 15 minutes minimum. Using your fingers, peel off the charred top layer of skin and discard. Give peeled pepper slices a rough chop, small enough to fit easily on a soup spoon, because they will not be puréed. Return to steaming bowl and reserve, along with any juices they shed, for later.

Cook the quinoa according to instructions on the label. I find that the stove-top method, while longer, produces superior results to the microwave method. YMMV. Set aside cooked quinoa for later use.

Cook the soup: In a 3½ quart or larger Dutch oven or heavy-bottomed pot, warm olive oil and onion on fairly low heat. Sauté, stirring occasionally, until softened and turning translucent, about 5 to 8 minutes. Add the roasted peppers (with any liquid they’ve thrown off), sun-dried tomatoes (or tomato or pepper paste), and garlic; cook a further 3-4 minutes until garlic is slightly less aggressive. Add smoked paprika/pimentón de la Vera, pepper flakes, amd mint; cook for about 30 seconds to release aromas. Add the can of tomatoes, the tomato sauce, vegetable broth, and cooked quinoa. Cook over medium heat for 30-40 minutes, stirring occasionally. After the first 5 minutes or so, add salt and pepper to taste, but not too heavily; you will adjust the seasonings just before serving. Taste periodically along the way (clean spoons each time!). If you think the consistency is too thin, whisk in 1 tablespoon / 10 g of potato starch with a little of the soup broth in a bowl, and add to the pot. Soup should thicken noticeably within five minutes. Taste at 30 minute mark, adjust seasonings (and thickness, if necessary), and allow to thicken if need be. Remove from heat and ladle into bowls. Garnish with mint sprigs and/or sour cream (or vegan alternative) if so desired. Serves 6 to 8 as an opening course, 4 as a main.

Soupe de la Semaine: Celeriac, Fennel, & Apple Chowder (Gluten-Free and Vegan)

0

Chowdah!

Chowdah!

It would seem that the most likely derivation of the word chowder comes from the French chaudière, meaning “boiler” (and is also an archaic French word for cauldron or kettle, from the Latin calderia). The Brits, though, not wanting to be left out of the linguistic fun, claim that the word springs from their jowter, or fishmonger. To be sure, many of the best known chowders do contain fish, but this one is a vegetable and fruit chowder that’ll stick to your ribs on a chilly night.

The original recipe was published in the excellent Cook’s Illustrated All Time Best Soups volume, and this variation was also influenced by a post on the terrific Big Girls, Small Kitchen blog and Ina Garten’s recipe for Celery Root and Apple Purée (which is very much like this soup without the vegetable broth).

I took two significant detours: I omitted the heavy cream (thus keeping the soup vegan), and substituted potato starch for wheat flour (which makes it gluten-free). Trust me, you won’t miss the cream a bit; if you process in a Vita-Mix, it will be plenty creamy, but even if you just use an immersion blender the soup will emerge a tiny bit more rustic, while still maintaining that silky mouthfeel.

When it comes to the wine, you don’t really need to use a $38 bottle of Roche 2014 Carneros Chardonnay French Oak Reserve, but damn, it was good (and you only need half a cup (or 120ml).

Special note for celiac patients: Be extra-sure that your vegetable broth is free of wheat or barley or malt products. These often show up in commercial vegetable broths and broth bases.

INGREDIENTS

    2 tablespoons / 30g Earth Balance Vegan Buttery Sticks (or unsalted butter, for non-Vegan version)
    1 onion, cut into 1/2-inch pieces
    1 fennel bulb, halved, cored, and cut into 1/2-inch pieces, plus 1 tablespoon minced fronds
    Salt and pepper
    6 garlic cloves, minced
    2 teaspoons / 1.6g minced fresh thyme (or 3/4 teaspoon / .75g dried)
    2 tablespoons / 20g potato starch
    1/2 cup / 120ml dry white wine
    5 1/2 cups / 1.3 liters vegetable broth
    1 celeriac (also known as celery root) (14 ounces / 400g), peeled and cut into 1/2-inch pieces
    12 ounces / 350g red potatoes, scrubbed but unpeeled, cut into 1/2-inch pieces
    2 Golden Delicious or Granny Smith apples, peeled and cut into 1/2-inch pieces
    zest of 1 lemon or orange
    1 bay leaf

Soup on the boil.

Soup on the boil.

DIRECTIONS

Put butter, onion, fennel, and a couple of pinches of salt in a heavy-bottomed pot or Dutch oven, cook over medium heat until translucent, about 5-8 minutes. Add garlic and thyme, cook for 30 seconds to a minute until fragrant. Raise heat to high and add potato starch, stirring continuously, and cook for another 2 minutes or so. Add the wine to deglaze the pot, making sure to scrape up all the bits on the bottom; let most of the wine boil off.

Stir in the vegetable broth, celeriac, potatoes, and apples. Add bay leaf and zest your citrus over the pot. Bring to a boil and then back the heat off to a high simmer. Cover pot and cook for 35-40 minutes, stirring occasionally, until vegetables are all tender.

Remove from heat. Discard the bay leaf. Process 2/3 soup in batches; if you are using a blender or Vita-Mix, making sure to cover feed tube loosely with tea towel (do not plug it up, because steam needs to escape). Return processed soup to pot. [Alternatively, use an immersion blender to process soup, making sure to leave at least 1/3 chunky.] Season with salt and pepper to taste, and ladle into bowls. Garnish with fennel fronds and serve. Makes 6 servings.

Torta or Tarta de Santiago (or maybe not)

3

On the road to Santiago... specifically, Triacastela.

On the road to Santiago… specifically, Triacastela.

In May of 2015, my bride and I took a journey along the Camino de Santiago, an ancient Catholic pilgrim route (more specifically, we traveled along a portion of the so-called Camino Francés, which is one of a number of Camino routes that all end up in Santiago de Compostela, Spain). It’s an excellent thing to do, as evidenced by the motion picture The Way, and by the still-incomplete blog chronicling our trip, Two Roads to Santiago.

Complexo Xacobeo. Food, lodging, taxi, you name it, you got it.

Complexo Xacobeo. Food, lodging, taxi, you name it, you got it.

Triacastela is a small (pop. 721) town in the province of Lugo, in the Galician region of Spain; it’s about 135 km east of Santiago de Compostela. It got its name from three castles that once stood there (though none of them do now). We stayed there the evening of 24 May, Bob Dylan’s birthday, apropos of nothing. After disgorging our luggage, we wandered into the center of town for dinner, and had an excellent meal at the Complexo Xacobeo.

We didn't have just wine and water, but it was a good start.

We didn’t have just wine and water, but it was a good start.

At dinner’s close, the bride and I had a minor disagreement that would change my life — our lives — for the better. I wanted a cool, refreshing ice cream for dessert, and she preferred to try a local delicacy called tarta de Santiago (in Spanish, anyway; in the local Gallego, it was torta de Santiago). It’s an almond cake whose recipe will follow later in this post.

I like almonds and I like sugar, but most almond confections have generally left me unimpressed; marzipan actually engages my gag reflex. But the bride had walked 20-odd kilometres that day over steep terrain, so she won. Wow, am I glad she did. It was so delicious that I dedicated the balance of our time in Spain to sampling as many versions of it as I could reasonably consume, and no fewer than eight bakers’ interpretations of the ancient recipe passed my lips.

1835? 1838? Galicia? Elsewhere? You decide.

1835? 1838? Galicia? Elsewhere? You decide.

How ancient is the recipe? It certainly goes back as far as the Cuaderno de confitería, which was compiled by Luis Bartolomé de Leyba circa 1838. It’s actually based upon this publication that the tarta/torta obtained its Indicación Geográfica Protegida, which protects its status and authenticity the same way that Champagne does for certain French sparkling wines and Parmigiano Reggiano does for certain Italian regional cheeses. That’s all good as far as it goes, but Spanish culinary historian Jorge Guitián discovered that the Cuaderno de confiteria was largely a rehash of recipes that had previously been published elsewhere, including one cookbook, Art Cozinha, that was published in Lisbon in 1752, not to mention Juan de la Mata’s Arte de Repostería, published in 1747. One source sets its first publication date at 1577, as “torta real,” claiming it was brought to Spain by the Moors. And on top of that, some culinary historians have suggested that the recipe came originally from Sephardic Jews settled in the area, and its original use was as a Passover cake, as it’s unleavened.

Because of their generous and welcoming nature, I’m inclined to give the Gallegos a mulligan on this one. Whether or not the tarta de Santiago actually originated in Galicia, it flourished there, and they have embraced it as part of their cultural and culinary heritage. One thing is for certain: the habit of dusting the top of the cake with powdered sugar, save for a stencil of a cruz Xacobeo (Saint James’ cross) dates to 1924, when José Mora Soto, a baker in Santiago de Compostela, decorated his cakes with the mark to distinguish his from competitors’. In the intervening 90+ years, the tradition has been almost universally embraced.

The ancestral home of the modern tarta.

The ancestral home of the modern tarta.

His bakery, rechristened Pastelería Mercedes Mora (for his granddaughter, pictured below), still makes the cakes today.

The real deal.

The real deal.

Good as they may be, it’s inconvenient to travel to Santiago de Compostela every time you care to have one of these cakes. So here’s a step-by-step version of the shockingly simple — and, if it makes a difference to you or your dining companions, gluten-free — recipe.

The finished item.

The finished item.

TARTA DE SANTIAGO

Ingredients

• 250 grams / 2.5 cups of almond flour (I use ½ blanched and ½ unblanched)
• 250 grams / 1.25 cups of sugar, preferably superfine/baker’s sugar
• 6 eggs
• Zest of two citrus fruits (lemon is traditional)
• Powdered sugar to sprinkle on the top
• 1 chunk of unsalted butter to spread on the springform pan
• You can use a variety of essences, extracts, or other scent enhancers to give the cake a nice aroma, such as brandy, cinnamon, etc. Use sparingly, though, so as not to overpower the simple and delicate flavours of the almond flour and citrus zest.
• 1 round detachable mold/springform pan / 22 to 25 cm or 9 to 10 in. diameter
• Lemon juice or other liquid for moistening top of cake
• a paper (or plastic) St. James cross for stencil

Two different almond flours are optional.

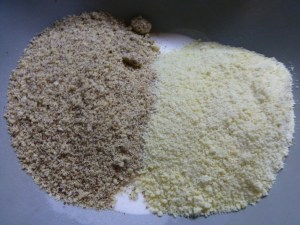
Two different almond flours are optional.

Batter will be fairly loose when you pour it into the pan; don't worry.

Batter will be fairly loose when you pour it into the pan; don’t worry.

Out of the oven and ready for stenciling.  I use a spray bottle to apply the liquid, but a dish and pastry brush works fine too.

Out of the oven and ready for stenciling. I use a spray bottle to apply the liquid, but a dish and pastry brush works fine too.

Preparation

• Preheat the oven to 175º C (350º F)
• In a large bowl, combine the sugar, almond flour, and lemon zest or other essence. Mix ingredients well with a fork.
• In separate bowl, mix eggs with fork until blended.
• Add the eggs and mix well with a spoon or rubber spatula, but do not whisk, only make sure all the ingredients are moistened.
• Spread the butter on the mold (or spray with PAM) and pour the mix in it.
• Bake at 175º C (350º F) for 40-45 minutes until the surface is toasted and golden; when a toothpick inserted in the center comes out clean, it’s done.
• When the cake is done, remove from the oven and let it cool before unmolding. You may want to run a knife or spatula around the edge to make sure the tarta hasn’t stuck to the pan, but do be careful not to scratch the pan when you do it.
• When the cake has cooled, place the paper/plastic cross on top of the surface, moisten the entire top of the cake (including the stencil) with citrus juice or other liquid (brandy, etc.), then sprinkle powdered sugar evenly over the entire surface, using a mesh strainer.
• Remove the stencil carefully, as to avoid dropping sugar from the stencil onto the cake.

Maybe not quite Mora, but pretty darn close and a whole lot easier.

Maybe not quite Mora, but pretty darn close and a whole lot easier.

We Be Jammin’ (Specifically, Strawberry Balsamic Jam with Black Pepper)

1

Itty bitty jars of sweet and savory goodness.

Itty bitty jars of sweet and savory goodness.

Ah, the joys of ADHD. I had planned on making a strawberry-cherry pie, then strawberry-rhubarb tarts, but when the steam had settled, my two pounds of luscious Driscoll strawberries found their way into a jam. Generally speaking, I’m not a huge fan of strawberry jam, because it tends to be both a little sweet and a little insipid for my taste, but I came across several recipes for a strawberry balsamic jam, and then the vision of serving it with an aged white Canadian Cheddar kicked in — no, wait; goat cheese! or maybe a stinky Roquefort! (see what I mean about the ADHD?) — so I committed to making a small batch.

Six ingredients. Six. No added pectin. Comparatively speaking, a fair amount of work for six four-ounce (118 ml) jars, but highly satisfying, especially when you give them away as gifts to a grateful palate (even if it’s your own).

STRAWBERRY BALSAMIC JAM (makes six 4 oz./118 ml jars)
Ingredients
2 lb./1 kg fresh strawberries
3 tbsp/45 ml lemon juice (fresh-squeezed, if you can get it)
1.5 cups/300 g granulated white sugar
4 tbsp/60 ml balsamic vinegar
1 tsp/5 g sea salt or kosher salt
1/2 tsp/1-2 g freshly ground black pepper

Berries and sugar, macerating nicely.

Berries and sugar, macerating nicely.

Rinse and hull strawberries. Place in a bowl with sugar and let sit for at least 1-2 hours (or overnight, if it’s convenient), mashing the strawberries after about 10-20 minutes.

Berries and sugar, all mashed up.

Berries and sugar, all mashed up.

Meanwhile, prepare jars and lids (which is to say, throw them in boiling water for a minimum of 10 minutes). [You have the option of making this a refrigerator jam if you don’t care to do the whole home canning thing; strictly up to you. I chose to preserve the preserve in the traditional manner. Otherwise, be sure to use it up within about 10 days.]

It may not be quick, but it does get thick.

It may not be quick, but it does get thick.

Place the strawberry and sugar slurry in a non-reactive saucepan, add the lemon juice, and bring to a boil on medium-high heat. Reduce heat to medium and continue to cook until jam is at the jell stage, stirring frequently and watching at least semi-observantly. [For me, this was about 45 minutes, but your pan and stove may bring about a different result, timewise; one of the recipes I read said you could get there in 30 minutes.] Add the balsamic vinegar, salt, and black pepper the last five minutes of cooking, stirring continuously. Remove the pan from heat.

Jam and a few spare jars.

Jam and a few spare jars.

Pour jam into hot, prepared jars, leaving 1/4″ headspace. Refrigerate immediately or seal and process jars for 10 minutes in a water bath canner. If processing in water bath, remove and let jars sit for 24 hours, ensuring a good seal. Remove bands and store for up to one year… if you think you can wait that long before finishing it all off.

Boiling, but not mad.

Boiling, but not mad.

[Thanks to my pal Susan Park for the suggestion of adding the salt; it cuts the sweetness nicely, and plays well with both the strawberries and the vinegar. And thanks to my cousin Sheryl for the gorgeous cutting board that served as a tray for the jars.]

Gluten-Free, Dairy-Free Blood Orange Olive Oil Honey Cake

0

At $20 USD, how could I resist?

At $20 USD, how could I resist?

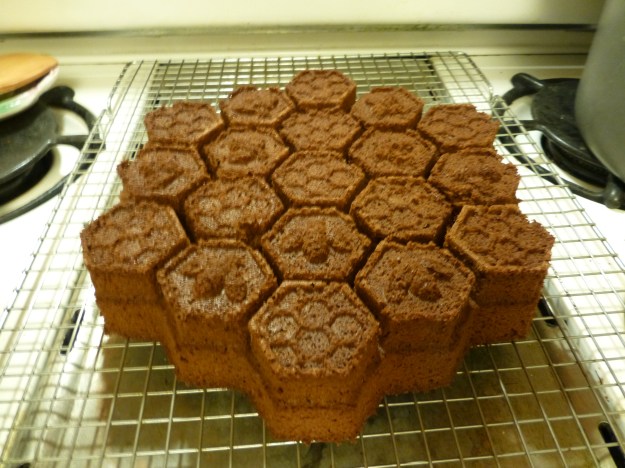
All right. I admit it. I’m a sucker for odd Bundt pans and other cake pans with funny shapes. And when I saw this one on Amazon for twenty bucks, I just had to have it. Had to. It’s like certain women (like the one to whom I’m married) and shoes. The sooner you learn to stop resisting — I’m speaking from personal experience here — the happier your life will be. That said, I’m not interested in becoming the Imelda Marcos of goofy baking tins, so my rule is that if I buy it, I have to use it. After I make 20 cakes in this pan, the price of the bakeware will have added a mere eight bits to the cake’s cost.

As luck would have it, the Internets this evening (24 September in lovely California) yielded a plethora of honey cake recipes, given that sundown marked the beginning of the Jewish holiday Rosh Hashanah, and some version of honey cake is a staple of the holiday in many households. While I myself cannot number myself a member of the tribe, many of my dearest friends are, and their cuisine has been a mitzvah in my life.

The main recipe I improvised from can be found at epicurious.com, though I made a couple of modifications that I believe enhanced it significantly. First, instead of using any old vegetable oil, I used Stonehouse extra-virgin blood orange olive oil. Oranges and honey take to one another like Marilyn Monroe’s arm and an elbow-length satin glove. I wasn’t keen on adding a coffee flavour to the mix, but I needed the additional moisture, so I substituted some French vanilla coconut milk “creamer” instead (think orange + vanilla = creamsicle). And I used some stupidly expensive (and largely unavailable) ingredients, such as Manuka honey that a friend hand-carried over from New Zealand (and which sells in America for about $20 USD for a 12 oz. / 350 ml jar), and Green Spot single pot still Irish whiskey, of which only about 500 cases are made per year, making it the Pappy van Winkle of Irish whiskey. I’m sure some of my friends would happly clout me upside the head with a 4×4 for using such an extraordinary spirit in baking, and they might be right. But the batter was excellent, and it was only two tablespoons / 30 ml of the whiskey.

19 little mini-cakes of goodness.

19 little mini-cakes of goodness.

Gluten-Free, Dairy-Free Blood Orange Olive Oil Honey Cake

Ingredients
• 1 3/4 cups / 225 g. Cup4Cup gluten-free flour (or all-purpose flour, if you’re OK with gluten)
• 1 teaspoon / 2.6 g. ground cinnamon
• 3/4 teaspoon / 4 mg. baking soda
• 3/4 teaspoon / 6 g. salt
• 1/2 teaspoon / 2 g. baking powder
• 1/2 teaspoon / 1 g. ground ginger
• 1/4 teaspoon / .75 g. ground cloves
• 1 cup / 237 ml honey (I used Manuka honey that a friend had brought from New Zealand)
• 2/3 cup / 158 ml blood orange olive oil (available from Stonehouse Olive Oil Company)
• 1/2 cup / 125 ml So Delicious French Vanilla coconut milk “creamer” (or freshly brewed strong coffee, cooled)
• 2 large eggs (I used duck eggs, because I had some)
• 1/4 cup / 60 g. packed brown sugar
• 2 tablespoons / 30 ml whiskey or bourbon (I used Green Spot Irish Whiskey)

Preparation
Put oven rack in middle position and preheat to 350˚F / 175˚C. Spray pan with Baker’s Joy, PAM cooking spray with flour, or oil pan well and dust with flour, knocking out excess.
Whisk together flour, cinnamon, baking soda, salt, baking powder, ginger, and cloves in a small bowl. Whisk together honey, oil, and coconut milk in another bowl until well combined.
Beat together eggs and brown sugar in a large bowl with an electric mixer at high speed 3 minutes. Reduce speed to low, then add honey mixture and whiskey and mix until blended, about 1 minute. Add flour mixture and mix until just combined. Finish mixing batter with a rubber spatula, scraping bottom of bowl.
Pour batter into Nordic Ware honeycomb pan or loaf pan (batter will be thin) and bake 30 minutes. Cover top loosely with foil or parchment and continue to bake until cake begins to pull away from sides of pan and a wooden pick or skewer inserted in center comes out clean, about 30 minutes more. Cool on a rack 1 hour.
Invert rack over pan and invert cake onto rack. Turn cake right side up and cool completely.
Baker’s note: • Cake keeps, wrapped tightly in plastic wrap or in an airtight container, at room temperature 1 week. As if you’ll be able to keep from devouring it for that long. Seriously.

NOTE: When I first posted this, I had some truly wacky cup-to-gram (or -ml) conversions, which I have since revised. [Some of them were computational errors, some mere typos.] I presume my astute audience would have correctly divined that 225 mg. of flour wouldn’t have made a very large cake in the best of scenarios, and given the amounts of the other ingredients, it would have been overwhelmed by, um, just about everything else. Because I am in America, I foolishly tend to continue to use cup/tablespoon/etc. measurements, and while the metric equivalent is printed on my measuring spoons, it’s not printed on my measuring cups. I should probably just measure the stuff on my fabulous kitchen scale, which is bilingual both in metric and the ridiculous and outdated Olde English measurements. Sorry about that.

Fig Onion Rosemary, um… It’s a Jam! It’s a Conserve! It’s a Very Thick Sauce!

2

Destemed figs await being destiny.

It’s figgy! It’s oniony! It’s rosemary-y! It’s… Supercondiment!

When it comes to a project like this, seems to me there’s only two ways to go: 1) You can make just enough for yourself, and let’s face it, a little goes a fairly long way, or 2) If you’re going to bother with it at all, you may as well make a bunch, and share it with friends, neighbours, co-workers, etc. After all, you’re committing the same amount of time in either case, and in the latter mode, you can share the wealth. Sure, your cost of ingredients doubles, but by a back-of-the-napkin calculation, that came to about $12 in this case, less if you use red onion rather than Vidalia sweet onions, a cheaper wine, and can find a better deal on fresh figs than Whole Foods‘, all of which are well within pretty much everyone’s reach.

Clostridium botulinum, or Botox in the wild.  (Photo Credit: Dr. Gary Gaugler/Science Photo Library)

Clostridium botulinum, or Botox in the wild.
(Photo Credit: Dr. Gary Gaugler/Science Photo Library)

I’m going to say this up front, because food safety is paramount: THIS MUST BE REFRIGERATED. You can’t really preserve it in a standard water bath as you do other jams, because the pH isn’t low enough (or, put another way, the acidity isn’t high enough) to guarantee that our old pal Clostridium botulinum won’t rush in and ruin the day. The spore that causes botulism — and turns actresses of a certain age into Stepford Wife-looking creatures — is given a perfect home to reproduce in a fairly low-acid foodstuff that has been canned in an anaerobic (air-free) environment. You could get around this by adding a healthy dose of lemon or lime juice (or citric acid powder), but that would muck about with the flavour in a way that I wasn’t aiming for, personally. That said, if you do want to adjust the recipe and can it in the trad fashion, I’d recommend getting a pack of pH test strips and make sure you have the acidity at a pH lower than 4. Then the nasty little beastie is banished from the kingdom.

Now that I’ve frightened you, let me say that this is the same advice you’d get for canning meat, or asparagus, or mushrooms, or wax beans, or pretty much any veg that isn’t a tomato (and yes, I know a tomato is technically a fruit).

If, on the other hand, you have a pressure cooker/canner, you could do this no worries, so long as you get the canning temp above 240° F/115.6° C for a specific period (there are online guides), and it makes sense to err on the side of caution. Otherwise, you’re just going to have to treat it the same way you do pretty much everything else: put it in the fridge, and use it within 10 days or so. [Since it isn’t going to be in an anaerobic environment, botulism isn’t an issue, but as you well know, nothing in the fridge keeps forever… except that box of baking soda that doesn’t really absorb the odors the way it’s advertised to do.]

On to the good stuff.

This jam/conserve/very thick sauce is most excellent when served with stinky cheese, or as a glaze/condiment for a pork tenderloin, chops, or chicken. [Of course, since it’s vegan, it’s also good with crackers and flatbreads, not to mention garden burgers.] I tried to keep the sugar content as low as practicable, favouring the umami as much as possible.

Destemmed figs, awaiting their destiny.

Destemmed figs, awaiting their destiny.

FIG ONION ROSEMARY JAM/CONSERVE/VERY THICK SAUCE
INGREDIENTS:

45ml (3 tbsp.) extra virgin olive oil
3 large Vidalia sweet onions, sliced (about 1kg) (any onion can be substituted here)
5g + 1.25g (1 tsp. + 1/4 tsp.) sea salt or kosher salt
15g + 250g (1 tbsp. + 1 cup) turbinado sugar (white sugar works also)
1.25kg (2.75 lbs.) fresh Kadota figs (or whatever variety is convenient)
30ml (2 tbsp.) fig balsamic vinegar (or other balsamic vinegar or wine vinegar)
500ml (2 cups) red wine (2/3 of a standard bottle)*
15g (1 tbsp.) fresh rosemary, finely chopped

DIRECTIONS:

[Mise en place notes: Slice the onions and set then aside in a bowl; wash and destem the figs, then cut them in half (north/south) and set aside in a separate bowl. Chop the rosemary and set it aside. You can measure out your other moist and dry ingredients at this time if you want to, but nothing here is so time-sensitive that it’s really necessary.]

The only time the Sweet Vidalia onions made me cry was at the checkout counter.

The only time the Sweet Vidalia onions made me cry was at the checkout counter.

Heat pan on high and add the olive oil; when oil begins to shimmer, add the sliced onions, 5g/1 tsp. salt, 15g/1 tbsp. sugar, and stir briskly, to coat onions with the oil and mix in the salt and sugar. Reduce heat to medium high and allow onions to caramelize, about 20 to 30 minutes. [Note: If you haven’t done this before, it’s a little tricky. Stir them too often, and they don’t brown up. Stir them too infrequently, and they can burn. Don’t freak out if a couple of the onions look overdone; not a big deal. Timing is approximate depending on the amount of onions, your pan, and the heat of your cooktop.]

Onions, rosemary, and figs! Oh my!

Onions, rosemary, and figs! Oh my!

When the onions are browned, add the balsamic vinegar and wine to deglaze the pan, being sure to scrape any brown bits off of the bottom of the pan. Add figs and simmer until tender, about 20-30 minutes, stirring occasionally and pressing the figs against the side of the pan with a wooden spoon to break them up. Add the remaining turbinado sugar and salt (to taste) and simmer for an additional 20 minutes. If jam/conserve/very thick sauce gets too thick, add more liquid (either wine or water) as needed until the desired consistency is reached.

Jam, condiment, or very thick sauce? We report, you decide.

Jam, conserve, or very thick sauce? We report, you decide.

Allow to cool until it is safe to handle, then spoon into clean jars and refrigerate. Makes approximately 1.5 liters/just over 6 cups. Should be just fine for at least 7-10 days.

Fancier than it needs to be?

Fancier than it needs to be?

* A note on wine: I used Kendall-Jackson 2010 Vintner’s Reserve Summation Red, a blend of 28% Zinfandel, 27% Merlot, 14% Cabernet Sauvignon, 7% Petite Sirah, 3% Grenache, and 2% Petit Verdot. Why? I’d like to tell you that I did because it was the perfect match for the Brix (sweetness) level of the figs, but in fact it was around, I wasn’t particularly interested in drinking it at the time, and it wasn’t so expensive that I’d feel bad about having used it for making jam/conserve/very thick sauce. Any dry red will do; I may try a Pinot Noir or some other wine for the next batch, just to see how that works. You’ve probably heard this before, but you should avoid using any wine in cooking that you wouldn’t drink. So-called “cooking wines” are about as appetizing as Drāno®.

ADDENDUM:
I gave away a pint of the you-know-what to my pal Lisa Jane Persky, who is an actress, writer, artist, and a damn fine cook in her own right; here’s the chop she made with it. Nice.

Mmmmmm.

Mmmmmm.

ADDENDUM #2:
The other week, I attended a food festival at which restaurateur/radio host/generally cool individual Evan Kleiman was speaking about preserving tomatoes, and she said that (given the comparatively high pH of some newer varieties of tomato), she sometimes adds straight citric acid (which can be purchased either online or at many fine markets) to acidify the solution rather than adding lemon or some other citrus juice. The reason is that, while citric acid will make your jam/conserve/really thick sauce lower in pH (and hence, more sour-tasting), it won’t introduce any new flavour. You can buy pH strips or litmus paper to check to see if its pH is below 4. Alternatively, as noted above, you can pressure can the conserve/jam/really thick sauce. Or just stick it in the fridge. You’ll probably go through it faster than you thought.

Vegan Tomato-Dill Soup

0

It's soup!

It’s soup!

Despite the widely-held belief that “it never rains in southern California,” it does, albeit not often enough. Tonight, for instance, was a prime example of the occasionally intemperate nature of SoCal weather; a much-needed downpour, most of which would wind up in storm drains on a quick trip to the Pacific Ocean, rather than into the aquifers and reservoirs that could make the best use of it. Rain, for me, signals an opportunity to make soup, which matches inclement weather the way pearls go with Sophia Loren’s exquisite neck.

In my youth, tomato soup meant a can of Campbell’s, made famous by Andy Warhol. My late and much beloved mom used to prepare it in high style, diluting it with milk rather than water for an instant “cream of tomato” concoction, which remained the gold standard for tomato soup in my estimation until well into my adulthood. One weekend in my thirties, though, on a trip to Lake Tahoe, I tasted freshly prepared tomato soup for the first time, and it was nothing short of revelatory. I’ve been spoiled ever since.

INGREDIENTS:

2 tbsp.olive oil
1 medium onion, finely chopped
2 tbsp. Cup4Cup gluten-free flour
2 cloves garlic, minced
1 can (28 oz.) San Marzano diced tomatoes
4 tbsp. stemmed and chopped fresh dill + 4 fronds for garnish
28 oz. vegetable broth (or chicken broth, if the vegan version isn’t sufficiently compelling)
1 bay leaf
salt
ground black pepper
dollop of cashew cream (for vegan version) or sour cream or yogurt (non-vegan version)

The humble onion.

The humble onion.

DIRECTIONS:
First, heat the olive oil in a soup pot, then add the diced onion at medium heat. Sweat the onion, allowing it to release its liquids, but don’t brown it. Add the Cup4Cup gluten-free flour, and stir, making sure to break up any lumps that might ensue (a whisk is good at doing this). Add the garlic and cook for about two minutes, stirring occasionally. Then add the tomatoes, broth (a simple way to measure this is to fill up the empty tomato can), chopped fresh dill, bay leaf, salt, and pepper.

Adding the flour.

Adding the flour.

Cook over medium low heat, stirring occasionally, for about 30 minutes, but you needn’t be particularly fussy about the timing; it’s just enough to let the flavours blend.

Spices added; stirring ensues.

Spices added; stirring ensues.

From here, you have a couple of options. 1) Allow the soup to cool overnight in the refrigerator, and serve it the following day as a rustic cold soup, garnished with a dill sprig (and remember to remove the bay leaf!).

A quick trip to the Vita-Mix.

A quick trip to the Vita-Mix.

2) Alternatively, you can remove the bay leaf, toss it in the food processor and purée it. Be sure to work in small batches, and DON’T plug the feeding tube unless you’d like your kitchen walls redecorated with a fine spray of tomato soup. [The steam needs somewhere to go; best bet is to drape a kitchen towel LOOSELY over the top of the feeding tube.]

You can add a delightfully silky texture by stirring a dollop of cashew cream into each bowl (or cup). Garnish with a dill sprig, and serve.

Serves 4-6

Shepherdless Pie — or — Don’t Kvetch About Guvech

0

Gyuvech: It's not only the container... it's what's inside.

Gyuvech: It’s not only the container… it’s what’s inside.


One-paragraph history and etymology lesson rolled into one: In Bulgaria (and throughout the Balkans), meat and vegetable casseroles are often made in beautifully decorated earthenware pots known by a staggering variety of names, including guvech, gyuvech, đuveč, ѓувеч, гювеч, ђувеч, and others. The word has become not only synonymous, but indeed coterminous, with the meal prepared within it. [In that sense, it’s kind of the opposite of the word restaurant, which, back in the mid-18th century, was the name of a bouillon, later morphing into its modern definition of where that bouillon is served (when bouillon is served there at all, rarely the case these days).] By the time the word reached Turkey, it had become güveç, which more or less transliterates into guvech or guvetch, which is how we know it in North America.

Just like my great-grandma didn't used to make. But someone else's did.

Just like my great-grandma didn’t used to make. But someone else’s did.

As with any casserole/stew/hotchpotch, there are something approaching an infinite number of recipes for guvetch, but I’m quite fond of this meatless commercial variety, produced in Bulgaria by Konex Foods and marketed In America by Indo-European Foods under the label ZerGüt. It may be my favourite guvetch because it’s the only kind I’ve ever had (which is true), but it’s quite delicious on its own terms. According to a spokesperson for Konex, the commercial recipe is derived from one handed down by one of the company founder’s ancestors. The vegetarian guvetch they market (pictured above) is a simple mélange of aubergines, peppers, potatoes, carrots, water, sunflower oil, green beans, tomato paste, peas, salt, okra, onion, sugar, and parsley, with no preservatives, artificial flavours, or colours. At 250 calories per 19 oz. bottle, it’s easy on the diet, too.

A potful of potatoes.

A potful of potatoes.

Flash forward to earlier this evening. I’d had a hankering for shepherd’s pie, but there wasn’t any ground lamb to hand, and I decided to take a whack at a vegan version.

SHEPHERDLESS PIE

Ingredients
2 large Russet potatoes
4 smallish yams (about a pound or so)
3/4 cup unsweetened almond milk
2 tsp salt
1 jar ZerGüt guvetch

Directions
Set a pot of salted water on to boil. Peel potatoes and yams; cook in boiling water for about 20 minutes, or until soft. Drain. Return to pot and mash with almond milk and salt; set aside to cool slightly.

Mashed potatoes, yeah.

Mashed potatoes, yeah.

Divide guvetch evenly into six ramekins. Microwave on high for about 2 minutes to warm.

Microwave me, baby!

Microwave me, baby!

Here’s where I got silly. The simple thing to do would have been to spoon the mashed yam-and-potato mixture on top, fluffing it with a fork to create those peaks that would brown underneath the broiler (about 8 minutes, and rotate the tray at 4 minutes). Instead, I pulled out a pastry bag and a star tip, and piped the potatoes in over the guvetch. Totally unnecessary, totally fun.

Sack o' spuds.

Sack o’ spuds.

If you decide to do it that way, work in a circular motion from the edge toward the center, finishing with a little peak on top.

Piped, but not yet piping hot.

Piped, but not yet piping hot.

Place the ramekins on a foil-lined baking sheet. Eight minutes under the broiler (or you can use a kitchen torch, if you wanna get fancy about it). Rotate the pan at four minutes, and have a care, because some broilers are more efficient than the one in my sixty-year-old O’Keefe & Merritt.

Good to go, after they've cooled a tad.

Good to go, after they’ve cooled a tad.

Allow the ramekins to cool sufficiently that you can handle them — albeit gingerly — with your bare hands. Serve while warm. Makes six.

[NOTE: Bottled guvetch is available at markets that cater to an Eastern European clientele, but it can also be purchased online. The big issue here is the shipping cost, which makes it kinda prohibitive to buy a single jar. If you are willing to purchase a six-pack, you can bring your cost down to about $6.50-$8 per jar (depending on where you live), which is about twice what you’ll pay for it in an ethnic market. It can be ordered online from Salonika Imports in Pittsburgh, so the closer you are to them, the less you’ll pay to have it shipped. Alternatively, you could chop and heat your own vegetable mélange; Google “guvech recipe” for ideas, or just go for it as the vegetable bin provides and the spirit moves.]

Potatoes au Gratin sans Fromage (Vegan-style)

3

It's plane to see.

It’s plane to see.

We’ve been doing Meatless Mondays around the pad for years now, and that frequently means one of several standbys, often involving potatoes. [What can I say, I’m Irish.] My original intent had been to take a whack at Chef Thomas Keller’s Potato Pavé recipe, but time and energy conspired against me, so I opted for Potatoes au Gratin. As luck would have it, The Bride and I dined a few days ago at Crossroads, an excellent vegan restaurant in Los Angeles, and that inspired me to retool the cheese-oozing, cream-dripping, diet-busting fave of my youth.

Generally speaking, I’m not much of a fan of ersatz food products (diet sodas largely excepted). I’d much rather have a beautifully grilled portobello mushroom served like a burger than any sort of the Frankenmeats that often try to pass themselves off as beef patties. As a consequence, my first order of business was to strike off most of the over-the-counter vegan cheese substitutes available, as they more often taste like Firma-Grip paste with a side of FD&C Yellow No. 6 than anything resembling fromage. What I wasn’t willing to sacrifice, though, was the creamy, viscous, umami-laden mouthfeel of the real deal. Fortunately, I didn’t have to.

Gotta give some props here to Tori Avey’s blog, The Shiksa in the Kitchen, which published a recipe for Dairy-Free Saffron Scalloped Potatoes that launched me in the right direction. Basically, there are two parts to the recipe: The potatoes and onions, and the sauce. Here’s a list of ingredients:

100_4774100_4770100_4768

DAIRY-FREE, GLUTEN-FREE, VEGAN POTATOES AU GRATIN

For the Sauce:
2 tbsp non-hydrogenated butter substitute (I used Earth Balance)
3 1/2 tbsp flour (I used Cup4Cup gluten-free flour)
1 can (13.5 or 15 oz) coconut milk* — NOT THE NON-FAT OR LOW-FAT VERSION!
1 cup Almond Breeze almond milk, unsweetened
1 tsp sea salt
1 tsp finely minced garlic (or 1/2 tsp garlic powder)
½ tsp tamari sauce (gluten-free soy sauce)
1 ½ tsp mustard powder
¼ tsp Piment d’Espelette (or hot paprika or cayenne powder)
1 tsp celery flakes or parsley flakes (optional)

For the Taters:
4-5 lbs Russet potatoes (you could use Yukon Gold as well, but Russets are way cheaper)
1 large onion
several dashes paprika for colour and presentation, optional

You have a couple of choices here (more if you are not acting as your own sous chef, which I was). Either make the sauce first (which I did), or slice the potatoes and onions first. If you are slicing the veggies first, please feel free to skip ahead. [Do remember to put your potato slices in a bowl of cold water to keep them from going brown while you’re working on other stuff.]

Making the Sauce:

Making the roux.

Roux the day.

Melt the butter substitute (or margarine, even if it’s not called that) over medium heat in a saucepan or pot, and whisk in the flour a tablespoon at a time, stirring more or less constantly to make a roux. Let it brown a bit, maybe two minutes or so, and then begin adding the coconut milk, about 1/3 of a can at a time. [The full fat variety of coconut milk will probably have a big fatty plug at the top of the can; this is a good thing. Smooth it as you whisk.] Then add the almond milk and spices, continuing to whisk all the while (nothing says “M-m-m-m, tasty!” quite like a thumbnail-sized lump of mustard powder in your finished dish). The reason I used tamari rather than regular soy sauce was to keep the recipe gluten-free; if you don’t care about that, your basic Kikkoman will work just fine. All that need be done from here on is to keep it at a simmer; it only has to be warm (and liquid) enough to pour over the potatoes. Cover it (to keep it from reducing) and turn the heat down low while you focus on the next task: preparing the potatoes.

Preparing the Vegetables:

Spud ends.

Spud ends.

First, preheat your oven to 350ºF / 175 (actually 176.67)ºC

The potatoes (peeled or unpeeled, according to the chef’s whim) should be sliced to a thickness of about 1/8″ or so. More skilled craftsmen than I can perform this task handily with nothing more than a knife, but I use a mandoline (as you can see at the top of the post), and because I am a manly and foolhardy man, I use it without the safety guard. [THIS IS NOT RECOMMENDED!] Should you find the safety guard oppressive, one alternative is to wear a steel mesh or Kevlar glove. But in the true Anthony Bourdain spirit of recklessness, well, I don’t do either of those things. That being said, not only is slicing off your fingertips or shaving your palm — a real possibility! — painful and disfiguring, it also invalidates the recipe’s claim to being vegan. (Blood, even accidentally spilled, is an animal product.) When all the potatoes are sliced (and put in a bowl of water to prevent their discolouring), repeat the process with the onion.

Potatoes and onions, ring the bells of St. Bunion's.

Potatoes and onions, ring the bells of St. Bunion’s.

Layer the potatoes and onions into a greased large baking dish or Dutch oven (I used a 5 qt. Le Creuset Braiser, which worked magnificently). First set down a layer of overlapping potato slices, then scatter some onions on it, then ladle some of the sauce over. Lather, rinse, repeat, until the dish is full (I had about 1/2 lb of sliced potatoes left, which I put in the fridge, and will roast or fry later). Sprinkle some paprika on the top, if you so desire.

Ready for some ovenizing.

Ready for some ovenizing.

Cover with foil (or put on the lid), and pop it into the oven for 60 minutes at the aforementioned 350ºF / 175ºC. By then, the potatoes should be soft and yield easily to a fork. Give them another 10 minutes in the oven uncovered, and finish them off with about 5 minutes under the broiler to brown the top (be watchful during this process, because it can go pretty fast, depending on the distance between the dish and the flame).

Remove from oven, and allow them to cool for about 10 minutes.

Brown is beautiful.

Brown is beautiful.

Coda: I realized (a little too late) that some diced green chiles would be a terrific addition to the sauce; I heated some up and spooned them over top, but it didn’t have quite the same effect. Also, you may want to add some salt (or allow your diners to) at the table, as it was a tiny bit shy on the NaCl for my taste. And a little fresh ground pepper is also nice.

*The full-fat variety of coconut milk runs about 700 calories a can, which is a not inconsiderable amount, but don’t be tempted by low- or non-fat substitutions, because they won’t provide the same mouthfeel. And when you consider how many fewer calories it has than cream (52 per ounce vs. 103), it’s totally worth the “splurge.” [Also, the almond milk is only 7.5 calories per ounce, and given that you’ve also left out all the cheese, there’s a pretty dramatic reduction in calories compared to the standard au gratin recipe.]

In Praise of a Very Fancy Blender

3

100_3529a

First off, let me say from the outset that I’m not a “juice guy.” Sure, I’ve seen the infomercials and heard the testimonials and been subject to in-store demos, just like the rest of us. And I love juice; very few liquids on Earth bring me greater pleasure than a fresh-squeezed glass of blood orange juice. But I’m not persuaded that juice can rightly claim the curative powers that its disciples ascribe to it. So it wasn’t for that reason that I found myself on Craigslist, obsessing over finding my first VitaMix (or Vita-Mixer, as it was known then).

Last year, I had promised to make mushroom soup for a Thanksgiving gathering at our friends Rick and Lori’s house, and I knew that some of the attendees had dairy issues. Accordingly, I mused aloud on my FB page as to whether I should substitute almond milk, or cashew cream, or some sort of ersatz non-dairy sour cream substitute as a thickening agent, to give it a “creaminess” without using cream. My pal (and head chef at Papilles Bistro in Hollywood) Tim Carey commented, “I never use cream. Get yourself a VitaMix.” Okay. When you get advice from the guy who has made the best cauliflower soup you’ve ever had in your life, it makes sense to listen.

VitaMix products are expensive. No, really. They are. Very. Expensive. Then again, so are Maybachs, and for much the same reason. I’m pretty sure I could throw a handful of gravel in my Vita-Mixer and come out with a lovely powder, suitable for sprinkling over a fruit cocktail that found itself light in mineral content. The one that I bought — a Vita-Mixer 4000, used, for $200 — had been in service for over a decade and a half, and the guy who sold it did so only because he had been given a new one as a present. It’s a champ, the very one pictured at the top of this post. Easy to clean, easy to use (though I have twice made a pretty comical mess of the kitchen by failing to secure the so-called “Action Dome”). The original cookbook, which came as part of the purchase, claims that one can actually use the device to cook soup, due to the friction of its rotors against the canister’s contents. That may be so, but the idea of having to listen to this device at full throttle for half an hour is about as appealing as being subjected to an extra-innings Justin Bieber concert.

100_3521

I made a mushroom stock from water and leeks and carrots and parsley and garlic and dried and fresh mushrooms (dried oyster and black trumpet mushrooms, fresh Eryngii, Maitake, and Bunapi mushrooms), then I sautéed a bunch of fresh mushrooms (I think there were seven different varieties of fresh mushrooms in the soup) and some spices, combined the whole lot (mushrooms, homemade mushroom stock, a bit of olive oil, a little fresh rosemary and oregano, and some salt and pepper) in the Vita-Mixer and puréed like a crazy man.

Sautéed and puréed fresh mushrooms

Sautéed and puréed fresh mushrooms

[Incidentally, there are consequences to puréeing hot soup in a food processor whose lid has been too securely clamped; the steam forces the liquid out of the container at high pressure in directions hitherto unimagined at a velocity just barely less energetic than an Olympic gymnast’s free-form floor event. Live and learn.]

543101_4367384215490_1311006759_n

The resulting soup — at least the part of it that I didn’t have to wipe off the cabinets, counters, and floor — was magnificent; creamy, hearty, aromatic. And I owe it all to the wonders of what might be the single most essential countertop kitchen device other than the toaster — the VitaMix[er].