Instant Pot® Vegan Risotto with Mushrooms, Preserved Lemons, and Basil

1

Canadian man makes Italian food.

As the news swirls with epic chills in the Midwest due to a polar vortex that has been altered by climate change, and when rain threatens my California home, it seems like the rib-sticking comfort of risotto is a reasonable response. Unlike my previous recipe for Saffron Risotto with Peas and Langoustine, this version was concocted in a cool bit of technology that had barely penetrated the public consciousness back then, and it’s vegan (although for my second helping, I grated a bit of Pecorino-Romano on top, and found it excellent).

Full disclosure: Although the idea for combining mushrooms and preserved lemons in a risotto originated with a yearning created in my tastebuds, several blog posts guided my thinking as I developed the recipe. You can find them at the Simple Vegan Blog, Vegan Heaven, Vegan Richa, Vegan Huggs, Chew Out Loud, and the ubiquitous Epicurious.

As is often the case, the recipe was developed around existing ingredients; I had some fresh basil in the fridge, it seemed like it would fit in with the other ingredients, and KAPOW, in it went. [One of my #squadgoals for 2019 is to undertake fewer unintentional fridge-based science experiments, a/k/a using ingredients before they stink up the joint.] Same deal with the dried mushrooms; they had been intended for a soup I was going to make for a friend who I later found out doesn’t like mushrooms.

The dried mushrooms I used were porcini (Boletus edulis), and an interesting variety known variously as slippery jack, pink boletus, and sticky bun. Although the package referred to them as Boletus luteus, which is their original 1753-era moniker gifted by the legendary botanist, physician, zoologist, and taxonomist Carl Linnaeus, they are now known to be of a different genus and are more properly called Suillus luteus. You are of course welcome to use fresh mushrooms in addition to or instead of the dried.

Two other ingredients might be slightly unfamiliar to those with a limited pantry. Nutritional yeast is sold as flakes, granules, or powder, and is often employed in vegan dishes to add a cheesy or nutty flavour. You’ll find it in my recipe for Vegan Potatoes au Gratin, in fact. If your local supermercado carries it, you’ll likely find it next to the spices or in the health food/gluten-free/dairy-free ghetto. If not, well, your local GNC or Amazon.

The other possibly unfamiliar ingredient is preserved lemons. Common in South Asian and North African cuisine, preserved lemon is basically a brined or pickled lemon, generally salted heavily and marinated/pickled/brined for a month or so in salt and either lemon juice or water, if liquid is employed. Sometimes spices are added to the mix, but not generally. If you have neither the time, patience, or lemons for this process, they can be found in jars at many Indian, Middle Eastern, or North African markets, should you have such in your area. And yeah, Amazon. But seriously, they are super easy to make and they last a long time, so even if you have to buy a jar to get started, you should make your own, too. Surprisingly, the part you mainly want to use is the peel, not the flesh. Weird, huh?

The Instant Pot® doesn’t let you off the hook entirely when it comes to stirring stirring stirring your risotto; it bypasses only about 85-ish percent, which is not insubstantial. And while this method in all honesty may not yield that Michelin-star-worthy risotto of your Tuscan dreams, it gets close enough that I’ll take it on a weekday when I don’t have the Zen-like attitude or schedule that the former requires.

INGREDIENTS
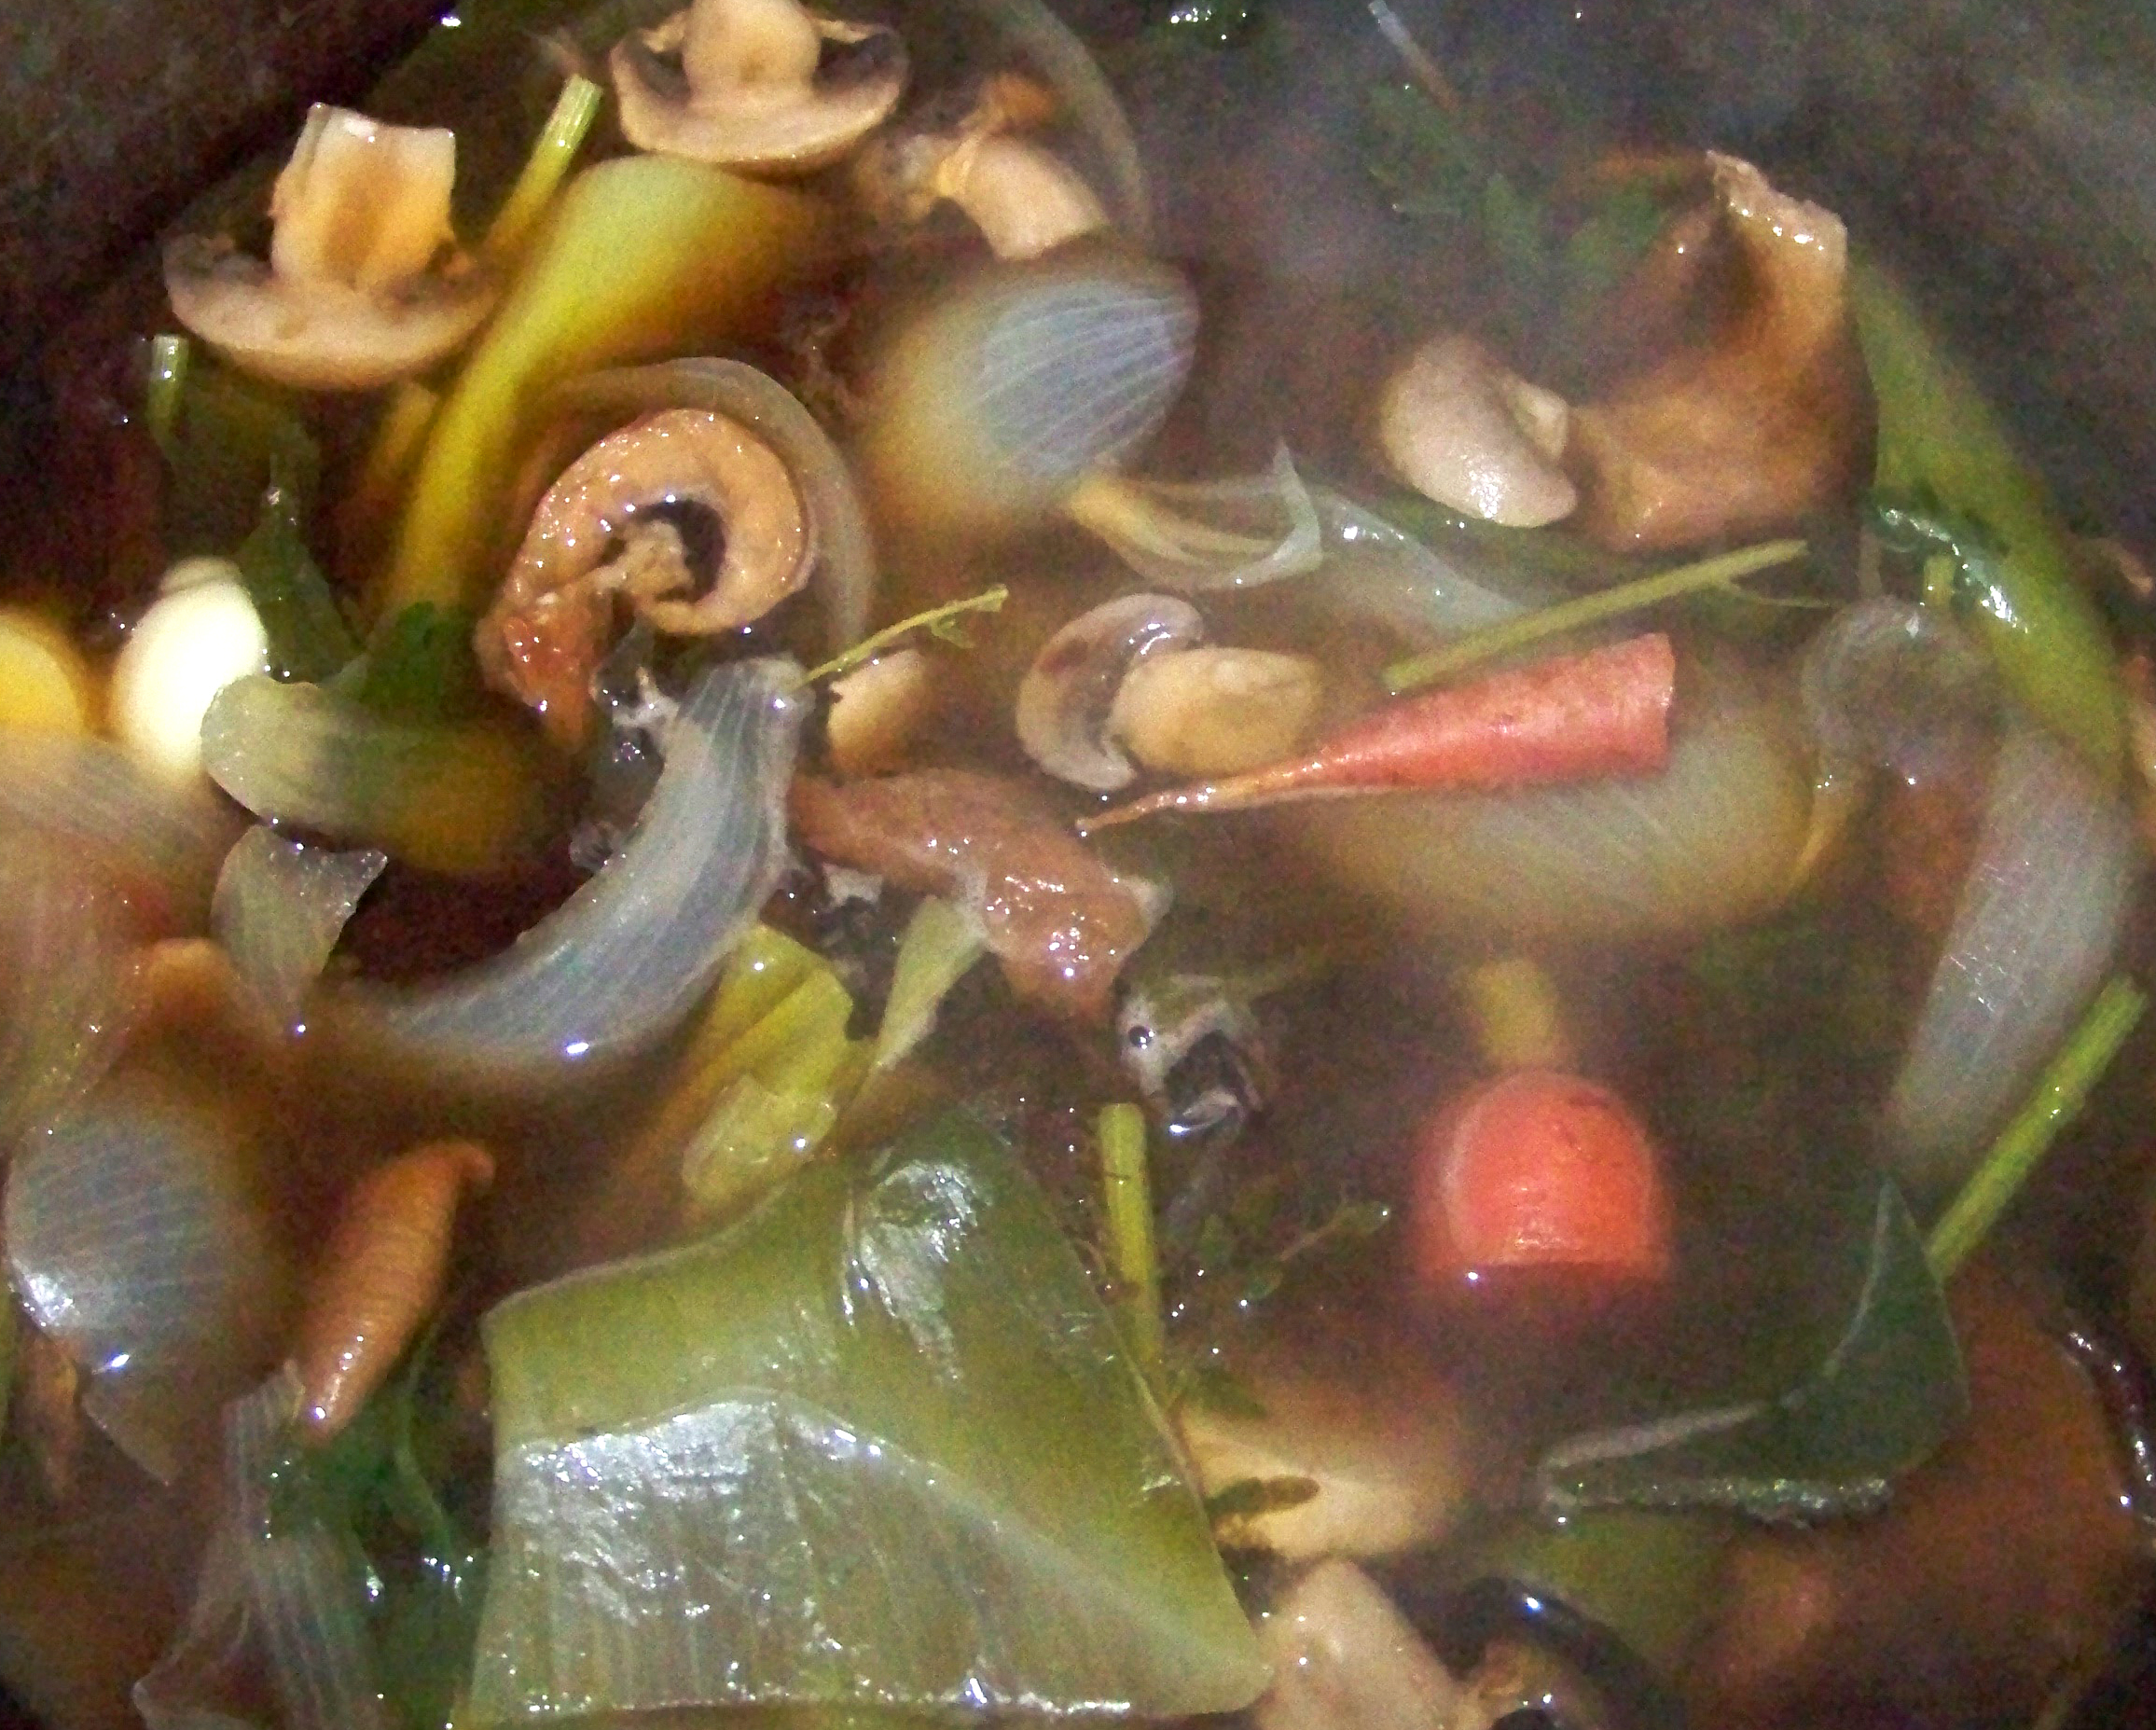
100 g / 3.5 oz dried mushrooms (to be rehydrated) (or 16 oz. / .5 kg fresh mushrooms, preferably crimini)
2 tbsp. / 30 ml extra virgin olive oil (or other preferred oil)
1 medium onion, diced
3 cloves garlic, minced
3 cups / 600 g uncooked Arborio rice
1/3 cup / 75 g preserved lemon, minced
8 cups / 2 liters Aneto vegetable broth, or other low sodium veggie broth
1 loosely packed cup (1.5 oz. / 45 g) fresh basil leaves, finely chopped
1/4 cup / 10 g nutritional yeast
1/2 teaspoon / 1 g white pepper
salt to taste

“Mushrooms and lemons,” ring the bells of St. Clements.

DIRECTIONS
Rinse dried mushrooms thoroughly to cleanse them of grit, then drain. Then cover them in a liter (or quart / 4 cups) of warm veg broth. I used the stupidly expensive and stupidly great Aneto vegetable broth, available at a case discount at Amazon. If you have your own veggie stock, great. Otherwise I would recommend a mix of water and one of Better Than Bouillon‘s stock bases, such as the No Chicken Base. The mushrooms should hydrate in about 1/2 hour. Remove them from the liquid, then strain the liquid to remove any remaining possible grit and reserve the liquid. [The mushrooms soak up about 100-150 ml of the original liquid, which you can replace with more stock, water, or dry white wine.]

Dice onion, mince garlic, mince preserved lemons.

You can chop the mushrooms if you want; I didn’t.

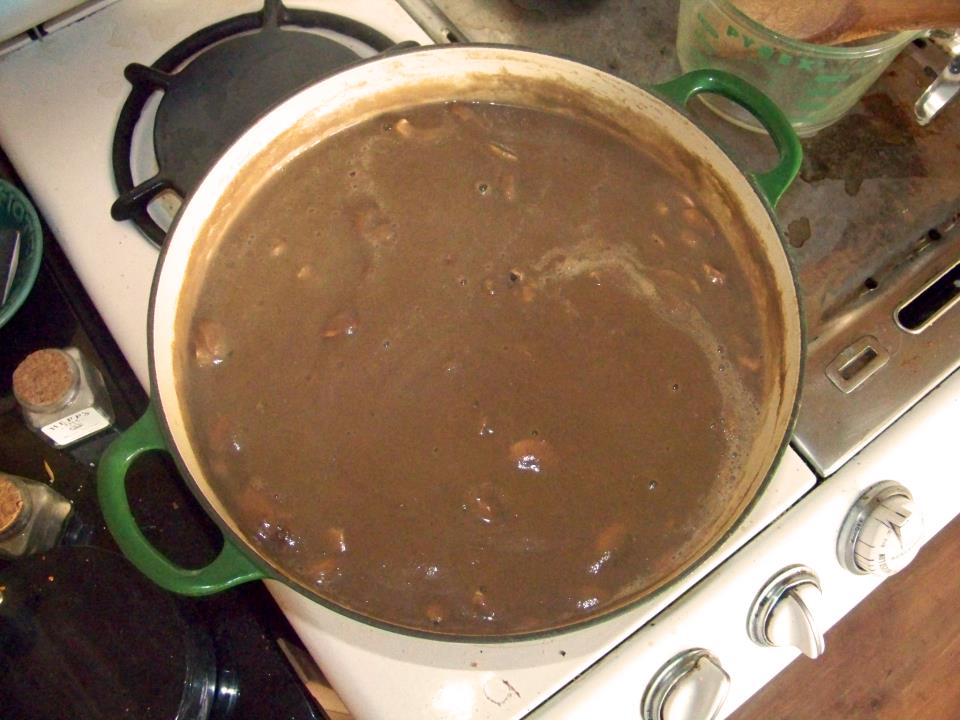
Set Instant Pot® to “Sauté” and add olive oil to the stainless steel inner container. Add onion and sauté for about 5 minutes, until soft without colouring. Add the garlic (and fresh mushrooms, if you are using them) and sauté for another two minutes or so, stirring regularly. Don’t worry if there’s some browning on the bottom of the stainless steel container. Add minced preserved lemons and sauté for another minute or so. Add rice, and stir, to coat all the rice with a little oil. [Add another few ml or a tbsp. of oil if you feel like you need to.] Deglaze the bottom of the container with a little of the reserved mushroom soaking liquid. Add the rest of the liquid and the mushrooms, close the lid, then set Instant Pot® to high pressure (I used the “Bean/Chili” setting) for six minutes, making sure to set the vent on the lid to “Sealing.”

Chop the basil and set aside.

How much basil? This much basil.

When the timer goes off, carefully turn the vent from “Sealing” to “Venting.” [You may want to do this wearing oven mittens; be mindful to avoid the rapid jet of steam that will be emitted.] Turn power to “Off.” When the steam has vented, carefully open lid and set aside. The risotto will look a little soupy at this point, but it will thicken as you stir in the remaining ingredients. Stir in the chopped basil, nutritional yeast, and white pepper a bit at a time, making sure they are well distributed, until remaining liquid is absorbed. Add salt (if necessary), ladle into bowls, and serve.

Just like mamma mia didn’t used to make.

More than Bacon, Egg, & Cheese : Coconut Curry Soba Noodle Egg Bites [Instant Pot® recipe]

2

Doesn’t take much to send me down the rabbit hole.

I’ve been goofing around with the Starbucks®-style egg bites for a bit now (as you can see here and here), and I’ve had some fun exploring sort of vaguely North American/Mediterranean variations on the theme commercially available at everyone’s favourite coffee charrers.

But why not move away from the tried-and-true cheese-and-egg model? How about something vaguely Caribbean? Or Eastern European? Or South Asian? The worst that could happen is the wasteful expenditure of some time, a few eggs, and my interest in “improving” on the already terrific.

Hard to get much more authentic than a coconut curry sauce marked “Product of Canada.”

I’d like to say I made my own coconut curry sauce for this recipe, but I’d be lying. It was totally an impulse thing, given that the local mercado had several bottles on markdown to $1.49 USD. [The total outlay for this recipe came to less than $14.00 USD, since both the sauce and the mushrooms were on special. I paid extra — like 25 cents per egg extra — for humanely-farmed eggs, but I think it’s worth it. For the first seven bites, it costs out at $4.00 per two-egg-bite serving, a fairly modest savings from the commercial version, especially when one adds in one’s time. But I still have sauce, mushrooms, eggs, herbs, and noodles left over for another batch and change, so the cost per serving going forward plummets way further, to $2.00; if I get some more coconut curry sauce, it goes even lower. Not too shabby.]

Soba, awaiting the warm embrace of sauce, eggs, herbs, and fungus.

I’m pretty sure you don’t just happen to have 5 ounces (or 150 g) of cooked soba noodles lying about, so allow me to offer you an option for the rest of the soba noodles you’re likely to cook in order to make this recipe. [This No Spoon Necessary blog’s recipe was the inspiration for last night’s dinner, but since the bride and I are ovo-lacto vegetarians until Lent’s end, I had to mess with it a bit. That’s another post for another day.] Also, this version is dairy-free, unlike most other egg bite recipes.


INGREDIENTS

4 eggs
5 oz. / 150 g cooked soba noodles (I flavoured the noodle cooking water with fresh ginger, lemongrass, makrut lime leaves, and tamari sauce)
10 tbsp. / 150 ml coconut curry sauce
4-5 small mushrooms, chopped
3 tbsp. / 18 g chopped green onions (2 or 3 shallots, just to make it easy)
3 tbsp. / 9 g chopped cilantro
2 scant pinches salt
olive oil or, even better, coconut oil to coat the molds
2 cups / ½ liter tap water for Instant Pot®
aluminum foil

Fungus and greens sweating it out.

DIRECTIONS
If your leftover soba noodles are in the fridge, put the ones you’re using for the recipe in a bowl with 4 tbsp. / 60 ml of the coconut curry sauce and let them sit overnight, or at least for a couple of hours; they’ll soak up the flavour. If you’re making the noodles expressly for this recipe, take the still-warm drained noodles and pop them in the bowl with the curry sauce and let them sit for as long as you can; overnight is best. In fact, I made both the soba noodles and the mushroom/cilantro/scallion combo the night before, because the timing worked out for me.

Oil egg bite tray, distribute soba noodles evenly into each cup and set aside. Chop mushrooms, green onion, and cilantro, place in a small frying pan with 1 tsp. / 5 ml oil (coconut, olive, or neutral), 2 tbsp. / 30 ml of the coconut curry sauce and the first pinch of salt; cook until soft and mushrooms have given up their liquor. Set aside to cool. [You can do this the night before if you want, and allow them to soak up the curry sauce flavour in the fridge.] In a medium size bowl, whisk the eggs, the remaining 4 tbsp. / 60 ml curry sauce, and second pinch of salt together until smooth. Fold in the cilantro, green onions, and mushrooms. Spoon mixture evenly into oiled cups in the egg tray. Add the water to the Instant Pot® container. Cover the egg tray loosely with aluminum foil, place it on the Instant Pot® steaming trivet, and lower it into the Instant Pot®. Set to “Steam” for 8 minutes at high pressure, making sure that the vent is set to “Sealing” rather than “Venting.” When timer goes off, wait four or five minutes (or more, if you desire), and flip vent from “Sealing” to “Venting.” Remove egg bites and allow them to cool for a few minutes before serving, or store in refrigerator up to five days. Reheat one or two at a time in the microwave for 30-40 seconds on “High” and serve.

Ribbons of soba in egg bites that bear a disturbing similarity to what are euphemistically known as “bull fries.”

Los cojones del toro. There’s a little something you can’t unsee.

Tourtière Végétalienne [Vegan Vegetable Pie]

0

Chef Marie (l.) and cousin Sheryl (r.) performing the Ritual Admiration of the Tourtière ceremony last December.

My great-great-great-great-great grandfather Pierre would disown me.

The very idea of making a vegetable tourtière would be as alien and outlandish to him as, um, reading Gwyneth Paltrow’s Twitter feed. As every Canadian knows, the only way to make this traditional Québécois holiday dish is with pork. Or a blend of pork and another meat. Or wild game. Or maybe the occasional bird. Spice, too, is highly variable from region to region. In fact, Susan Semenak of the Montreal Gazette suggests that each particular recipe may be a “tell” as to one’s genealogy. As you might have intuited, it’s quite the subject of debate, and if you thought Canadians are unfailingly polite, donnybrooks over the dish’s “authenticity” will disabuse you of that notion for good. [Although, to be fair, the CBC Radio host in the previous link responded individually — and no doubt courteously — to all the hate mail she got over a network story on the subject.]

I had a delicious tourtière in Vancouver this past holiday season (see picture at top), but for Lent this year, we’re all vegetarian all the time, so salty tasty pig parts are right out. In my scent memory, tourtière was always more redolent of warm winter spices (cloves, cinnamon, nutmeg) than pork, though, so I figured if I got the seasoning right and the filling didn’t clash, I could pull a decent vegan version together. Since I’ve always found a grilled portabello cap an acceptable substitute for a burger, I started with mushrooms. Potatoes and onions could make the leap from the trad version to this one without effort, but it still seemed to be missing something. I knew that certain ersatz meat-like products are made with lentils, and I had the dregs of a box of lentilles du Puy in the pantry, so in they went. If nothing else, at least they were French. Plus, I love their peppery bite.

[Sidebar: Le Puy lentils ain’t your standard ranch stash legumes. Known as “the poor man’s caviar” and “the pearls of central France,” the lentilles vertes du Puy are sufficiently distinctive to have been awarded their own AOC, much like Champagne and Roquefort cheese. So please don’t just wander down to your local south Asian market and load up on urad dal, good though it may be. Not for this dish.]

I’m not going to lie to you: this is not the sort of recipe of which you can say, “I just tossed everything in the microvection pot, and twelve-point-four minutes later, my family and I were discussing Corsi stats for the Vegas Golden Knights while shoveling forkfuls of a storied Québécois holiday dish into our cavernous pieholes.” On the other hand, none of the steps require a whole lot of sophistication or attention, so it’s pretty easy to pull this together while you are assembling your personal Death Star, extracting ink from a squid, or knitting handcuffs for children.

Tourtière in situ, avec des feuilles d’érable pour l’authenticité.

Tourtière Végétalienne
(serves 8-12)

INGREDIENTS

Tourtière Spice Blend
2 teaspoons / 12 g salt
2 teaspoons / 1 g Herbes de Provence
1 teaspoon / 1½ g thyme
½ teaspoon / 1 g cinnamon
½ teaspoon / 1 g ground ginger
½ teaspoon / 1/3 g marjoram
½ teaspoon nutmeg / 1 g (fresh ground if possible)
½ teaspoon / 1/3 g sage
½ teaspoon / 1/3 g savory
¼ teaspoon / ½ g allspice
¼ teaspoon / ½ g coriander
¼ teaspoon / 1/5 g dry mustard
⅛ teaspoon / ¼ g ground cloves
dash white pepper

Tourtière Filling
2 lb. / 1 kg potatoes, peeled, cooked, and mashed
1 lb. / 500 g crimini mushrooms
75 g dried porcini and Chilean Bolete mushroom mix (about 2 cups rehydrated, or just add another pound of fresh mushrooms)
1 cup / 200 g Le Puy French lentils, cooked (this is a type, not a brand name)
1 large onion, diced
2 ribs celery, minced
4 cloves garlic, minced
2 tbsp. / 30 ml olive oil

Tourtière Crust
12 oz. / 340 g (about 2¼ – 2½ cups) all purpose flour
½ teaspoon / 3 g salt
1 cup / 2 sticks / 225 g Earth Balance Vegan Buttery Sticks (or some other vegan shortening product)
8-12 tbsp. / 120-175 ml ice water (REALLY COLD!)
1 – 2 teaspoons / 5-10 ml vinegar

DIRECTIONS

For the Tourtière Filling:

You might want to read the directions all the way through once before leaping in; I tried to arrange several discrete steps to minimize waste of time and resources (like hot water). But if you’re doing other things in the meantime, feel free to rearrange the process to suit your schedule.

Assemble the spice blend, stir with a fork to mix, and set aside.

Rehydrate the dried mushrooms in warm water; this will take about half an hour or a bit more, depending on the mushrooms and their thickness. When they are plump, remove them from the water (reserving the water in the process) and rinse the grit off in a colander. Strain the reserved mushroom liquid through a fine sieve and set aside. [It can be used for a sauce or in stock later. It will keep in the fridge for a week, or it can be frozen for future use.] Chop the washed mushrooms and set aside in a bowl. Of course, if you are using all fresh mushrooms, you can skip this step. Wash the fresh mushrooms, chop them roughly, and set aside in a bowl.

Peel potatoes (this can be done while the mushrooms are rehydrating) and cut into quarters. Cover with about 1 – 2 inches (2½ – 5 cm) of water and boil gently in saucepan for between 15-25 minutes, until a knife slides in without resistance. Remove potatoes with slotted spoon and transfer to bowl. Mash potatoes with a pinch of salt and pepper, but no liquid (although if they are too much of a challenge, you could add 1/4 cup or 60 ml of the boiling water and give them a little bit of help).

While potatoes are boiling, rinse lentils and remove debris, if any. After potatoes have been removed from the saucepan, you can cook the lentils in the already-warm potato water, boiling gently for 20 minutes. When they are done, drain them, discarding the potato water, and set aside.

Dice onion, and add it along with the olive oil to a large pan (big enough to hold all the ingredients, which it eventually will). Brown onion, stirring occasionally, about 25 minutes or so.

While onions are browning, mince celery and garlic, setting them aside in separate bowls.

After onions have browned, increase the heat under the pan, add minced celery, and sweat it for a couple of minutes, stirring occasionally. Then stir in lentils, minced garlic and spice mix, and cook for about 2-3 more minutes. Reduce heat and fold in mushrooms; simmer, stirring occasionally, until mushrooms have softened and released their liquor, about 15 minutes. If mixture seems too dry at any point along the way, add between 2 tablespoons and 1/4 cup (30 – 60 ml) of reserved mushroom rehydrating broth. When mushrooms are cooked, fold in mashed potatoes and mix with wooden spoon so that all ingredients are distributed evenly throughout. When it’s all warm (about 5-10 minutes), taste and adjust spices as necessary. [This usually means a bit of salt and pepper, but if your palate is discerning, you may detect that one element or another of your spice blend has disappeared, so you can fix that as well. Be forewarned: cloves, cinnamon, and ginger are very assertive, so add with caution, if at all.]

Remove from heat and allow to cool at least to room temperature before filling pie.

Here’s your shortening.

DIRECTIONS

For the Tourtière Crust:

Freeze shortening overnight. Chop shortening into small chunks. Add, along with salt and flour, to food processor bowl fitted with “S” blade. Pulse until a “gravelly” dough comes together that will adhere to itself if you pinch it in your hand (think wet sand). Notice little clump at left of photo.

Not quite ready, but close.

Begin adding ice water and vinegar solution a tablespoon or two at a time, and pulsing until dough begins to have enough moisture to cohere. There’s not a great way to explain this in print, which is why there are apprentices and grandmothers. Once you feel it, you will understand. In the meantime, check this vid, and you’ll get a sense of the process. [The video version is done with a pastry cutter rather than a food processor, but you’ll see how the chef gets where she needs to go.]

IMPORTANT SIDEBAR: Keep everything as cold as you can! Warm dough is greasy and soggy dough.

Not quite a 50-50 spilt.

Empty dough from processor and mold into a round-ish lump, wrap with cling film, and pop it into the chill chest — you know it as the refrigerator — to rest for AT LEAST an hour, though overnight is even better. When dough has rested, bring it out onto your rolling surface (I used a big cutting board with a floured silicone mat on top) and cut it in half-ish (the bottom crust needs to be bigger than the top).

In the pan, ready to be filled.

Roll out the dough from the center outwards until you have a sufficiently large crust for the bottom, two to three inches (5 – 7.5 cm) bigger than the pan. Don’t worry about overhang; that will be incorporated later. Once bottom crust is set in pan, fill with mushroom/lentil/potato mix, making sure to distribute it evenly.

Man, I’m stuffed.

Roll out top crust and place on top. This video shows not only shows about how to crimp the dough together, it’s a useful instruction tool on how to make pie dough period (even if his version is not vegan). You’ll need to vent your tourtière just like any pie, to allow steam to escape. You may choose to cut your vents in the shape of maple leaves, or you can just poke the crust a few times with a knife or fork. Have a little fun with it; after all, you’re making pie for dinner. How cool is that?

Vented and crimped.

Bake the filled tourtière for approximately 50 minutes at 175°C / 350°F. Serve warm, or allow to cool to room temp and serve then. Mushroom gravy, a wine reduction sauce, or a vegan mustard “cream” sauce are delightful accompaniments, but they’re going to have to wait for another post, I’m afraid.

Praying for Grain: Vegan Fried Rice, Mushroom, and Super Greens Bowl

0

Asked the bride last night if she had any ideas for tonight’s dinner, and she responded with, “I pinned some grain bowls on my Pinterest page.” Some people find Pinterest really useful and convenient. I am not one of those. So after I looked through all 266 pins in the “No Animals Were Harmed” folder, I wound up (as I often do) perusing Food & Wine’s website. On it, I found this recipe, for Kale-and-Shiitake Fried Rice. It was pretty close to where I wanted to go, but it had eggs, and I was in a vegan mood, so I made a few simple mods for tonight’s meal.

This is super easy to whip together if you already have some cooked rice lying around, so I made a bunch in the Instant Pot last night before going to bed. Obvs, you can use any type of rice, but I find that brown Basmati rice is a good middle path between an insipid white and a cloying brown. The author of the Food & Wine recipe (David Lebovitz) recommended day-old rice, which he says works better to absorb the flavourings. Makes sense, since it will dry out a bit in the fridge overnight. As far as the greens go, I used a mix from the local market, but you could easily add or substitute arugula, collard greens, turnip greens, watercress, or even the leafy part (not the stem) of bok choy. Mustard greens, on the other hand, might overpower the dish, so have a care if you are thinking of adding them.

[NOTE: I love my Instant Pot; I made a whole slew of rice all at once with nary a care. Typically, the recipe for rice in the Instant Pot calls for a 1-to-1 ratio between liquid and dried rice; for brown rice, however, I’ve found that a 1.25-to-1 ratio of liquid to rice works better. Also, the “Rice” button on the front of the cooker is calibrated for white rice. If you are making brown rice, you’ll want to cook it at high pressure for 22-24 minutes, then let the cooker depressurize naturally, which takes about 10 minutes.]

INGREDIENTS

1/4 cup / 60ml olive oil
One 1-inch / 2.5cm chunk of fresh ginger, peeled and grated
2 oz. / 57g sliced or slivered almonds
6 scallions, thinly sliced
12 oz. / 350g mushrooms, thinly sliced
5 oz. / 141g coarsely chopped “super greens” (kale, chard, mizuna, and baby spinach or whatever greens you prefer)
4 cups day-old cooked brown Basmati (or other) rice
3 tablespoons / 45ml lemon juice (juice of one medium lemon) or equivalent rice wine vinegar
Sea salt

DIRECTIONS

In a wok or large skillet, heat the oil. Add the ginger, almonds, scallions, and a pinch of salt. Cook over moderately high heat, stirring constantly, until the ginger and scallions are tender, about 2 minutes. Add the sliced mushrooms and a generous pinch of salt and cook, stirring occasionally until tender, about 5 minutes. Add the greens, season with salt and stir-fry until wilted, 2 to 3 minutes. Add the cooked rice and stir-fry until heated through, about 3-5 minutes. Serve immediately.
 Serves 2 as a main course (see bowl in picture), or 4-6 as a starter or side.

In Praise of a Very Fancy Blender

3

100_3529a

First off, let me say from the outset that I’m not a “juice guy.” Sure, I’ve seen the infomercials and heard the testimonials and been subject to in-store demos, just like the rest of us. And I love juice; very few liquids on Earth bring me greater pleasure than a fresh-squeezed glass of blood orange juice. But I’m not persuaded that juice can rightly claim the curative powers that its disciples ascribe to it. So it wasn’t for that reason that I found myself on Craigslist, obsessing over finding my first VitaMix (or Vita-Mixer, as it was known then).

Last year, I had promised to make mushroom soup for a Thanksgiving gathering at our friends Rick and Lori’s house, and I knew that some of the attendees had dairy issues. Accordingly, I mused aloud on my FB page as to whether I should substitute almond milk, or cashew cream, or some sort of ersatz non-dairy sour cream substitute as a thickening agent, to give it a “creaminess” without using cream. My pal (and head chef at Papilles Bistro in Hollywood) Tim Carey commented, “I never use cream. Get yourself a VitaMix.” Okay. When you get advice from the guy who has made the best cauliflower soup you’ve ever had in your life, it makes sense to listen.

VitaMix products are expensive. No, really. They are. Very. Expensive. Then again, so are Maybachs, and for much the same reason. I’m pretty sure I could throw a handful of gravel in my Vita-Mixer and come out with a lovely powder, suitable for sprinkling over a fruit cocktail that found itself light in mineral content. The one that I bought — a Vita-Mixer 4000, used, for $200 — had been in service for over a decade and a half, and the guy who sold it did so only because he had been given a new one as a present. It’s a champ, the very one pictured at the top of this post. Easy to clean, easy to use (though I have twice made a pretty comical mess of the kitchen by failing to secure the so-called “Action Dome”). The original cookbook, which came as part of the purchase, claims that one can actually use the device to cook soup, due to the friction of its rotors against the canister’s contents. That may be so, but the idea of having to listen to this device at full throttle for half an hour is about as appealing as being subjected to an extra-innings Justin Bieber concert.

100_3521

I made a mushroom stock from water and leeks and carrots and parsley and garlic and dried and fresh mushrooms (dried oyster and black trumpet mushrooms, fresh Eryngii, Maitake, and Bunapi mushrooms), then I sautéed a bunch of fresh mushrooms (I think there were seven different varieties of fresh mushrooms in the soup) and some spices, combined the whole lot (mushrooms, homemade mushroom stock, a bit of olive oil, a little fresh rosemary and oregano, and some salt and pepper) in the Vita-Mixer and puréed like a crazy man.

Sautéed and puréed fresh mushrooms

Sautéed and puréed fresh mushrooms

[Incidentally, there are consequences to puréeing hot soup in a food processor whose lid has been too securely clamped; the steam forces the liquid out of the container at high pressure in directions hitherto unimagined at a velocity just barely less energetic than an Olympic gymnast’s free-form floor event. Live and learn.]

543101_4367384215490_1311006759_n

The resulting soup — at least the part of it that I didn’t have to wipe off the cabinets, counters, and floor — was magnificent; creamy, hearty, aromatic. And I owe it all to the wonders of what might be the single most essential countertop kitchen device other than the toaster — the VitaMix[er].