Soupe de la Semaine: Vegan Hot and Sour Soup

0
M-m-m-m-m m-m-m-m-m good.

M-m-m-m-m m-m-m-m-m good.

It all started with a bag marked Dried Black Fungus (Whole).

p1050184

Okay, I’m a geek. I admit it. Some people go to the beach, others go to art museums. I go to ethnic and foreign grocery stores. I’m happy to wax poetic about my experience at Carrefour in Galicia, but this one was much closer to home. It’s a market called LAX-C, and while it’s nowhere near LAX (a/k/a Los Angeles International Airport), it (like the airport) encompasses several of Los Angeles’ communities quite vibrantly. While strolling the aisles, I saw this bag of dried black fungus and just had to have it. Somebody out there clearly used this stuff, so it wouldn’t kill me, I figured. Into the shopping cart it went. I could figure out later what it really was and how it might be used.

When I got home, I discovered that it was nothing more exotic than dried wood ear mushrooms. I felt like kind of a naïf, but as luck would have it, I knew exactly how they might be deployed in a recipe.

I’ve been eating hot and sour soup for as long as I’ve been dining at Chinese restaurants, which is more than half a century. And yet, I never tried to make it myself until last night. Idiot me. Wow, this is simple. If you can operate a spoon, a knife, a pot, and a flame, you can do this. And if you have a cold, as I did when I made it, this soup beats the living tar out of chicken soup in terms of restorative powers.

NOTE: It’s easy to convert this soup to the trad non-vegan version, too. First, substitute chicken stock for vegetable stock. Then, add some shredded cooked chicken (or shredded cooked pork) at the same time you add the mushrooms, and right at the very end, beat a couple of eggs in a small bowl, and drizzle them into the soup as you stir it (that keeps them from lumping up).

If you want to keep this gluten-free, use tamari sauce rather than soy, and have a care if you are buying commercial vegetable broth that it doesn’t contain any grains that have gluten. Chances are, if it’s gluten-free, it will say so somewhere on the package.

INGREDIENTS

    2.5 oz. / 70 g package dried Chinese fungi, such as wood ears or cloud ears
    6 oz. / 170 g sliced fresh shiitake mushrooms
    8 oz. / 225 g canned bamboo shoots, sliced
    1-inch piece fresh ginger, peeled and grated
    1 tablespoon / 20 g red chile paste, such as sambal oelek
    1/4 cup / 60 ml soy sauce (or tamari sauce if you want to keep it gluten free)
    1/4 cup / 60 ml rice vinegar
    1 teaspoon / 6 g salt
    1.5 teaspoons / 3 g ground white pepper
    1/2 teaspoon / 2.5 ml sesame oil
    8 cups / 1.89 liters vegetable stock
    8 oz. / 225 g firm tofu, drained and sliced in 1/2-inch cubes
    2 tablespoons / 16 g potato starch mixed with 1/4 cup / 60 ml water (you may also use cornstarch)
    4-6 green onions, chopped, for garnish
Soaking your fungi.

Soaking your fungi.

DIRECTIONS

Place the dried fungus into a bowl and cover with 4 cups / 1 liter boiling water. They should soften in about 20 minutes to half an hour. Squeeze them out into the bowl and place them on a chopping board. Reserve the liquid (it goes in the pot later).

Toss out the nasty tough bits.

Toss out the nasty tough bits.

Slice up the fungus into spoon-size bits. You will find that the “stem” (pictured above) is particularly tough, so cut it out and discard it. It may be white, or it may not, but you will be able to tell with your fingers that it’s not been rehydrated. (It was only the very center of those two mushrooms that I tossed; there was still a fair amount of useable fungus.)

Strain the remaining juice into a heavy soup pot or dutch oven (don’t want any mushroom grit). I had 3 cups / 700 ml mushroom water, so the remaining 5 cups / 1.1 liters of liquid came from vegetable stock, and I put that on a fairly high heat to bring it to a boil. You can add the mushrooms (both kinds) at this time.

Drain the sliced bamboo shoots and slice to matchstick width (I cut mine in thirds lengthwise), and add to broth. Grate the ginger into the pot (a microplane works well for this if you have one), or grate over cutting board with box grater and add to pot.

Add chili paste, soy/tamari sauce, sesame oil, salt, and rice vinegar to soup. Stir. Add white pepper 1/2 tsp. / 1 g at a time, and taste; I like it hot, but you may want to stop at 1 tsp. 2 g if you are not a heat freak. If soup is boiling, back it off to a simmer. At the 15 minute mark of so, add the drained and cubed tofu.

In a separate bowl, whisk 2 tablespoons / 16 g potato starch with 1/4 cup / 60 ml cold water to make a slurry. Transfer slurry to pot, stirring soup with whisk as you do to prevent clumps from forming. Cook a further 10 minutes and allow to thicken. Add chopped green onions and serve. Serves 4-6.

NOTE: The process can be speeded up dramatically if you do your mise en place ahead of time. Basically, you need to have the mushrooms and the bamboo shoots in the hot broth for about 10 minutes to sofeten them up, and you need a further few minutes to allow the potato starch slurry to thicken the soup. If you use a cornstarch slurry to thicken the broth, it needs a little time to cook off the pasty taste. That’s why I like potato starch.

Also, the “hot” is coming from the white pepper and the “sour” is coming from the vinegar, so those are the two variables you’ll want to control most carefully to achieve the balance you want. You may want to add each of those a bit at a time, tasting as you go.

Soupe de la Semaine: Turkish Roasted Red Pepper & Tomato Soup -or- Közlenmiş Kırmızı Biberli ve Domatesli Çorba [Gluten-Free and Vegan]

0

I was tempted to call it the “Istanbowl.” Shame on me.

Yeah, the title is a mouthful. Happily, though, so is the soup.

I didn’t sample this when I visited Istanbul back in the ’80s, but I think I have some general sense of the Turkish flavour palate, and since this dish is reputed to be much like chicken soup is in America (which is to say that there are a quadzillion variations), this should be on pretty safe ground. I consulted with my Turkish pal Nil ex post facto (sending her the picture you see above), and she confirmed that I was in the ball park, and that I had nailed the spelling. I’d hate to give y’all a recipe for Turkish Roasted Red Bat Turd Soup thanks to a typo.

Many recipes call for bulgur wheat as the thickening agent and starchy backbone, but I opted for quinoa, since it’s gluten-free and generally considered safe for celiac patients, depending on whose article you read. If that’s not an issue for you, help yourself to bulgur wheat, rice, or even Israeli couscous (which is actually a pasta) in its stead. The smokiness comes not only from the roasted peppers, but also from the fire-roasted tomatoes and the pimentón de la Vera (or smoked paprika). You may add a pinch of smoked salt to finish before serving if you wish. Lots of bass notes to be had here. You can always add the zest of 1/2 lemon or a teaspoon (5 ml) of vinegar if you feel it needs to be brightened up, but I don’t think you’ll need it, as the acid in the tomatoes should balance it nicely. Some recipes also call for cornstarch as a thickening agent; I would deploy a tablespoon / 10 g of potato starch in a slurry if I thought it needed it. You be the judge.

The biggest downside of this soup is that it requires some time to bring together, unless you happen already to have roasted red peppers (not the marinated kind) and cooked quinoa in your fridge. In that case, it’s a snap. But it will take somewhere between 30-40 minutes-ish to cook the quinoa, and maybe 35 minutes to groom your peppers to soup-readiness. Your patience and dedication will be rewarded!

INGREDIENTS

    3 red bell peppers, halved, de-seeded, and roasted, with skins removed
    3/4 cup / 135 g dry quinoa, cooked (use package instructions) [will yield 2 1/4 cups / 415 g]
    2 tablespoons / 30 ml olive oil
    1 onion, diced
    3-4 garlic cloves, peeled and finely chopped
    2 tablespoons / 5 g sun-dried tomatoes, chopped (or red pepper paste or tomato paste)
    1 teaspoon / 2.5 g smoked paprika (I prefer Spanish pimentón de la Vera, and I used picante/hot rather than dulce/sweet)
    1/2 teaspoon / 1.5 g red pepper flakes, to taste
    1 teaspoon / 2.5 g dried mint (maybe double that if using fresh)
    28 oz. / 793 g can fire-roasted tomatoes (or 10-12 fresh tomatoes, roasted and chopped)
    8 oz. / 227 g tomato sauce
    4 cups / 950 ml vegetable broth
    Salt & coarsely ground black pepper
    OPTIONAL: 1 tablespoon / 10 g potato starch for thickening
    OPTIONAL: Fresh mint for garnish
    OPTIONAL: Sour cream (or vegan alternative) as garnish
Simmerin' away.

Simmerin’ away.

DIRECTIONS

Roast the peppers: Turn on broiler. Spread peppers on an aluminum foil lined cookie sheet, skin side up, in a single layer (you may need to repeat this step to roast all your peppers). Place cookie sheet about 3″ / 8 cm below broiler element. Roast until peppers are blackened across the top, around 10-15 minutes.

Transfer roasted peppers to a medium-sized bowl and cover with plastic wrap, allowing them to steam for 15 minutes minimum. Using your fingers, peel off the charred top layer of skin and discard. Give peeled pepper slices a rough chop, small enough to fit easily on a soup spoon, because they will not be puréed. Return to steaming bowl and reserve, along with any juices they shed, for later.

Cook the quinoa according to instructions on the label. I find that the stove-top method, while longer, produces superior results to the microwave method. YMMV. Set aside cooked quinoa for later use.

Cook the soup: In a 3½ quart or larger Dutch oven or heavy-bottomed pot, warm olive oil and onion on fairly low heat. Sauté, stirring occasionally, until softened and turning translucent, about 5 to 8 minutes. Add the roasted peppers (with any liquid they’ve thrown off), sun-dried tomatoes (or tomato or pepper paste), and garlic; cook a further 3-4 minutes until garlic is slightly less aggressive. Add smoked paprika/pimentón de la Vera, pepper flakes, amd mint; cook for about 30 seconds to release aromas. Add the can of tomatoes, the tomato sauce, vegetable broth, and cooked quinoa. Cook over medium heat for 30-40 minutes, stirring occasionally. After the first 5 minutes or so, add salt and pepper to taste, but not too heavily; you will adjust the seasonings just before serving. Taste periodically along the way (clean spoons each time!). If you think the consistency is too thin, whisk in 1 tablespoon / 10 g of potato starch with a little of the soup broth in a bowl, and add to the pot. Soup should thicken noticeably within five minutes. Taste at 30 minute mark, adjust seasonings (and thickness, if necessary), and allow to thicken if need be. Remove from heat and ladle into bowls. Garnish with mint sprigs and/or sour cream (or vegan alternative) if so desired. Serves 6 to 8 as an opening course, 4 as a main.

Soupe de la Semaine: Roasted Pepper Soup with Cilantro Cream

0

p1050126

My pal Beth, herself no slouch around the kitchen, dropped a UXB (UneXpected Book) into our mailbox earlier this week: Cook’s Illustrated All-Time Best Soups. It boasted a number of recipes that will serve as inspiration during soup season — which is all year, of course, but especially in the winter. I had my eyes set on a celeriac, fennel, and apple chowder for the opening salvo, but the bride had other ideas, and she wins.

Over the course of due diligence (I almost never cook a recipe without scanning the Interwebs to see if someone has concocted a more interesting version), I came across the Cookie + Kate blog, in which she lays out several entertaining reasons for not making this soup. Long story short, it’s not particularly cheap to make (unless you grow your own peppers), and the pepper roasting process is both time-consuming and a wee bit tedious. That said, just like her, I concluded that this soup is so tasty that any quibbles about prep were overcome mere nanoseconds after the intersection of tongue and spoon. [All the original recipes I consulted to arrive at this one called for red bell peppers, but the local supermercado‘s red peppers looked a little sketchy, so I made it with orange ones instead. I presume yellow bell peppers, or a mix of all three, would work equally well.]

For those of you who are interested, the recipe is easily vegan-adaptable (see notes below); while the half and half is a tasty touch, I tasted the puréed soup prior to its addition, and I could easily have stopped there, ingredient-wise. Recipe yields 4-6 large servings.

INGREDIENTS

Cilantro Cream

    3/4 cup / 170g sour cream (or soy yogurt for vegan version)
    2 tablespoons / 30ml half and half (or cashew cream for vegan version)
    2 tablespoons / 5.3g fresh minced cilantro leaves
    zest of 1 lime, plus juice from half of that lime (approximately 2 tablespoons / 30ml)

Soup

    8 red (or orange, or yellow) bell peppers, roasted, skins removed, and chopped
    1 tablespoon / 15ml olive oil (I used basil-infused EVOO) (double if making tortilla strips)
    2 medium garlic cloves, minced
    1 medium red onion, chopped
    1 teaspoon / 2.5g ground cumin
    1 teaspoon / 2.5g smoked paprika (I prefer Spanish pimentón de la Vera, and I used picante/hot rather than dulce/sweet)
    3 tablespoons / 50g tomato paste (or 8 oz. / 227g tomato sauce)
    1 tablespoon / 10g potato starch
    4-6 cups / 950ml-1.4l vegetable broth; start with smaller amount, adjusting for consistency as desired
    2 bay leaves
    1/2 cup /120ml half and half (or 100ml cashew cream + 20ml coconut oil for vegan version)
    2 tablespoons / 30ml dry sherry
    2 tablespoons / 5.3g minced fresh cilantro
    salt and pepper, to taste

Garnish (optional)

    3 corn tortillas, sliced into thin, 2-inch long strips, fried in oil until crispy

INSTRUCTIONS

For the Cilantro Cream:
Whisk all the ingredients together in a small bowl. Cover with plastic and refrigerate until serving.

For the Crispy Tortilla Strips:
Cut tortillas into strips about 2″ (5cm) long and 1/4″ (2/3cm) wide. Warm 1 tablespoon / 15ml olive oil in a large sauté pan over medium heat. Add tortilla strips and salt. Stir to coat the strips with the oil, and fry until both sides are golden and crispy, about 3 to 5 minutes. Transfer to a plate lined with a paper towel to cool. NOTE: If you are making the vegan version, be sure no lard was used in the tortilla manufacture! Corn tortillas are gluten-free, if you are concerned about that.

Peppers pre-peeling.

Peppers pre-peeling.


Post-peeling pepper perfection.

Post-peeling pepper perfection.

For the Soup:
Roast the peppers: Spread peppers on an aluminum foil lined cookie sheet, skin side up, in a single layer (you may need to repeat this step several times to roast all your peppers). Place cookie sheet about 3″ below broiler element. Roast until peppers are blackened across the top, around 10 minutes.

Transfer roasted peppers to a medium-sized bowl and cover with plastic wrap, allowing them to steam for 15 minutes. Using your fingers, peel off the charred top layer of skin and discard. Take peeled pepper slices and give them a rough chop (they will be puréed later, so no need to be fussy about it).

Cook the soup: In a 3½ quart or larger Dutch oven or heavy-bottomed pot, warm olive oil and minced garlic on fairly low heat. Sauté, stirring occasionally, until the garlic gets a little foamy and sticky, about 6-7 minutes. Increase heat to medium, add onions and sauté until softened and turning translucent, about 5 to 8 minutes. Add the cumin and smoked paprika/pimentón de la Vera and cook for about 30 seconds to release aromas. Add the potato starch (or flour) and cook for one minute, stirring constantly. Add the tomato paste (or sauce) and gradually whisk in the stock, stirring to prevent lumps. Add the peeled red/orange/yellow peppers and stir. Bring the soup to a gentle boil, then reduce heat to maintain a simmer and cook for 15 minutes, stirring occasionally.

Once your soup is done cooking, remove it from heat and allow it to cool for 5 minutes.

Blend the soup: Transfer soup to a blender or Vita-Mix (do NOT fill it over halfway, unless you wish to decorate your walls and person with hot soup); drape a kitchen towel over the blender (so the escaping steam doesn’t build up or burn your hands) and process in batches. Transfer puréed soup to another pot and continue until all of the soup is blended. Alternatively, use an immersion blender to blend the soup in the pot. Blend until the mixture is smooth and creamy. If soup is too thick, add vegetable stock to achieve desired consistency.

Transfer soup back to cooking pot and rewarm gently on the stove; add the half & half (or vegan substitute), dry sherry, and chopped cilantro. Divide soup into individual bowls, and drizzle in cilantro cream. Top with crispy tortilla strips (optional) and serve.

Soupe de la Semaine: Pasilla, Potato, & Garlic Soup — Vegan-style

0

p1050061

I’ve got a beef (no pun intended) with the Food Network and the Cooking Channel. Much like MTV, they drifted away from their original vision and began offering a schedule filled with fake drama and connerie that has precious little to do with anything that happens in a kitchen, professional or amateur. People being tasked to make dishes with ingredients like licorice, chicory, hickory, foie gras, and lima beans. The self-appointed Mayor of Flavourtown swanning around the country, sunglasses dangling ridiculously off the back of his bleach-tipped head like an errant swath of toilet paper attached to a shoe. And the content-free talking-head programs where workaday foodstuffs such as pretzels and cupcakes are routinely characterized by the multiple hosts as amazing. Look: if you can be amazed by a pretzel, your kidney is going to rocket out of your dorsal abdomen when you see the northern lights or the Eiffel Tower. Also, any native English speaker who modifies the word “unique” deserves to be banished to an asteroid outside the Van Allen Belt. So I’ve pretty much gone cold turkey (albeit heirloom breed, free-range, and antibiotic-free) on them.

But when one network closes, another one opens. I discovered that one of my local PBS station’s digital sub-channels features programming from a sort of network-within-a-network: Create TV. It’s excellent, and filled with cooking friends both old and new. Julia Child. Andreas Viestad (of New Scandinavian Cooking). Rick Bayless. Steven Raichlen. Hubert Keller. And the timeless Jacques Pépin.

It was Pépin’s show that inspired me to make this soup; his version is potato-free and employs sour cream (I wanted to make mine vegan). I also wanted to tone down the heat a bit, and give it some more body. As it turned out, I had half a dozen Yukon Gold potatoes lying around, and they filled the bill nicely. But to add an extra bass note, I roasted them first. I should also offer up a hat-tip to the Kevin Is Cooking blog, whose Roasted Pasilla Chile and Potato Soup with Shredded Chicken recipe also inspired me.

Before I get into the nuts and bolts, don’t blanch at the concept of the soup using a whole head of garlic. (Don’t skimp, either.) Because the garlic is added initially as whole cloves, it’s not overwhelming (even though it is puréed later). Which reminds me: if you are using pre-minced garlic or garlic paste, dial it back… A LOT.

Ingredients

8 large dried Pasilla chile peppers, rehydrated (Ancho or Guajillo peppers may be substituted if necessary)
8 cups / 1.8 litres vegetable stock or water
6 medium-to-large Yukon Gold potatoes (about 3 lbs. / 1.5 kg)
2 large yellow onions, diced (about 4 cups / 600g)
1 head garlic (approximately 20-25 whole cloves)
2 + 2 tablespoons / 30ml + 30ml oil (I used garlic-infused olive oil)
1 large can (28-ounce / 793g) diced tomatoes — fire-roasted if you can get them
1 tablespoon / 3g dried oregano leaves
Salt and pepper to taste
Chopped fresh cilantro, if desired, for garnish
Vegan sour cream substitute, if desired, for garnish
Fried tortilla strips or crumbled tortilla chips, optional (check to see that they are made without lard if you are cooking for vegans)
1 sunny side up egg per bowl, optional (this invalidates the vegan-ness, so have a care)

Onion family reunion.

Onion family reunion.

Preparation

1. Soak dried Pasilla chile peppers in vegetable broth for approximately two hours. When they are rehydrated, remove them from broth, seed them and chop them roughly. Set aside. Be sure to reserve soaking broth.

2. Preheat oven to 400°F/200°C. Wash and dice potatoes into 1″ / 2.5cm cubes (you may peel them if you prefer, but it is not necessary). Place cubed potatoes into plastic bag with 2 tbsp / 30ml oil), and shake to coat. Dump potatoes out on a cookie tray and spread out into a single layer (you can line the pan with aluminum foil or parchment paper for easier cleanup). Salt lightly. Roast for 45-60 minutes, until nicely browned. [If you wish, you can turn them over midway through the roasting process, but it’s not strictly necessary.]

3. Peel garlic and dice onions. [No need to be too fancy here, since it’s all getting puréed later.] Place in large pot or Dutch oven with the remaining two tablespoons / 30ml of oil, and cook over medium heat until onions are translucent, approximately 5-7 minutes.

4. Strain in the reserved vegetable stock (this will catch any remaining seeds from the Pasilla soaking), and add chiles, potatoes, tomatoes, oregano, plus a little salt and pepper to taste (be frugal; you can always add some more later).

5. Bring soup to a boil, then reduce heat, cover partially, and cook at a simmer for 60 minutes (or longer, if you have the time). Process soup with immersion blender, food processor, or Vita-Mix. [Be very careful when you purée hot soup — leave room for steam to get out (I cover the feed tube loosely with a dish towel), and if using an immersion (stick) blender, be careful when it exits the surface of the soup, so as to avoid coating both chef and walls.] Adjust spices as necessary and serve.

Before the blend.

Before the blend.

Soupe de la Semaine: Sweet & Sour Cabbage Soup — Vegan-style

0

sweet-and-sour-cabbage-soup

As you might have guessed from the headline, I’m going to try to post a soup recipe every week. We’ll see how that goes. But if I am to hold the throne of “Le Roi de Potage,” awarded me in Paris a few years back (another story for another time), it’s time to step up.

They say it never rains in southern California, but that’s not quite true. This evening was one of those rare and welcomed occasions, and soup is the ideal antidote for a dark and stormy night. As I trawled the Internets, looking for something to suit my fancy, I unearthed a couple of Sweet and Sour Cabbage Soup recipes, which I melded to make this one. The first was modified from the NY Times by ofallytasty.com, who adapted it from The National. The second came from cookforyourlife.org, who wisely noted that the pimentón helps to make up for the smokiness that ham would ordinarily bring to this soup in its non-vegan state. Alternatively (or even better, additionally), you could finish it with a tiny pinch of smoked salt (I heartily recommend Hepp’s 7-Fire Smoked Sea Salt — it’s not cheap, but a little goes quite some distance, and it’s sooooo good). Some of the recipes I read called for an immersion blender to purée a portion of the soup, but I found it unnecessary. Dealer’s choice.

Idiot me, I didn’t measure how much the recipe made, but it will easily serve 10-12 as an opener and 6 as a main, especially if augmented with a baguette.

Ingredients

2 tablespoons / 30ml neutral oil
2 large yellow onions, diced
2 teaspoons / 4g caraway seeds
2 bay leaves
1 large can (28-ounce / 793g) diced tomatoes — fire-roasted if you can get them
1 fairly large cabbage, cored and shredded (approximately 2.5 lbs / 1.1 kg)
8 cups / 1.8 liters vegetable stock or water
4 tablespoons / 50g brown sugar
2-3 teaspoons / 4-6g smoked paprika (pimentón de la Vera is preferred if you can get it)
Salt and pepper to taste
3-4 tablespoons (45-60ml) fresh lemon juice or vinegar (apple cider vinegar is what I used, but white wine vinegar would be fine)
Pinch of smoked salt for finishing, optional
Sour cream or vegan sour cream substitute, if desired, for garnish
Baguettes or rolls to serve alongside, optional

Preparation

1. Heat oil in a Dutch oven or other heavy-bottomed pot over medium-high heat. Add onions and cook until translucent, 5-7 minutes. Stir in the caraway seeds and cook for 1 more minute.

2. Add the diced tomatoes (along with their juice), the stock (or water), and the bay leaves. Cook for about 10 minutes or so, to warm the liquid.

3. Add the shredded cabbage, brown sugar, smoked paprika, salt, and pepper. Bring to a boil, then simmer, covered, for at least 1 hour (but two is better, especially if you want your cabbage a little less crunchy).

4. Stir in vinegar or lemon juice right before serving (start with 2 tbsp. stir, and add more to taste), then cook for about 1-2 minutes to allow flavours to blend; serve with a baguette. If desired, sour cream or vegan sour cream substitute may be dolloped on top, and a tiny(!) pinch of smoked salt may be added per portion for finishing.

NOTE: When reheating, add a small amount of your acid (lemon or vinegar) to refresh taste.

We Be Jammin’ (Specifically, Strawberry Balsamic Jam with Black Pepper)

1
Itty bitty jars of sweet and savory goodness.

Itty bitty jars of sweet and savory goodness.

Ah, the joys of ADHD. I had planned on making a strawberry-cherry pie, then strawberry-rhubarb tarts, but when the steam had settled, my two pounds of luscious Driscoll strawberries found their way into a jam. Generally speaking, I’m not a huge fan of strawberry jam, because it tends to be both a little sweet and a little insipid for my taste, but I came across several recipes for a strawberry balsamic jam, and then the vision of serving it with an aged white Canadian Cheddar kicked in — no, wait; goat cheese! or maybe a stinky Roquefort! (see what I mean about the ADHD?) — so I committed to making a small batch.

Six ingredients. Six. No added pectin. Comparatively speaking, a fair amount of work for six four-ounce (118 ml) jars, but highly satisfying, especially when you give them away as gifts to a grateful palate (even if it’s your own).

STRAWBERRY BALSAMIC JAM (makes six 4 oz./118 ml jars)
Ingredients
2 lb./1 kg fresh strawberries
3 tbsp/45 ml lemon juice (fresh-squeezed, if you can get it)
1.5 cups/300 g granulated white sugar
4 tbsp/60 ml balsamic vinegar
1 tsp/5 g sea salt or kosher salt
1/2 tsp/1-2 g freshly ground black pepper

Berries and sugar, macerating nicely.

Berries and sugar, macerating nicely.

Rinse and hull strawberries. Place in a bowl with sugar and let sit for at least 1-2 hours (or overnight, if it’s convenient), mashing the strawberries after about 10-20 minutes.

Berries and sugar, all mashed up.

Berries and sugar, all mashed up.

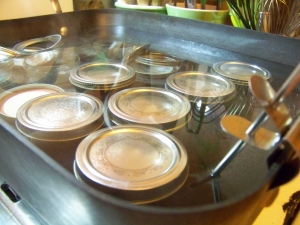
Meanwhile, prepare jars and lids (which is to say, throw them in boiling water for a minimum of 10 minutes). [You have the option of making this a refrigerator jam if you don’t care to do the whole home canning thing; strictly up to you. I chose to preserve the preserve in the traditional manner. Otherwise, be sure to use it up within about 10 days.]

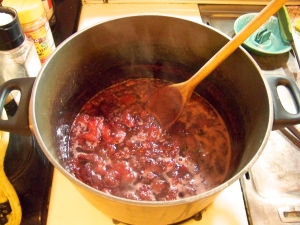
It may not be quick, but it does get thick.

It may not be quick, but it does get thick.

Place the strawberry and sugar slurry in a non-reactive saucepan, add the lemon juice, and bring to a boil on medium-high heat. Reduce heat to medium and continue to cook until jam is at the jell stage, stirring frequently and watching at least semi-observantly. [For me, this was about 45 minutes, but your pan and stove may bring about a different result, timewise; one of the recipes I read said you could get there in 30 minutes.] Add the balsamic vinegar, salt, and black pepper the last five minutes of cooking, stirring continuously. Remove the pan from heat.

Jam and a few spare jars.

Jam and a few spare jars.

Pour jam into hot, prepared jars, leaving 1/4″ headspace. Refrigerate immediately or seal and process jars for 10 minutes in a water bath canner. If processing in water bath, remove and let jars sit for 24 hours, ensuring a good seal. Remove bands and store for up to one year… if you think you can wait that long before finishing it all off.

Boiling, but not mad.

Boiling, but not mad.

[Thanks to my pal Susan Park for the suggestion of adding the salt; it cuts the sweetness nicely, and plays well with both the strawberries and the vinegar. And thanks to my cousin Sheryl for the gorgeous cutting board that served as a tray for the jars.]

Celebrating Celeriac with a Superb Soup [Vegan]

4
Celeriac, before and after a trim.

Celeriac, before and after a trim.

If there is an uglier vegetable on the planet Earth than celeriac (Apium graveolens variety rapaceum), I have yet to find it. Fortunately, much as beauty is only skin deep, in the case of this magnificent and underappreciated vegetable, so is ugly.

While celeriac itself doesn’t grow very deep — maybe six inches or so beneath the surface of your average garden plot — its roots in food history are deep indeed. In Book V of Homer’s Odyssey, it’s described as a component of Calypso’s garden, albeit in the Greek it is referred to as selinon. In one passage, Hermes admires the environs of Calypso’s cave, festooned with grapes, violets, and wild celery before stepping inside to beseech her to let Odysseus go and finish his journey back to Ithaca. But that’s another, much longer, story.

In ancient times, and for much of their early history, both celery and celeriac were regarded more as medicines than as foodstuffs. Pliny the Elder claimed that the so-called helioselinon was “possessed of peculiar virtues against the bites of spiders.” He also suggested that it could be used to revive sick fish. But by the 17th century, it was being cultivated in France, and by the 18th, it was being used in England for soups and broths.

Fast forward to today: soups and broths! For your consideration, here’s a soup that contains not just one, but two of the planet’s least photogenic vegetables (the latter being parsnips), along with a little ginger (no beauty contest winner itself), some onion, tarragon, and lemon thyme.

CELERIAC AND PARSNIP VELOUTÉ WITH GINGER AND LEMON THYME

Ingredients
48 oz./1.42 litres vegetable broth
2 large celeriac roots, peeled and roughly cubed
3 large parsnips, peeled and chopped
1 large onion, roughly chopped
1 tablespoon (or more, to taste) fresh ginger root, finely chopped
2 tsp./1.2g dried tarragon (it’s what I had at the time; fresh is good too, but use less)
4 sprigs fresh lemon thyme
1 carrot, cut into “coins” (optional)

Before you get all huffy, this is not technically a velouté, inasmuch as it is not thickened with a roux and cream, but it resembles one in texture. If you just want to call it soup, you have my blessing.

Cleaning the celeriac is best done with a very sharp knife, and it may be treated the same way you would strip off the rough outer skin of a pineapple; ideally, you’ll get off all the brown bits underneath the skin, but don’t make yourself crazy (or whittle the vegetable down to half its original size) getting there. Chopping the peeled celeriac is a bit of a chore, and may require rocking your knife back and forth a bit to get through the dense root. Alternatively, you can use a cleaver, if you have one. The parsnips should be scraped with a vegetable peeler, much like carrots, then chopped. As for the ginger, I started with a segment that was about the size of my thumb and scraped off the peel with a spoon before mincing it as finely as my admittedly mediocre knife skills would permit.

Once the prep is completed, making the soup is a snap; basically, you just dump all the ingredients into a big pot, bring it to a boil, and back it off to a simmer for about an hour to soften up the veggies and give the flavours a chance to blend. Then remove the thyme sprigs (which will have shed their leaves), and transfer the soup, in batches, to a food processor, blender, or Vita-Mix. [IMPORTANT NOTE: Do NOT clamp down the lid on your food processor/blender in such a way that steam cannot easily escape, or you will run the risk of both scalding yourself and decorating your walls with hot soup. I leave the top plug out of my Vita-Mix’s “Action Dome” and drape a tea towel over the opening to allow steam, but not solids, to egress.] Alternatively, the soup can be processed in situ with an immersion blender. Process until smooth.

Perhaps not the root of all soups, but it is a soup of all -- well, almost all -- roots.

Perhaps not the root of all soups, but it is a soup of all — well, almost all — roots.

You might note that salt is not a component of the ingredients list, and that’s because the vegetable broth I used (I’m ashamed to admit that I didn’t have any vegetable stock of my own lying around) contained 570mg of sodium, presumably in the form of sodium chloride, which was plenty salty for my taste. Your taste (and your broth) may vary.

To finish the soup off, I sliced a small carrot on a hand-held mandoline, arranged the carrot “coins” into a small “flower,” and sprinkled a few leftover thyme leaves on top. I might drizzle a few drops of olive oil on it as well next time, but it’s by no means necessary. Serves 6-8 (easily!) as an opening course.

Calabaza Rellena con Todo lo Bueno — or — Pumpkin Stuffed with Everything Good

1

Four years ago almost to the day, I was listening to National Public Radio (on KPCC in Pasadena, one of the two NPR stations to which I donate). I heard a woman hitherto unknown to me named Dorie Greenspan wax poetic about a French recipe that seemed to be the most delightful non-dessert pumpkin dish imaginable; she simply called it Pumpkin Stuffed with Everything Good. Intrigued by the concept, I purchased her most excellent cookbook (Around My French Table: More Than 300 Recipes from My Home to Yours), and I’ve made it a number of times, with great success. [Her version is simpler than this one, because there’s no pre-cooking involved; you just slice and dice and stuff and cook. Or, as the French, say, “Voila!” But hang with me here, and you’ll see where I was going.]

As I walked into the market this past Thursday, a cart piled high with gorgeous sugar pie pumpkins greeted me, and I was inspired to take a shot at reinventing the dish with a Southwest/Mexican flair. This is a fine way to introduce pumpkin into a Thanksgiving meal in some form other than pie, and it’s a remarkably flexible recipe. In many ways, this “recipe” sort of resembles a road map, with a thousand thousand routes that will all lead you from your point of departure (the kitchen) to your destination (the table).

You’ll want to note that all measures are approximate, because the pumpkin sizes will vary widely, but if you have leftover stuffing, you can always wrap it in tin foil (or, if you’re trying for a little more Southwest authenticity, a banana leaf or two), and cook it alongside the pumpkin. Arranging and wrapping the banana leaves in a way that will keep the liquid from seeping out may be something of a challenge, but it’s manageable.

This version is gluten-free; it can easily be “veganized” by substituting your favourite vegan cheeses, and full-fat coconut milk for the cream (the reason I suggest the full-fat coconut milk as opposed to soy-, rice-, or almond milk is that the coconut milk better replicates the creamy mouthfeel).

CALABAZA RELLENA CON TODO LO BUENO
(PUMPKIN STUFFED WITH EVERYTHING GOOD, SOUTHWEST STYLE)

Ingredients:

1 pumpkin (approximately 3 lbs/1.5 kg)
1 can (15.25 oz/432 g) corn, drained
4-6 slices of stale bread, cubed (I used Whole Foods’ Sun-Dried Tomato and Roasted Garlic Gluten-Free Bread)
12 oz/345 g Monterey Pepper Jack cheese, shredded (you could also use Cheddar or Gouda or Manchego)
3 Hatch chile peppers (or Anaheim chile peppers), seeded and diced (or a 4 oz/113 g can of diced green chiles)
6-8 shallots, chopped
6-8 stems fresh cilantro leaf (also known as coriander leaf or Chinese parsley), chopped
2-3 cloves garlic (to taste), peeled, germ removed and coarsely chopped
1 tsp/1.8 g dried oregano
4-6 sliced of crisp bacon, crumbled
2 links chorizo (about 1/2 lb/0.25 kg)* [see note on chorizo below]
1 plantain, diced (optional)
1 small or 1/2 large brown onion, diced
salt and pepper to taste
1/3 cup/80 ml heavy cream (or half and half, if you prefer)
2 tbsp/12 g Cotija cheese, crumbled or grated, for garnish (optional)
Fresh cilantro leaves, chopped, for garnish (optional)
3-4 banana leaves, optional (available at most Latino grocery stores)

Directions:

Center a rack in the oven and preheat it to 350°F/175°C. Line a baking sheet with aluminum foil, parchment, or a silicone baking mat so that if the pumpkin innards boil over (which they sometimes do, a bit), they don’t soil the inside of your oven.

This pumpkin needs a cleaning out.

This pumpkin needs a cleaning out.

Using a sharp and sturdy knife, carefully cut a cap out of the pumpkin’s top the way you would if making a Jack-o’-lantern. [Ms. Greenspan’s suggestion is to cut at a 45-degree angle. But be careful; the pumpkin rind is tough. I find that a stabbing motion, a la Psycho, is emotionally satisfying, but it’s your call.] The opening should be large enough for you to work inside the pumpkin. Clean the strings and seeds from the cap, and set it aside (we’ll be using it later). Scoop out the loose guts (again, strings and seeds) from the pumpkin’s interior. [The seeds can be cleaned, salted, and roasted later, should you desire, or you can toss them.] Season the inside of the pumpkin with salt and pepper, and place it on the baking sheet.

Chorizo and onions and plantains, oh my!

Chorizo and onions and plantains, oh my!

Heat a frying pan and cook the bacon until crispy, then let it drain on a paper towel. Peel the plantain and dice it into quarter-inch cubes. Remove the chorizo from its casing and put it, the chopped plantain, and the chopped onion into the still-warm frying pan (which should still have bacon grease in it, so no need for oil), being careful not to splatter hot grease. Cook for about 8-10 minutes, breaking up the lumps of chorizo, and stirring occasionally. Remove plantain, onion, and chorizo from pan with a slotted spoon (or drain in colander over a ceramic or Pyrex bowl, as you don’t want that grease going down your sink) and place in a large bowl. Add the bacon, bread, peppers, cheeses, scallions, garlic, cilantro, and oregano, then toss. Season with a bit of freshly-ground black pepper, and pack the pumpkin with the mix, leaving enough room for the cap to fit back on. [We’ll come back to what to do with any extra filling a little later.] Pour the cream into the pumpkin, and use your judgement to decide whether you need to use all of it; it’s for moistening the ingredients, not immersing them.

All stuffed up...

All stuffed up…

...and capped for cooking.

…and capped for cooking.

Replace the cap and bake the pumpkin for about 2 hours — check it after 90 minutes — or until the pumpkin filling is bubbling and its flesh is tender enough to be pierced easily with the tip of a knife. You may want to remove the cap for the last 20-30 minutes of cooking to brown the top and evaporate some of the liquid.

Note the colour change on the pumpkin. Gorgeous.

Note the colour change on the pumpkin. Gorgeous.

IF YOU HAVE LEFTOVER PUMPKIN STUFFING…
You can moisten it with a little cream (not too much!) and wrap it in a banana leaf, seal it in tin foil, or even put it in a small covered casserole dish, and roast it alongside the pumpkin on the baking sheet. It can come out after 60-75 minutes (after all, it wasn’t insulated by all that pumpkin flesh), but even if you forget, it should still be plenty moist. Alternatively (as this recipe yielded just about enough for TWO small pumpkins), you can freeze the remainder, making the next pumpkin-stuffing party all that much quicker.

Serving:

When the pumpkin is ready, allow it to rest on the baking sheet for about 5 minutes or so before trying to move it. Then, carefully transfer it to a platter and bring it to table. Remember, it’s hot, and the cooking will have reduced the pumpkin’s structural integrity, so take your time. It can either be cut into wedges with the filling spooned over, or you can scoop out pumpkin flesh and filling together. Garnish with the chopped cilantro leaves and/or Cotija cheese. Depending on the size of the pumpkin, the size of your guest list, and the size of your appetite, it can serve as either a main course, or the perfect accompaniment to a turkey or some other fowl.

A little Cotija, and now the stuffed pumpkin is ready to return the favour and stuff you.

A little Cotija, and now the stuffed pumpkin is ready to return the favour and stuff you.

*A NOTE ABOUT CHORIZO: Depending on where you live, the sausage known as chorizo may come in one of two forms. Typically, in Southern California (where I live), it comes in a loose, uncooked state, sometimes packed in a typical intestinal sausage casing (or a plastic one), but it is also sometimes sold without a casing, much like any spiced ground meat. In many other places, including my homeland of Canada, chorizo is generally sold fully cured and has a texture not unlike a dry salame. Either one of these will work, but it’s entirely unnecessary to fry the dried version of chorizo; it can merely be diced (about 1/4 inch is good), and added to the pumpkin stuffing mix just like any of the other ingredients. [You should, however, peel off the casing before dicing it.]

Gluten-Free, Dairy-Free Blood Orange Olive Oil Honey Cake

0
At $20 USD, how could I resist?

At $20 USD, how could I resist?

All right. I admit it. I’m a sucker for odd Bundt pans and other cake pans with funny shapes. And when I saw this one on Amazon for twenty bucks, I just had to have it. Had to. It’s like certain women (like the one to whom I’m married) and shoes. The sooner you learn to stop resisting — I’m speaking from personal experience here — the happier your life will be. That said, I’m not interested in becoming the Imelda Marcos of goofy baking tins, so my rule is that if I buy it, I have to use it. After I make 20 cakes in this pan, the price of the bakeware will have added a mere eight bits to the cake’s cost.

As luck would have it, the Internets this evening (24 September in lovely California) yielded a plethora of honey cake recipes, given that sundown marked the beginning of the Jewish holiday Rosh Hashanah, and some version of honey cake is a staple of the holiday in many households. While I myself cannot number myself a member of the tribe, many of my dearest friends are, and their cuisine has been a mitzvah in my life.

The main recipe I improvised from can be found at epicurious.com, though I made a couple of modifications that I believe enhanced it significantly. First, instead of using any old vegetable oil, I used Stonehouse extra-virgin blood orange olive oil. Oranges and honey take to one another like Marilyn Monroe’s arm and an elbow-length satin glove. I wasn’t keen on adding a coffee flavour to the mix, but I needed the additional moisture, so I substituted some French vanilla coconut milk “creamer” instead (think orange + vanilla = creamsicle). And I used some stupidly expensive (and largely unavailable) ingredients, such as Manuka honey that a friend hand-carried over from New Zealand (and which sells in America for about $20 USD for a 12 oz. / 350 ml jar), and Green Spot single pot still Irish whiskey, of which only about 500 cases are made per year, making it the Pappy van Winkle of Irish whiskey. I’m sure some of my friends would happly clout me upside the head with a 4×4 for using such an extraordinary spirit in baking, and they might be right. But the batter was excellent, and it was only two tablespoons / 30 ml of the whiskey.

19 little mini-cakes of goodness.

19 little mini-cakes of goodness.

Gluten-Free, Dairy-Free Blood Orange Olive Oil Honey Cake

Ingredients
• 1 3/4 cups / 225 g. Cup4Cup gluten-free flour (or all-purpose flour, if you’re OK with gluten)
• 1 teaspoon / 2.6 g. ground cinnamon
• 3/4 teaspoon / 4 mg. baking soda
• 3/4 teaspoon / 6 g. salt
• 1/2 teaspoon / 2 g. baking powder
• 1/2 teaspoon / 1 g. ground ginger
• 1/4 teaspoon / .75 g. ground cloves
• 1 cup / 237 ml honey (I used Manuka honey that a friend had brought from New Zealand)
• 2/3 cup / 158 ml blood orange olive oil (available from Stonehouse Olive Oil Company)
• 1/2 cup / 125 ml So Delicious French Vanilla coconut milk “creamer” (or freshly brewed strong coffee, cooled)
• 2 large eggs (I used duck eggs, because I had some)
• 1/4 cup / 60 g. packed brown sugar
• 2 tablespoons / 30 ml whiskey or bourbon (I used Green Spot Irish Whiskey)

Preparation
Put oven rack in middle position and preheat to 350˚F / 175˚C. Spray pan with Baker’s Joy, PAM cooking spray with flour, or oil pan well and dust with flour, knocking out excess.
Whisk together flour, cinnamon, baking soda, salt, baking powder, ginger, and cloves in a small bowl. Whisk together honey, oil, and coconut milk in another bowl until well combined.
Beat together eggs and brown sugar in a large bowl with an electric mixer at high speed 3 minutes. Reduce speed to low, then add honey mixture and whiskey and mix until blended, about 1 minute. Add flour mixture and mix until just combined. Finish mixing batter with a rubber spatula, scraping bottom of bowl.
Pour batter into Nordic Ware honeycomb pan or loaf pan (batter will be thin) and bake 30 minutes. Cover top loosely with foil or parchment and continue to bake until cake begins to pull away from sides of pan and a wooden pick or skewer inserted in center comes out clean, about 30 minutes more. Cool on a rack 1 hour.
Invert rack over pan and invert cake onto rack. Turn cake right side up and cool completely.
Baker’s note: • Cake keeps, wrapped tightly in plastic wrap or in an airtight container, at room temperature 1 week. As if you’ll be able to keep from devouring it for that long. Seriously.

NOTE: When I first posted this, I had some truly wacky cup-to-gram (or -ml) conversions, which I have since revised. [Some of them were computational errors, some mere typos.] I presume my astute audience would have correctly divined that 225 mg. of flour wouldn’t have made a very large cake in the best of scenarios, and given the amounts of the other ingredients, it would have been overwhelmed by, um, just about everything else. Because I am in America, I foolishly tend to continue to use cup/tablespoon/etc. measurements, and while the metric equivalent is printed on my measuring spoons, it’s not printed on my measuring cups. I should probably just measure the stuff on my fabulous kitchen scale, which is bilingual both in metric and the ridiculous and outdated Olde English measurements. Sorry about that.

Vegan Tomato-Dill Soup

0
It's soup!

It’s soup!

Despite the widely-held belief that “it never rains in southern California,” it does, albeit not often enough. Tonight, for instance, was a prime example of the occasionally intemperate nature of SoCal weather; a much-needed downpour, most of which would wind up in storm drains on a quick trip to the Pacific Ocean, rather than into the aquifers and reservoirs that could make the best use of it. Rain, for me, signals an opportunity to make soup, which matches inclement weather the way pearls go with Sophia Loren’s exquisite neck.

In my youth, tomato soup meant a can of Campbell’s, made famous by Andy Warhol. My late and much beloved mom used to prepare it in high style, diluting it with milk rather than water for an instant “cream of tomato” concoction, which remained the gold standard for tomato soup in my estimation until well into my adulthood. One weekend in my thirties, though, on a trip to Lake Tahoe, I tasted freshly prepared tomato soup for the first time, and it was nothing short of revelatory. I’ve been spoiled ever since.

INGREDIENTS:

2 tbsp.olive oil
1 medium onion, finely chopped
2 tbsp. Cup4Cup gluten-free flour
2 cloves garlic, minced
1 can (28 oz.) San Marzano diced tomatoes
4 tbsp. stemmed and chopped fresh dill + 4 fronds for garnish
28 oz. vegetable broth (or chicken broth, if the vegan version isn’t sufficiently compelling)
1 bay leaf
salt
ground black pepper
dollop of cashew cream (for vegan version) or sour cream or yogurt (non-vegan version)

The humble onion.

The humble onion.

DIRECTIONS:
First, heat the olive oil in a soup pot, then add the diced onion at medium heat. Sweat the onion, allowing it to release its liquids, but don’t brown it. Add the Cup4Cup gluten-free flour, and stir, making sure to break up any lumps that might ensue (a whisk is good at doing this). Add the garlic and cook for about two minutes, stirring occasionally. Then add the tomatoes, broth (a simple way to measure this is to fill up the empty tomato can), chopped fresh dill, bay leaf, salt, and pepper.

Adding the flour.

Adding the flour.

Cook over medium low heat, stirring occasionally, for about 30 minutes, but you needn’t be particularly fussy about the timing; it’s just enough to let the flavours blend.

Spices added; stirring ensues.

Spices added; stirring ensues.

From here, you have a couple of options. 1) Allow the soup to cool overnight in the refrigerator, and serve it the following day as a rustic cold soup, garnished with a dill sprig (and remember to remove the bay leaf!).

A quick trip to the Vita-Mix.

A quick trip to the Vita-Mix.

2) Alternatively, you can remove the bay leaf, toss it in the food processor and purée it. Be sure to work in small batches, and DON’T plug the feeding tube unless you’d like your kitchen walls redecorated with a fine spray of tomato soup. [The steam needs somewhere to go; best bet is to drape a kitchen towel LOOSELY over the top of the feeding tube.]

You can add a delightfully silky texture by stirring a dollop of cashew cream into each bowl (or cup). Garnish with a dill sprig, and serve.

Serves 4-6

Saffron Risotto with Peas and Langoustine

2
No, I didn't make my own stock or grate my own cheese this time; please don't judge

No, I didn’t make my own stock or grate my own cheese this time; please don’t judge

In what passes for winter in Southern California, one may on occasion wish for a wintry dish, and nothing fills that bill quite like risotto. There are a million ways to make it, but I had a hankering for some peas, and I had gotten a great deal on some frozen (and pre-cooked) langoustine, so I cogitated on what spice might work well with the two of them; I settled on saffron. I had some that my brother had brought back from Turkey, and a little (slightly fresher, if not as exotic) Spanish saffron from Trader Joe’s, each of which made it into the final mix.

Risotto (or “little rice”) can be traced back to 16th century Milan, though rice’s role in Italian cooking predates that considerably, having likely been introduced by the Arabs who conquered Sicily in the 9th century. By many accounts, saffron arrived in Italy in the 13th century, though it’s not clear who brought it in. Why it took the Italians three centuries to marry saffron and rice in this dish is something of a mystery, but it just bears out the thesis that risotto is the great-granddaddy of the slow cooking movement. Arborio rice, which is central to the dish, is a short-grain rice named after the town of Arborio in the Po Valley, where it is grown. [Some areas in Italy use other varieties of rice; Milanese chefs are said to prefer Carnaroli rice, while Vialone nano is more popular around Venice. Neither are as widely available in America as Arborio, though both can be found at Italian specialty markets or through Amazon.]

Two things about risotto: First, don’t be intimidated. It’s time consuming, no doubt, but once you get your head around that, it’s really not hard to make a very tasty, elegant dish that will wow your friends (or, in this case, endear me to The Bride). Second: There is no speed round when it comes to risotto making. Commit to stirring constantly for the better part of 45 minutes. Think of it as a kitchen meditation, where all the world’s cares drop away and you can focus on the gastronomical, physical, and spiritual union of stock and rice.

INGREDIENTS:

• 1 liter (4 cups) vegetable stock, maybe a bit more
• 75g (5 tbsp) unsalted butter
• 30ml (2 tbsp) olive oil
• 1/2 medium brown onion, finely chopped
• 1/2 celery stick, finely chopped
• 2 garlic cloves, crushed and chopped
• 375g (1 3/4 cups) Arborio rice
• 190g (1 1/4 cups) frozen peas
• 500g (1 lb) frozen cooked and shelled langoustine
• Pinch of saffron threads
• 125g (1 cup) finely grated Parmesan
• Salt & freshly ground black pepper
[Remember, grams are a measure of weight, and cups are a measure of volume, so there’s a little room for movement here. We’re not in a science lab.]

Stock warming nicely

Stock warming nicely

DIRECTIONS:
First, bring the stock just barely to a boil, then set it back to a simmer. If you have not yet defrosted the langoustine (they often to tell you to do it the night before by moving them from the freezer to the fridge, but I rarely plan that far ahead), take them from the freezer, put them in a sealed plastic bag, and set the bag in warm water. Since they will only be at this warming temp for about 40 minutes or so, you don’t need to panic about bacterial bloom or other fishy evils.

Butter and allium products bubbling

Butter and allium products bubbling

Next, heat the butter and oil in a large saucepan over low heat until foaming. Add the onion, celery and garlic, and cook, stirring, for 5 minutes or until onion softens. Add the rice and cook, stirring, over medium heat for 1-2 minutes or until the grains appear slightly glassy.

Stir until the rice is coated with butter and begins to turn glassy

Stir until the rice is coated and begins to turn glassy

Add a ladle (about 125ml / 1/2 cup) of the heated stock to the rice mixture and use a wooden spoon to stir until the liquid is completely absorbed. Why wood? It’s so much nicer than plastic, isn’t it?

Adding some stock, then stirring, and stirring, and stirring...

Adding some stock, then stirring, and stirring, and stirring…

Continue to add the stock, one ladle at a time, stirring constantly and allowing the liquid to be absorbed before adding the next.

As the rice absorbs the stock, it gets creamier

As the rice absorbs the stock, it gets creamier

Cook until the rice is just tender and the risotto is creamy (this will take at least 25 minutes — DON’T RUSH).

Ready for the last little mix; langoustines, peas, and cheese all added

Ready for the last little mix; langoustines, peas, and cheese

Add the langoustine, peas, and saffron, and cook, stirring, for 3 minutes or until well combined and heated through. Remove from heat and stir in the Parmesan. Taste and season with salt and pepper. Remember: the Parmesan brings its own saltiness, so have a light hand with the NaCl! You can always add more salt — even at the table — but you can’t take it away.

C'est fini! Or, more appropriately, è finito.

C’est fini! Or, more appropriately, è finito.

Spoon the risotto into bowls and serve immediately. Try not to consume it like a just-uncaged wolverine.

Santa Fe Sunrise

0

100_4204

The Bride and I, a couple of decades ago, opted for Santa Fe as our honeymoon destination. Practically nothing outside Guantánamo screamed “honeymoon” less to me than Santa Fe — going to the desert in the middle of summer seemed unpalatable in the extreme — but it’s always been a good policy for me to pay attention to The Bride’s desires (as evidenced by the fact that, decades later, she’s still The Bride). As it turned out, the greater Santa Fe area is gorgeous, and our day runs out to several of the Northern Pueblos were both charming and informative. [And when I think of it, Houston in the summer makes Guantánamo seem like Ibiza by comparison, so please disregard my previous knock on Santa Fe.]

100_4202

The cuisine was something of an eye-opener as well, from Cindy’s Santa Fe Bite-Size Bakery’s addictive chocolate pepper cookies to the local sparkling wine, Gruet. We were served a complimentary glass — one of the many perks of being on one’s honeymoon — and we drank it with some hesitancy at first. New Mexican sparkling wine? Seriously? Turns out that the Gruet family, which had been making sparkling wine in France since 1952, was on vacation in New Mexico in 1983, and decided to put down roots and make both sparkling and still wines south of Albuquerque. Quite frequently, we serve it to our friends, introducing it to newbies with the phrase, “How about some refreshing New Mexican sparkling wine,” just so we can see the look of shock and horror in their eyes. It never gets old. Really.

But I digress.

One day, as I was idly wandering the Interwebs, I came across a blog titled The Domestic Mama & The Village Cook, which featured a dish called “Idaho Sunrise,” which was apparently originally adapted from a recipe featured in Marion Cunningham’s The Supper Book. Basically, it’s a twice-baked potato with an egg on top, stuffed with mashed potato and bacon and chives.

As usual, I decided to tinker with the recipe to suit my palate, and came up with something I like to call the “Santa Fe Sunrise.”

Santa Fe Sunrise

Santa Fe Sunrise

SANTA FE SUNRISE (makes 4)
Ingredients
4 previously baked potatoes
4 tbs butter or sour cream or butter-like substitute
1 can chipotle chiles in adobo sauce OR 1 can diced green chiles
4 oz. grated cheese (pepper jack, cheddar, whatever you have around)
salt, pepper
4 medium eggs
scallions, cheese, chopped tomato (or tomatillo) for garnish
dash hot sauce

Bake the potatoes the way you normally would. Then, slice off the top (see picture) and scoop out as much of the interior as you can while allowing the potato shell to hold its structural integrity (I usually leave about a 1/4-inch “wall” in the interior). Mash together the potato innards, sour cream/butter, adobo sauce OR diced green chiles, grated cheese, and salt/pepper to taste. Refill the potatoes with the mixture, leaving a well deep enough to allow for the egg. [One quick note: the adobo sauce is plenty hot even without the chipotle peppers, which you can reserve for another purpose, and one would be wise to mix in only a little of the sauce at a time, tasting along the way to ensure it doesn’t completely immolate your tongue… unless that’s what you like.] Crack an egg into the well, and place potato back into a preheated 375°F/190°C oven for 17-25 minutes or until eggs are just set (you can tell, because the whites are just barely white, maybe even a little translucent still). Garnish with scallions or chives, cheese , chopped tomato or tomatillo, and a dash of hot sauce, if desired. [I prefer Tapatío hot sauce myself, but Tabasco works just fine, if somewhat inauthentic to the Southwest vibe.]

The excellent aspect of this recipe is that it’s as easily adapted to vegans’ diets (you can sub either a vegan spread or almond milk or vegetable broth for the sour cream/butter and omit the cheese), as carnivores’ (fry up some bacon to a crispy crunch and crumble it into the potato stuffing).

gruet-brut-rose

And no matter how you make it, the Santa Fe Sunrise goes great with a glass or two — or a bottle or two — of the Gruet Brut Rosé… just to keep the New Mexico theme intact, of course.